This set of columns provides the Tasks information. At least one Task is always required before a Project can be used.
AMG will:
1. Allow you to upload a Project without any Tasks.
2. Will NOT copy existing Tasks in the template to your new Project.
Note – To work around Oracle’s functionality you can use the ‘Create Options’ button to select source data to copy the Tasks ‘From Sheet’, From Source Project’ or ‘From Template’ (Refer to section: Select Source Data to be Copied), or otherwise be sure to include your required Tasks at upload time. You may add them later using this product, but your project will not be usable until Tasks are loaded.
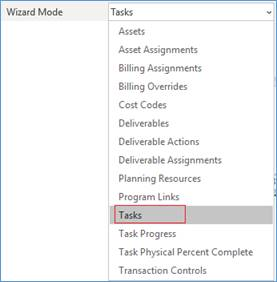
To view the Tasks options, you will need to select ‘Tasks’, from the ‘Wizard Mode’ list of values provided on the Project Wizard ribbon as per the screenshot below:
The ribbon will be reset to reflect the options available for Tasks.
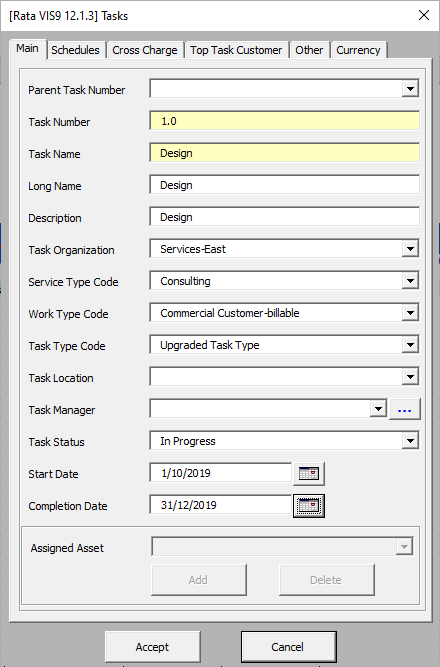
Double-click in the ‘Tasks’ section of the worksheet below row 9 or click the ‘Forms’ icon and select ‘Tasks Form’ from the Project Wizard ribbon.
The following ‘Tasks’ form will display with its associated tabs:
a) Main
The ‘Main’ tab of this form is where you enter the main task information. This form allows you to ‘Add’ or ‘Delete’ an ‘Assigned Asset’ directly from the form by using the buttons provided.
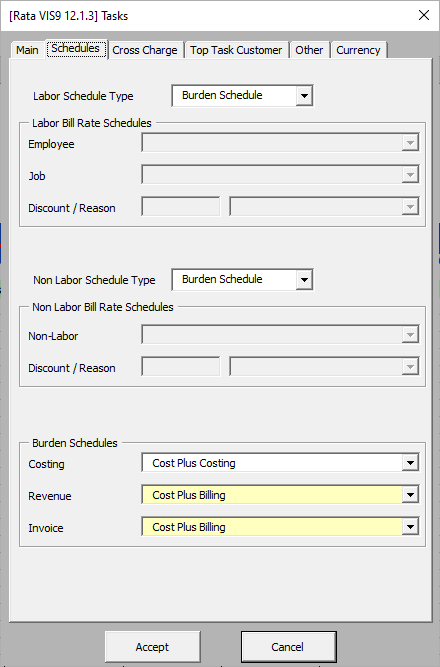
b) Schedules
The ‘Schedules’ tab of this form is where Burden and Bill Rate Schedule information is entered.
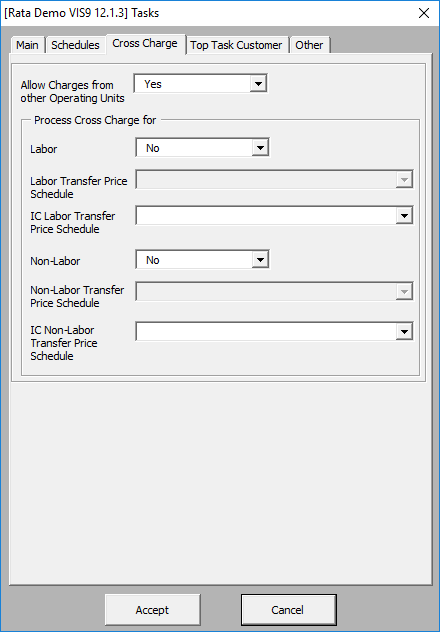
c) Cross Charge
The ‘Cross Charge’ tab of this form is where validated cross charge information is entered at the task level.
The form only works on the selected row at the time the form is loaded. You may of course have multiple Tasks. The form however can only deal with these one at a time.
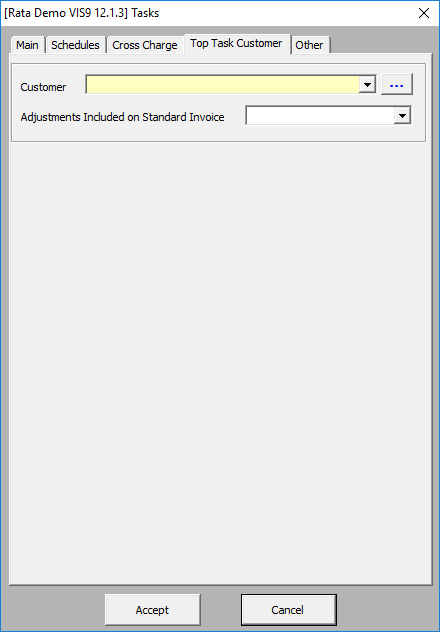
d) Top Task Customer
The ‘Top Task Customer’ tab of this form is used to assign a customer at the Top Task level when Top Task billing is enabled on contract projects.
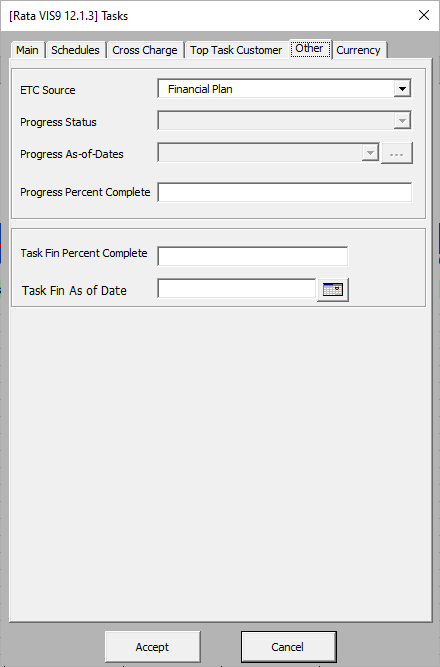
e) Other
Tasks have a Work Breakdown Structure (WBS). Tasks may or may not be attached to parent tasks. In order to achieve this it is necessary to indicate the parent task number in the column provided. It is NOT necessary to list the parent tasks before the child tasks.
This ‘Task Manager’ column is optional but any value must exist in the list of values. The search facility works as follows:
• A person’s name is always shown as Last Name then comma then space then First Name form e.g. Bloggs, Joe
• If you wish to search for a name, just type in some of the first characters of the last name, then press the ‘…’ button. A wildcard ‘%’ is implied at the end, you do not need to type it.
• Other wildcard searches are also possible, e.g.: %Joe or %logs%Joe.
All the above will find Bloggs, Joe. If you already have some values in the list of values and you wish to stop the Autocomplete function from ruining your search, type a % at the end. This will prevent Autocomplete from filling in the value.
Important Note: Do NOT have any blank lines between Tasks. The upload program loops through the lines until it encounters a blank value in the ‘Task Number’ column or there is a new project.
To delete a Task highlight a field on the row of the task you want to delete, making sure the option of ‘Publish Workplan’ is selected on the Task ribbon. Click the ‘Delete’ icon and select ‘Delete Selected Task’ on the Task ribbon.
Refer to section: