The Wizard can either be run with secure templates defined by your System Administrator, or by using the pre-defined modes without implementing templating.
Using the Wizard without Templating
Item Wizard has different default layouts predefined for each mode. You choose the mode depending on the data upload you are performing. Each mode contains the necessary fields available for the functionality selected.
Important Note:
By default, new sheets created for each mode will contain the more commonly used EBS columns for each section, which can infer if the field you require is not in the worksheet it’s not yet available. More4apps Wizards contain almost all available fields, see here on how to determine if the Wizard does already have the column implemented.
Click the ‘Select Template’ icon on the Item Wizard ribbon:
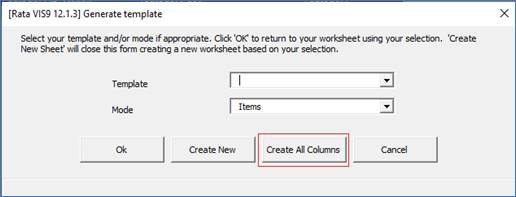
The ‘Generate template’ form will open. Select the applicable ‘Mode’ value from the list:
Click the ‘Create All Columns’ button to generate a new worksheet containing all available columns in the Wizard for the selected mode.
‘Create All Columns’ is not applicable for 11i instances.
Now you can simply copy the columns you require from this worksheet to your own worksheets. Note these additional columns may be ignored when using Templating and they do not exist in the template definition.
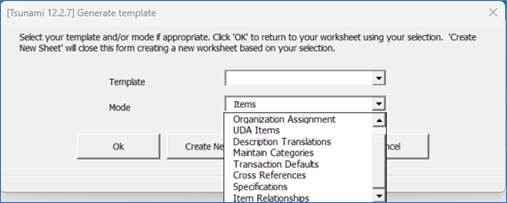
The modes available are:
o Items - Used for all standard Inventory functions, creating and updating Items.
o UDA Items - Creates and Updates Item Catalog UDA (User Defined Attribute) information.
o Maintain Categories - Gives the user the power to Crate, Update and Delete Categories (Category assignment can be done in the main Item mode).
o Transaction Defaults – This mode is used to add Transaction Defaults to an Item for both Subinventory and Subinventory/Locator.
This mode is only applicable to 12.2 onwards. If you are less than 12.2 then this mode is available in the Item Extension Wizard. This mode will only be visible if this Patch 30733858 has been applied in your instance. This patch is needed by API to create/update 'Transaction Defaults'.
o Cross References - Mode used to associate one of your company's inventory items with a specific customer or vendor, GTIN or with another inventory item.
o Specifications – Mode used to apply specifications to an item within an Inventory Organization.
After you have established your worksheet, there are three ways to populate information into the worksheet:
a) Import, type or paste data directly into the cells provided. Validation is performed when you run the upload, validate, or open the Item form.
b) Use the data-entry forms to enter the data into the worksheet. Data is validated and lists of values are available.
c) Download existing information by using one of the following options:
(i) Download form.
(ii) Download using sheet data (from criteria entered directly into the worksheet).
(iii) Custom Query Ribbon to run pre-defined queries.
You can use one of the methods above to update information prior to loading into Oracle. For detailed instructions refer to the Download from Oracle Inventory section.
Column names are stored in row 9. These are fixed and cannot be changed. DO NOT insert or delete rows before row 11 (Default Values row 10). The case of the column names is not important but spelling is. If you change the column name in row 9, you have in effect deleted the column as far as the program is concerned. You can move the columns anywhere you like, hide, or even delete them if they are not required. Whenever you open a form or run the upload, the program determines the positions of all the ‘named’ columns. If you duplicate a column header, the first one will prevail (the program searches from right to left).
Create a Worksheet for the required Mode
Create a worksheet for the required mode by clicking the ‘Select Template’ icon on the Item Wizard ribbon:
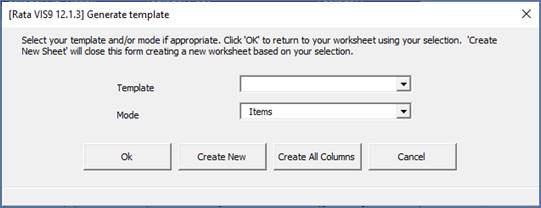
The ‘Generate template’ form will open to select the required Mode:
Create a new sheet, by clicking the ‘Create New’ or ‘Create All Columns’ button on the ‘Generate template’ form and this will open a new worksheet.
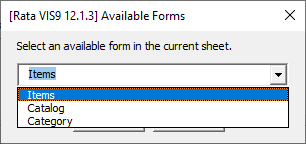
To open a form in the new worksheet; either double-click on a row or alternatively click the ‘Forms’ icon on the ribbon and select the required form from the ‘Available Forms’ LOVs:
The following sections explain each Mode in detail:
Refer to section: