Position the cursor on the row you wish to enter or update the Special Information (below row 10). Click on the ‘Edit Special Information’ button on the ribbon.
Alternatively, you can double-click in any cell on the row and the Special Information form will open.
The following table explains how to use the various fields/functions to populate the information:
Field
Description/Functionality
Employee Number Contingent Worker Number
Last Name
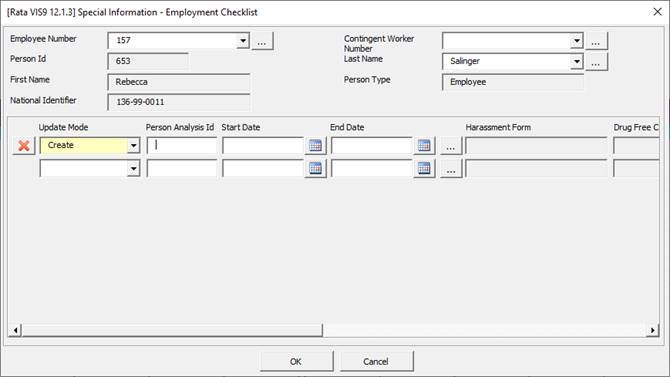
To select an Employee/Contingent Worker, you can enter a partial value into either the ‘Employee Number’, ‘Contingent Worker Number’ or ‘Last Name’ field and then click on the corresponding search icon.
The drop-down list will be populated with Employees/Contingent Workers that meet the criteria. Select an Employee/Contingent Worker from the list.
Once an Employee/Contingent Worker is selected, the remaining fields will populate with the relevant information.
Person Id
First Name
Person Type
National Identifier
As described above, these fields will be populated with information if an Employee/Contingent Worker is selected via the form (using Employee Number, Contingent Worker Number or Last Name); or the information has already been populated in the spreadsheet (from download or some other source).
These fields are read-only in this form.
Update Mode
The Update Mode list of values contains:
Create– Used to create a new special information record for the employee/contingent worker.
Correct– Used to change/update a special information record for the employee/contingent worker.
If you leave the ‘Update Mode’ blank, then no changes will be made to the special information during the upload process.
Person Analysis Id
A person_analysis_id is required by the interface when you are changing/updating an existing special information record.
The easiest way to populate this information is to download the employees and their special information records. Make changes to these records and then upload the new information. Refer to section: Download Special Information
This field will also be populated after doing a ‘Create’ of a new record. This record could then be copied and subsequently changed.
Note - The person_analysis_id field must be blank prior to uploading a ‘Create’ record.
Start Date
End Date
Optionally, enter a Start Date and/or End Date for this special information record. You can key directly into the field or use the calendar icon to select a date.
Note - If you want an End Date you must populate a Start Date.
Segment1...
Segment30
The segments/fields for this special information type will display to the right-hand-side of the form. You can scroll across to view the information.
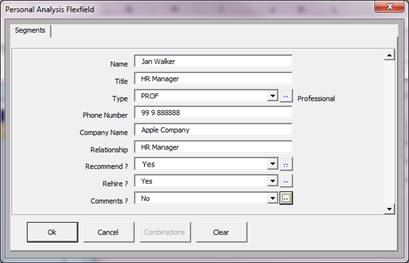
The custom names/titles you have defined in your Special Information Type structure (Personal Analysis Flexfield) will display at the top of each column.
To edit the special information fields, click on the flexfield button
The Flexfield form will open:
Numeric Values, Lists of Values, Text fields etc will all be validated according to your set up.
To populate the lists of values, click on the search icon […] to get the full list; or enter a partial value into the field and click on the [...] icon. Use the dropdown to select a value.
Okbutton – Closes this form and writes the values into the read-only fields on the SIW form.
Cancelbutton – Closes this form, returns to the SIW form and ignores any changes that you have made.
Clearbutton – Clears out all of the values on this form.
Remove record from spreadsheet
Click on the ‘Remove record from spreadsheet’ icon if you need to remove a record from the spreadsheet.
As you enter special information records into the form, a new blank row will be created, enabling you to enter as many special information records as required for this employee.
Once you have finished entering the information, click the ‘OK’ button to close the form and write the information to the worksheet. Click the ‘Cancel’ button to close the form and make no changes to the worksheet.