|
1. Create a new Worksheet
Worksheets can be created using the ‘Template123’ or using the ‘Format Sheet’ function. For this illustration we will use the ‘Template123’.
|
|
Step
|
Task
|
Screenshot
|
|
1.1
|
Click on create the ‘New Sheet’ icon on the Price List Wizard ribbon.
|
|
|
1.2
|
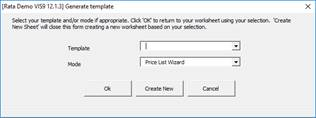
The ‘Generate template’ form will open and allow you to select a Mode which best suits your requirements.
For the purpose of this demonstration select Mode of ‘Price List Wizard’. This will use the ‘Template123’ to create a new sheet, which if not modified will return all columns available.
Click ‘Create New’ and then ‘Ok’ to close the form.
|
|
|
2. Download a Price List, and associated Lines and Attributes
We will now download into the worksheet one of your existing Price Lists.
|
|
Step
|
Task
|
Screenshot
|
|
2.1
|
Put cursor on any row below row 10 (Row 9 holds the labels and row 10 is reserved for defaulting).
On the Price List Wizard ribbon, click the ‘Download’ icon and select the ‘Download Form’ option.
|
|
|
2.2
|
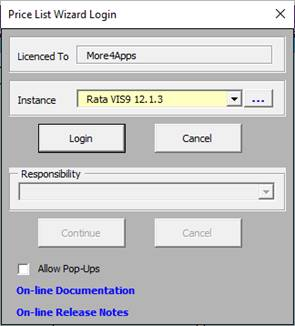
The following screen may appear if you are not logged into your Oracle Instance.
Select the correct Oracle Instance from the drop-down list provided, click on the Login button and enter your User Name and Password.
Select a Responsibility from the list of values and click ‘Continue’.
|
|
|
2.3
|
The ‘Download Price List Information’ form will open.
|
|
|
2.4
|
Either:
1. Enter an existing Price List in the field provided.
To do this you can enter a part of the Price List name, then place the wild card % at the end of the characters.
Select the  icon icon
Select the  icon icon
Select from the list of values.
2. Enter a Price List in the first field using the above instructions and also enter a value in the ‘To’ field. This will download all Price Lists which are between (and included) in this range.
Click the ‘Download’ button.
|
|
|
2.5
|
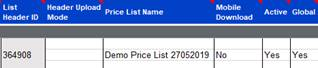
You will now have either one or multiple Price Lists in your worksheet.
|
|
|
3. Create a new Price list using the downloaded record as a Template
We will now use the downloaded Price List as a template for a new Price List
|
|
Step
|
Task
|
Screenshot
|
|
3.1
|
For this exercise (using Excel functionality) delete all price lists except for one which has ‘Price List Lines’.
Delete ‘List Header ID’ and List Line ID’ for all rows.
|
|
|
3.2
|
Place your cursor on a row which holds the Price List.
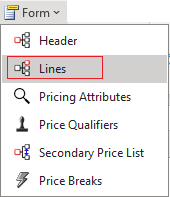
Click the ‘Form’ icon and select ‘Header’ on the Price List Wizard Ribbon.
Alternatively double-click on a cell which holds one of the values for the price list in the Header section.
|
|
|
3.3
|
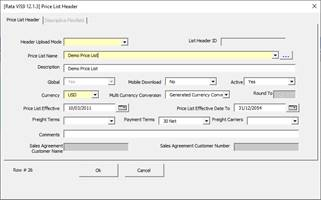
The following ‘Price List Header’ form will display.
|
|
|
3.4
|
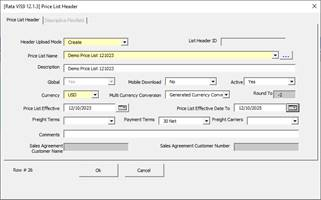
Price List Header
Make the following changes:
Header Upload Mode: Create
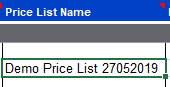
Price List Name: Rename to Demo Price List plus today’s date (e.g. Demo Price List 27052019)
Description: any value
Price List Effective Date: today’s date
Price List Effective Date To: today’s date plus 2 years
Click ‘Ok’ to save the changes and close the form.
|
|
|
3.5
|
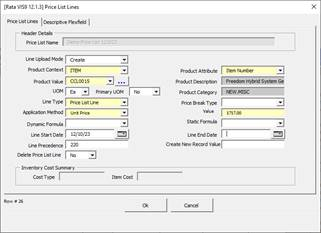
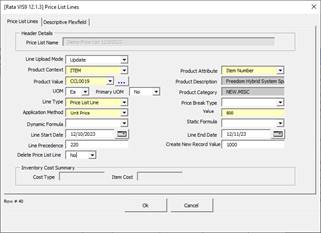
Price List Lines
Click the ‘Form’ icon on the ribbon and select ‘Lines’ to open the ‘Price List Lines’ form. Or double click in the Lines section.
Make the following changes to one or multiple lines:
Line Upload Mode: Create
Value: enter another value
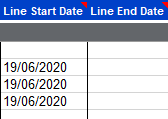
Line Start Date: today’s date
Line End Date: blank if populated
Click the ‘Ok’ button.
The form will close and the changes will be written to your worksheet.
|
|
|
3.6
|
If you have more than one line in your Price List and the Line Start Date and or Line End Date is populated, then you will need to change this to a date which is between (and including) today’s date and today plus 2 years.
|
|
|
4. Upload the Price List into Oracle
We will now upload this record into Oracle to create a new Price List which will have the same Line and Attribute details except for those changed during the exercise.
|
|
Step
|
Task
|
Screenshot
|
|
4.1
|
Place your cursor on any row which has the Price List.
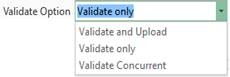
Select the ‘Validate only’ option from the Price List Wizard Ribbon.
|
|
|
4.2
|
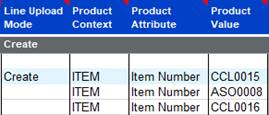
Enter ‘Create’ into the ‘Default Values’ row, in column ‘Line Upload Mode’.
|
|
|
4.3
|
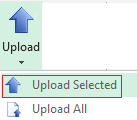
Click the ‘Upload’ icon and select ‘Upload Selected’ on the Price List Wizard Ribbon.
|
|
|
4.4
|
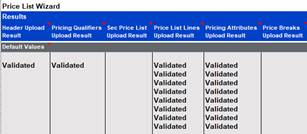
Your Price List will show an ‘Upload Result’ of Validated.
In the example shown to the right, each Price List Line has been Validated.
Once the data has been corrected revalidate the Price List by placing your cursor on any row with the price list and completing step 4.3. You can do this as many times as appropriate until all lines have a validated upload result.
|
|
|
4.5
|
Once you have resolved any issues (if any) place your cursor on any row which has the Price List.
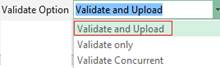
Select the ‘Validate and Upload’ option from the Price List Wizard Ribbon.
|
|
|
4.6
|
Click the ‘Upload’ icon and select ‘Upload Selected’ on the Price List Wizard Ribbon.
|
|
|
4.7
|
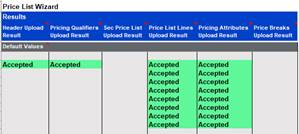
Your Price List will show an ‘Upload Result’ of Accepted.
In the successful example shown to the right the header, one qualifier and numerous lines have been uploaded successfully.
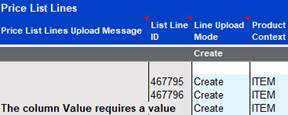
In the unsuccessful upload one of the lines had an error so this has as status of Error.
In the ‘Price List Lines’ section is the message which will indicate what the issue is.
If you encounter any errors read the Upload Message column (in the appropriate section) and refer to the Error Handling and Validation section of this document.
|
Example of successful Upload
Example of unsuccessful Upload
|
|
4.8
|
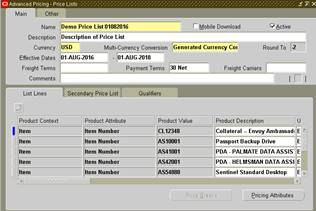
Log into your instance of Oracle and check the Price list has been loaded successfully
|
|
|
5. Make changes to an existing Price List
We will now download the Price list created above and make some changes
|
|
Step
|
Task
|
Screenshot
|
|
5.1
|
In a row below the rows used earlier, enter the name of the Price List created at step 3 and 4 in the ‘Price List Name’ column.
|
|
|
5.2
|
With cursor on this line, click on the ‘Download’ icon and then select ‘Download using sheet data’ on the Price List Wizard Ribbon.
|
|
|
5.3
|
The Price List will now display in your worksheet.
|
|
|
5.4
|
Place your cursor on the first Price List Line and double-click.
The Price List Lines form will display.
|
|
|
5.5
|
Change the ‘Line Upload Mode’ to ‘Update’.
Change the ‘Line End Date’ to be next month and enter a new value in the ‘Create New Record Value’ field.
This will end date the existing line and create a new line with the new value.
Select ‘Ok’ to close the form and write the changes into your worksheet.
|
|
|
6. Upload the changes into Oracle
We will now upload the changes to the existing line and the new line into Oracle.
|
|
Step
|
Task
|
Screenshot
|
|
6.1
|
Place your cursor on any row which has the Price List.
On the Price List Ribbon, from the ‘Validate Option’ choose ‘Validate and Upload’ option.
|
|
|
6.2
|
Enter ‘Update’ into the ‘Default Values’ row, for columns ‘Header Upload Mode’ and ‘Line Upload Mode’.
|
|
|
6.3
|
Place your cursor on any line populated by the Price List.
On the Price List Ribbon, select the ‘Upload’ icon and then select ‘Upload Selected’.
|
|
|
6.4
|
Your price list will show an ‘Upload Result’ of Accepted.
|
|
|
6.5
|
To check that the new line was created, download the modified Price List using the instructions at section 5.1 and 5.2 above.
|
|
|
End of Demonstration
|