|
1. Create a new Worksheet
All worksheets are created from the ‘Select Template Columns’ form.
Use the following steps to create your own customized template for your organization.
|
|
Step
|
Task
|
Screenshot
|
|
1.1
|
Click the ‘Customize Fields’ button on the Supplier Wizard - Setup ribbon.
|
|
|
1.2
|
The following screen may appear when the above action is undertaken. This indicates that you are not logged into your Oracle Instance of Oracle.
Select the correct Oracle Instance from the dropdown list provided, click on the Login button and enter your User Name and Password.
Select a Responsibility and click ‘Continue’.
|
|
|
1.3
|
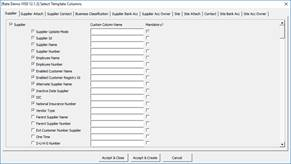
The ‘Select Template Columns’ form will display.
Supplier Tab
Remove the √ from all items below ‘Vendor Type’.
Note - You may have other columns which are required to create a Supplier in your instance of Oracle. If this is the case, then ensure these columns are also selected.
|
|
|
1.4
|
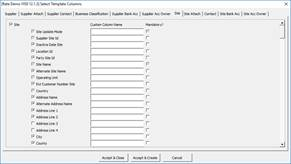
Site Tab
Remove the √ from all items below ‘Bill To Location’. (Untick Address Line 3 and Address Line 4 as you probably won’t need them).
Note - You may have other columns which are required to create a Site in your instance of Oracle. If this is the case, then ensure these columns are also selected.
|
|
|
1.5
|
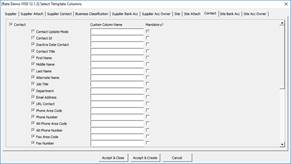
Contact Tab
Ensure all items have a √.
|
|
|
1.6
|
Ensure the following tabs have the left-hand flag not selected:
Supplier Contact
Supplier Bank Acc
Supplier Acc Owner
Site Bank Acc
Site Acc Owner
Select ‘Accept & Create’ at the base of the form.
|
|
|
1.7
|
A new sheet will be created and the selections on the ‘Select Template columns’ form will be saved.
Note - To create new sheets with the same column selections, the user can click the ‘New Worksheet’ button on the ribbon.
|
|
|
2. Download an existing Supplier
We will now download an existing Supplier (and associated Sites/Contacts) into our worksheet.
|
|
Step
|
Task
|
Screenshot
|
|
2.1
|
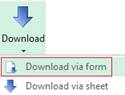
With cursor on a blank row click the ‘Download’ icon on the Supplier Wizard ribbon and select ‘Download via form’.
|
|
|
2.2
|
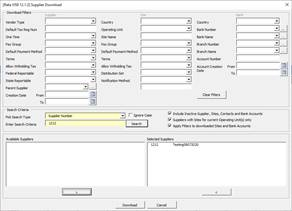
The ‘Supplier Download’ form will display with the Search Criteria type as ‘Supplier Number’ or ‘Supplier Name’.
Enter the wild card (%) in the ‘Enter Search Criteria’ field and select the ‘Search’ button next to this field.
The ‘Available Suppliers’ section will be populated with all Suppliers.
Click on a Supplier from the ‘Available Suppliers’ list and select the ‘>’ button at the bottom of this section.
The Supplier will move to the ‘Selected Suppliers’ section.
Note - Any number of Suppliers can be moved to the ‘Selected Suppliers’ section and subsequently downloaded into your worksheet.
|
|
|
2.3
|
Click the ‘Download’ button.
The Supplier selected will now be downloaded into your worksheet.
|
|
|
3.Create a new Supplier from the downloaded record
We will now change the details downloaded into our worksheet to create a new Supplier.
|
|
Step
|
Task
|
Screenshot
|
|
3.1
|
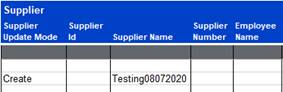
Supplier Section
In the same row as the Supplier Name enter Create in the ‘Supplier Update Mode’ column.
Delete the existing ‘Supplier Id’ and ‘Supplier Number’.
As we are creating a new Supplier, the Id’s populated as part of the download need to be deleted. These will be populated when we upload the Supplier into Oracle.
Change the ‘Supplier Name’ to Testing and today’s date (Testing08072020).
|
|
|
3.2
|
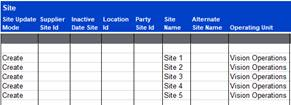
Site Section
Scroll across to the Site section.
In the same row as each of the sites enter Create in the ‘Site Update Mode’ column.
Delete the existing Supplier Site Id, Location Id and Party Site Id.
As we are creating a new Supplier the Id’s populated as part of the download need to be deleted. These will be populated when we upload the Supplier into Oracle.
Change each of the Site names to Site1, Site2 etc.
|
|
|
3.3
|
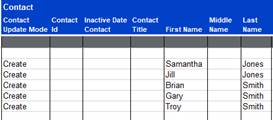
Contact Section
Scroll across to the Contact section.
In the same row as each of the Contacts enter ‘Create’ in the Contact Update Mode column.
Delete the existing Contact Id.
As we are creating a new Supplier the Id’s populated as part of the download need to be deleted. These will be populated when we upload the supplier into Oracle.
Change the First Name and Last Name of each Contact.
|
|
|
3.4
|
We are now ready to upload the new Supplier into Oracle.
|
|
|
4.Upload the new Supplier into Oracle
We will now upload the details entered above into Oracle
|
|
Step
|
Task
|
Screenshot
|
|
4.1
|
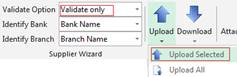
Place your cursor on any row which holds the Supplier record.
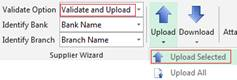
Select the Validate Upload option of Validate only on the Supplier Wizard ribbon.
Select the ‘Upload’ icon and select ‘Upload Selected’ on the Supplier Wizard ribbon.
|
|
|
4.2
|
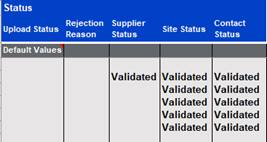
The worksheet will now show a status of Validated for each of the records.
If any errors are encountered read the ‘Rejection Reason’ column and correct the error. After you have corrected the error revalidate using the instruction at 4.2.
|
|
|
4.3
|
Ensure your cursor is on any row which holds the Supplier record.
Select the Validate Option of Validate and Upload on the Supplier Wizard ribbon.
Select the ‘Upload’ icon and select ‘Upload Selected’ on the Supplier Wizard ribbon.
|
|
|
4.4
|
The Supplier will successfully load into Oracle.
If any errors are encountered read the ‘Rejection Reason’ column and correct the error. After you have corrected the error re-upload the supplier using the instruction at 4.3. Note - If the ‘Upload Status’ is Processed this will need to be deleted before re-uploading.
|
|
|
4.5
|
Check Oracle and confirm the Supplier has been created.
|
|
|
5. Make changes to the Supplier created above
We will now make changes to the Supplier created above
|
|
Step
|
Task
|
Screenshot
|
|
5.1
|
Click on the ‘New Worksheet’ button on the Supplier Wizard ribbon to create a new sheet.
|
|
|
5.2
|
Click the ‘Download’ icon and select ‘Download via form’ on the Supplier Wizard ribbon.
|
|
|
5.3
|
The ‘Supplier Download’ form will appear.
Change the ‘Pick Search Type’ to ‘Supplier Number’.
Enter the Search Criteria with the Supplier Number as created above at step 4.
Click the ‘Search’ button which will place the supplier in the ‘Available Suppliers’ section.
Click on the Supplier and select the ‘>’ button to move the Supplier to the ‘Selected Suppliers’ section.
Click the ‘Download’ button.
|
|
|
5.4
|
The Supplier selected will now be downloaded into your worksheet.
|
|
|
5.5
|
Position your cursor on any row holding the Supplier record.
Select the ‘Edit Supplier’ button on the Supplier Wizard ribbon.
|
|
|
5.6
|
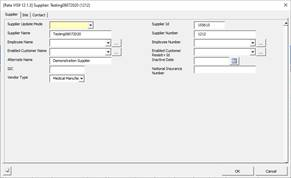
The ‘Supplier’ form will display.
Note - The columns included in your worksheet will determine what appears on the Supplier form. The advantage of using the form to enter the details is that the form will validate the values entered prior to uploading.
|
|
|
5.7
|
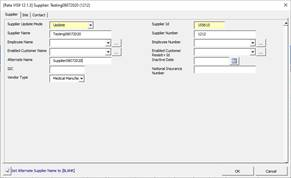
On the Supplier tab:
1) Enter the Supplier Update Mode of Update.
2) Change the ‘Alternative Name’ to Supplier and today’s date (ie Supplier08072020)
|
|
|
5.8
|
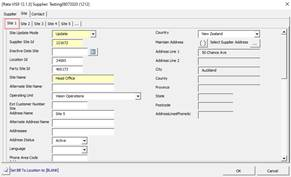
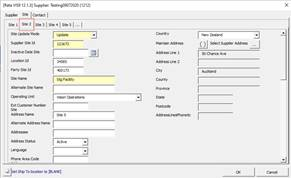
Click on the Site tab, select ‘Site 1’ (if not already selected).
1) Select Site Update Mode of Update.
2) Change the ‘Site Name’ to ‘Head Office’.
3) Change the ‘Bill To Location’. Use the list of values provided by typing the wild card ‘%’ in the Bill To Location and then select the search button. Select a value from the list provided.
|
|
|
5.9
|
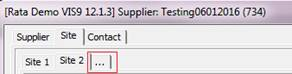
Select ‘Site 2’ tab
Existing Site
If 2nd Site already exists for this Supplier:
1) Select Site Update mode of Update.
2) Change the ‘Site Name’ to ‘Stg Facility’.
3) Change the Ship To Location. Use the list of values provided by typing the wild card ‘%’ in the Ship To Location and then select the search button. Select a value from the list provided.
New Site
If there is currently only one site for this Supplier:
1) Click on the … new Site button illustrated to the right.
2) Select the Site Update Mode of Create.
3) Enter the ‘Site Name’ of ‘Store Facility’ (note – this field only allows 15 characters).
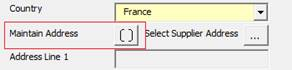
4) Choose from the list of values for the following fields:
a. Operating Unit
b. Ship To location
c. Bill To Location
d. Country
5) Select the ‘Maintain Address’ flexfield button (illustrated to the right) and enter:
a. Address Line 1
b. City
c. County
d. State
Select ‘Ok’ on the Address form
|
|
|
5.10
|
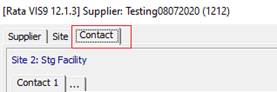
Select the ‘Contact’ Tab
|
|
|
5.11
|
As you have navigated to the ‘Site 2’ tab prior to moving to the ‘Contact’ tab the contact details displayed are for ‘Site 2’ (as illustrated).
Note: To move to another site’s contacts click on the ‘Site’ tab and then select the appropriate site sub tab (e.g. Site 3) then navigate back to the ‘Contact’ tab.
Existing Contact
1) If Contact details already exist for this site enter ‘Contact Update Mode’ of Update.
2) Change the contact First and Last name and phone number.
New Contact
1) If there is currently no contact for this site enter the ‘Contact Update Mode’ of Create.
2) Enter the contacts First and Last Name and Phone Number.
|
|
|
5.12
|
Select ‘OK’ on the Supplier form. This will write the changes you have made on the form to the worksheet.
Note - We may have only updated or created records for part of this Supplier. Any Sites or Contacts which do not have an Update Mode will not be processed by the Wizard.
|
|
|
6. Load the changes into Oracle
|
|
Step
|
Task
|
Screenshot
|
|
6.1
|
Ensure your cursor is still on any row which holds the Supplier record.
Select the Validate Option of Validate and Upload on the Supplier Wizard ribbon.
Click the ‘Upload’ icon and select ‘Upload Selected’ on the Supplier Wizard ribbon.
|
|
|
6.2
|
The Supplier will be successfully loaded into Oracle.
Note - Any lines which do not have an ‘Update’ Mode will not be processed by the Wizard, with a message of:
“No update mode, section will not be processed”.
|
|
|
6.3
|
Check Oracle and confirm the Supplier has been updated with the changes made in the worksheet.
Navigation:
Ø Supply Base > Suppliers
Enter the Supplier Number and click ‘Go’
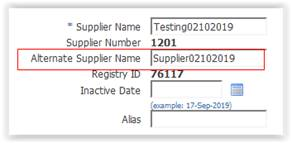
Another way to confirm the changes is to re-download the Supplier into your worksheet and check the changes.
|
Example as per above - Update of Alternative Supplier Name
|
|
End of Demonstration
|