The Order Entry mode is the main mode for creating, updating and deleting all relevant fields used in the Sales Order form in EBS.
Enter Sales Order Details
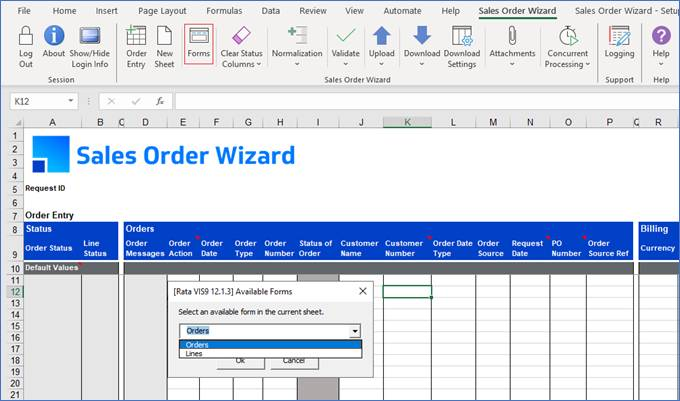
To use the Sales Order Wizard form, firstly position your cursor on the row you wish to contain the sales order data. Then double-click in one of the cells and the form will automatically open. Alternatively click on the ‘Forms’ button on the ribbon shown below:
Note: The list of values will vary as it is restricted to the sections actually included on the worksheet.
The form includes the fields that are commonly used for a Sales Order. The fields on the form correspond with the columns on the worksheet. Use the form to validate each of the values for the order.
Order Form Information
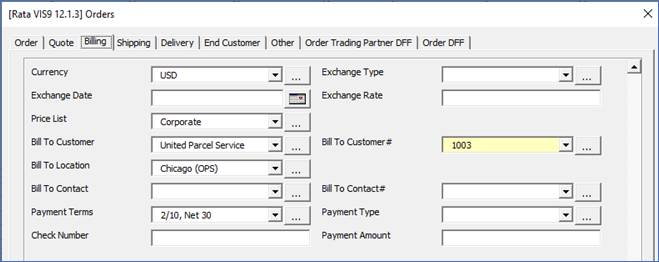
The Order tab is used to enter the header information for the sales order. During an upload the Customer Number and Order Type are required. It is possible to make other fields mandatory using the Template functionality. Refer to section: Manage Templates
Several of the fields have dependent list of values (LOV); once one field is populated the LOV data is set based on that field. A good example is the customer that limits the available values in the Billing, Shipping and Item fields.
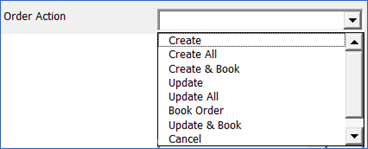
Order Actions are: Create, Create All, Create & Book, Update, Update All, Book Order, Update & Book, Cancel and Delete. Refer to section: Action Columns
Order Tab
Quote Tab
Billing Tab
‘Currency’ plays an important part in the LOV of Price List values. If Currency exits in the form then LOV values in the Price List picks based on the Currency value, if not it will show all values. Removing this column from the worksheet will effect the values in the Price List.
Tax Handling
The Tax Handling columns are control field that determines how the system applies tax to the entire order. It allows a user to override the default tax exemption rules that would normally apply to a customer, customer site, or item.
Note:The visability of these fields is determined by the Profile eBTax: Allow Override of Customer Exemptions, and they will only be visable if this option is Yes.
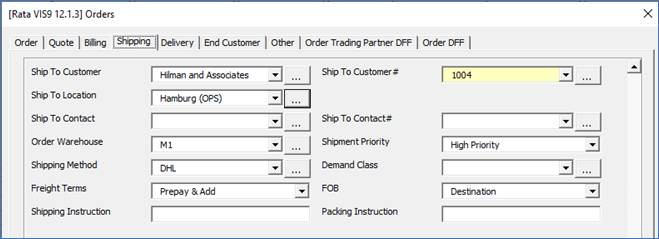
Shipping Tab
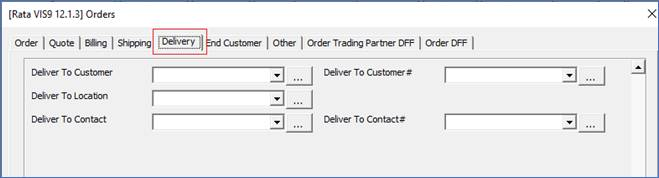
Delivery Tab
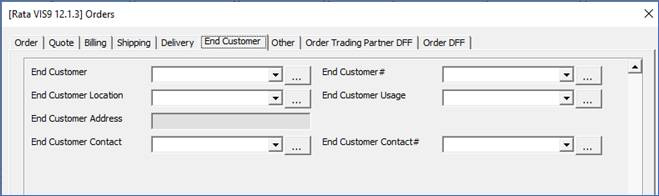
End Customer Tab
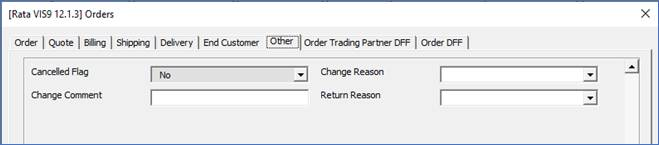
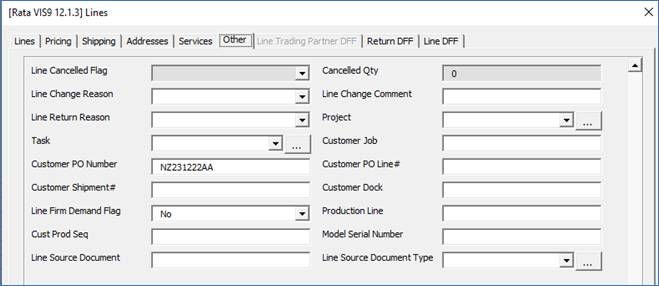
Other Tab
Lines Information
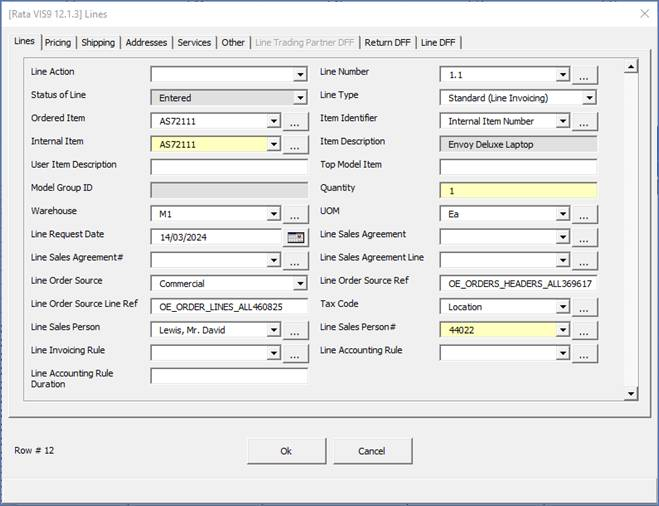
The Lines tab is used to enter the lines of each Sales Order. The fields are named in such a way to align with the EBS form.
Lines Tab
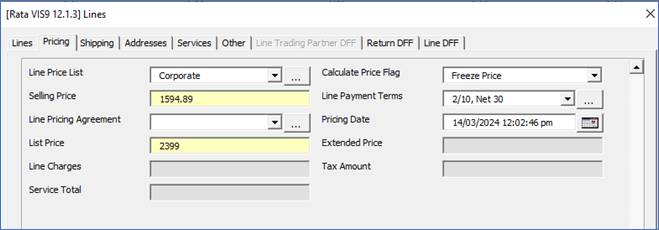
Pricing Tab
Calculating Selling and List Prices
The ‘Calculate Price Flag’ column controls how Oracle determines the selling and list prices. The options provided are:
• Calculate Price – If this option is used then Oracle will calculate the selling and list prices so these values can be left blank in your worksheet. Any list and selling prices entered into your worksheet will be ignored.
• Freeze Price – If this option is selected any prices you enter in the ‘Selling Price’ and ‘List Price’ will be populated into Oracle (overriding Oracle’s calculations). If these fields are left blank, then no value will be populated in Oracle.
• Partial Price – If this option is selected in ‘Create’ mode the values entered in the ‘List Price’ will be uploaded into Oracle as the ‘Selling Price’ and ‘List Price’. Any value entered in the ‘Selling Price’ field will be ignored.
Note - ‘Partial Price’ is dependent on your set up in Oracle and extensive testing should be undertaken when using this option.
If you need to override the ‘Selling Price’ and leave Oracle to calculate the ‘List Price’ please follow these steps:
1. Set the upload option to ‘Create’ and enter ‘Calculate Price’ in the ‘Calculate Price Flag’ field. This will set Oracle to calculate the selling and list prices.
2. Change the upload option to ‘Update’ and enter ‘Freeze Price’ in the ‘Calculate Price Flag’ field. Then enter the price you require in the ‘selling price’ field and update your record. This will update the selling price in Oracle to the price entered in the spreadsheet (Oracle will not override this) and will leave the list price.
Secondary Quantity and UOM
If an item is configured for a Secondary Unit of Measure (UOM), you can include the Secondary Quantity on the sheet. This Secondary UOM is read-only and sourced from the Item setup; it cannot be updated directly on the sheet. If the Secondary Quantity is left blank, the UOM conversion will be automatically calculated during the API creation process but will only appear on the sheet until after the order is downloaded.
You can adjust the UOM conversion by entering a Secondary Quantity, especially when the conversion is variable (e.g., one case of meat might weigh 10 kg, another 11 kg). Your Item setup must permit this variance. The API will verify that the updated Secondary Quantity falls within the item's set tolerance. If it exceeds this tolerance, an error will occur during API execution:
'API Error: The quantity entered is higher than the allowed deviation for the item. Please re-enter.’
Unfortunately, this API error is returned at the header level, requiring the user to identify and correct the specific line items.
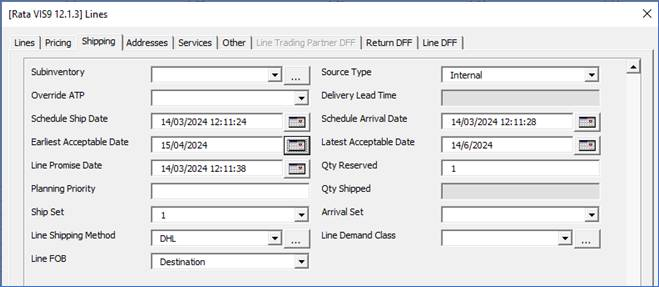
Shipping Tab
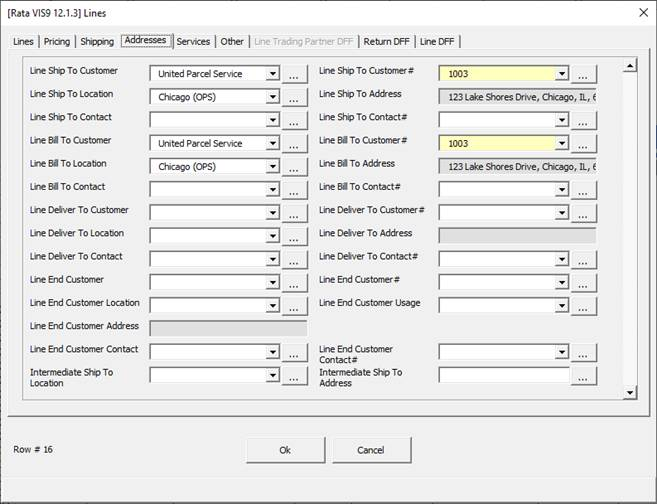
Addresses Tab
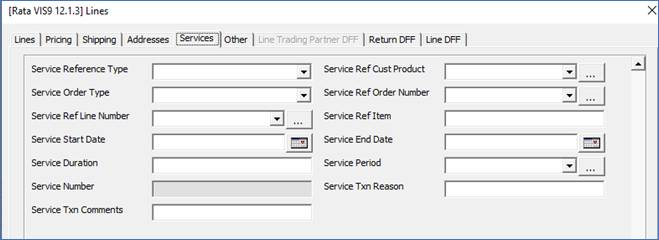
Services Tab
For Service Reference Type ‘Order’, the service reference information includes order number, line, shipment and option numbers which are available from a list of values.
Functionality is not yet available for Service Reference Type ‘Customer Product’.
Select ‘CURRENT’ if you want to reference the service line to the current order being created. The ‘Service Ref Order Number’ can be selected from the list of values. If no values are available, then you need to enter the line number manually to link to the Sales Order line number.
The Service Start and End Dates determine the duration of the service program. Enter either the End Date or Service Duration.
Specify the ‘Service Period’ such as day, month, or year - or whatever is set up against the ‘Internal Item’ in Oracle.
‘Service Reason’ and any additional comments for the service program are available in the form.
Other Tab
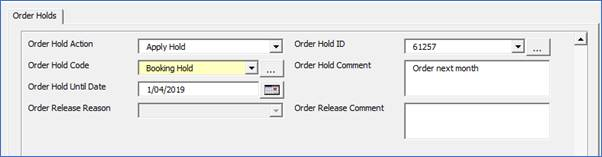
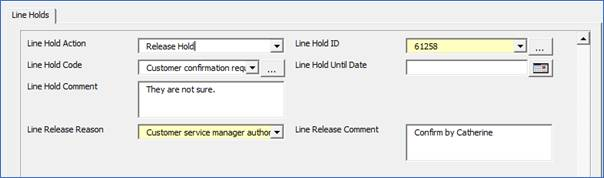
Order and Line Holds
Using these sections, Order and Line Holds and the two actions ‘Apply Hold’ and ‘Release Hold’, gives you the ability to manage your order holds. The ‘Order Hold ID’ is generated when the hold is created (Applied) and is used as the link when ‘Releasing’ the hold. This ID can be obtained by downloading the order. Refer to the example worksheet within the Wizard.
Order and Line Attachments
This functionality is described in the Attachments section.
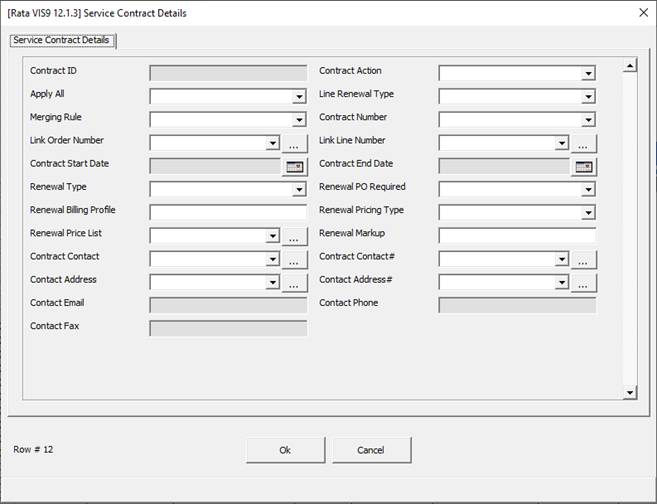
Service Contract Details
This allows the form to establish which line you are creating a Service/Contact record for.
Contract Details
The ‘Apply All’ checkbox allows subsequent service lines to inherit the same renewal and merging attributes as the initial order line.
Line Renewal Type determines the desired duration of the service line.
The Merging Rule determines the type of merging required.
‘New’ Merging Rule
If the rule is ‘New’, the order line will be merged to create a new contract.
‘Contract’ Merging Rule
The ‘Contract’ rule will merge the line to an existing contract with the same customer, service line and end date. Select the ‘Contract Number’ from the list of values, the default Start and End Date entries will be displayed.
‘Order’ Merging Rule
The ‘Order’ rule will merge the line to a line of the current order.
Contract Renewals
Renewal information only applies where the Merging Rule is ‘New’.
Select the Renewal Type from the list of values. This determines how the renewal type is to be processed e.g. Notify Salesrep.
The renewal pricing attributes determine the basis for pricing the renewed contract e.g. Price List
Select Customer Contact details from the list of values.
Click the ‘OK’ button to write the information to the worksheet and close the form.
Click the ‘Cancel’ button to cancel your changes and close the form.
Returned Serial Number
This section allows a user to create Lot and Serial Number controlled item returns.
Serial Number can be user’s choice or picked from the LOV’s.
Note - Sales Order Wizard only allows for an individual return for Lot Number/Serial Number (i.e. only 1x Serial Quantity) and if a Serial Quantity is entered then a Lot Number/Serial Number must be specified.
To view the Serial Number uploaded, you need to go to Oracle:
Transaction Form > Tools > Serial Numbers.
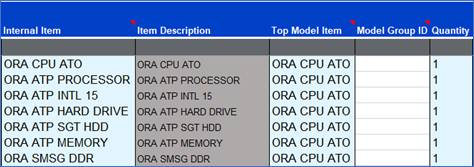
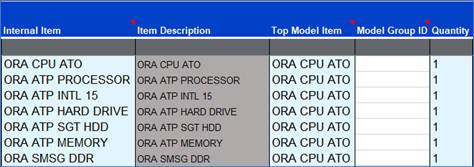
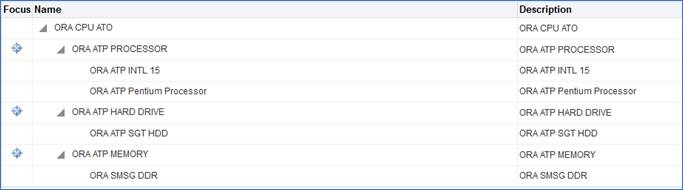
Configurator (ATO/PTO)
Configurator (ATO/PTO) Sales Orders need to be entered in a structured way, like the BOM, keeping the parent child relationship.
The ‘Top Model Item’ will always be the same number for the whole components of the same BOM. After upload, the ‘Model Group ID’ will be populated.
BOM Structure
Refer to section: