Now that the Wizard has been installed and configured this document will guide you through the following simple changes:
1.Create a new Worksheet
2.Download an existing Project
3.Create a new Project using the existing Project as a template
4.Create Tasks for a Project
5.Update and create Key Members for a Project
6.Update an existing Project Task
Note - The screenshots are using Oracle Release 12 and Excel 2013.
This script is designed to illustrate the downloading/creating/uploading of a Project to give the user a “feel” for the Wizard.
The Wizard is designed to use the same process for creating and updating a large number of Projects, which will significantly reduce data-entry time and improve productivity.
1. Create a new Worksheet
All worksheets are created from Template worksheet(s). Project Wizard has 17 standard worksheets available to be selected.
Step
Task
Screenshot
1.0
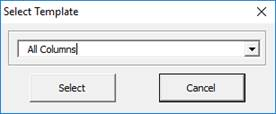
Click on the ‘New Sheet’ button.
Choose the ‘All Columns’ template from the LOVs.
Click the ‘Select’ button.
1.1
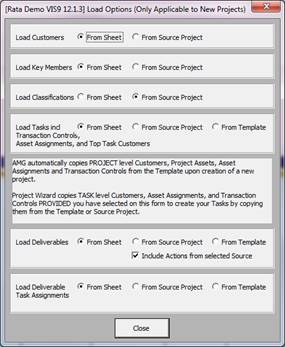
Click the ‘Create Options’ button on the Project Wizard Ribbon. This will open the ‘Load Options’ form.
This form dictates what values will be uploaded when a project is created e.g. If the ‘Load Tasks and Transaction Controls’ are set to ‘From Template’ then even if the data is entered on the worksheet the data will be ignored and the values held in the ‘Template’ will be used.
For this demonstration we will use:
Load Customers: From Sheet
Load Key Members: From Sheet
Load Classifications: From Source Project
Load Tasks: From Sheet
Click ‘Close’
Download the Project Template
Step
Task
Screenshot
1.2
Projects are created based on templates. Normally you would just enter the Template name and then carry on entering project data.
For this example we will download the template so we can view it while creating a project.
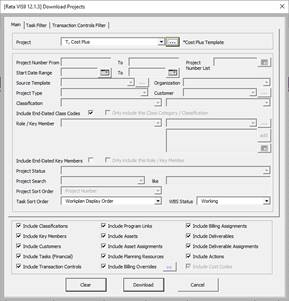
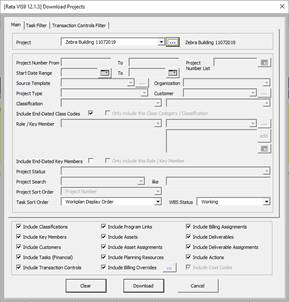
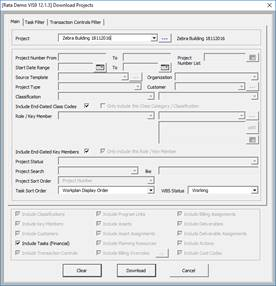
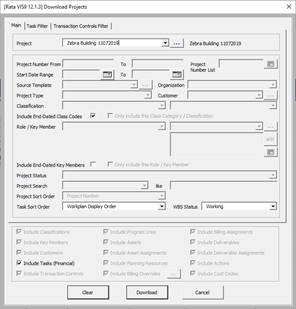
Put the cursor on a blank row (below row 9) and click the ‘Download via Form’ button. The ‘Download Projects’ form will display.
Log in, if not already logged in.
Choose the following criteria for download:
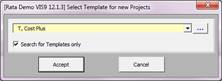
Project:Click on the Search icon…to populate the Project Template you wish to download.
Make sure all the check boxes in the bottom section are all selected.
Note: If the ‘Project’ field is grey before beginning then click on the ‘Clear’ button.
Task Sort Order: Workplan Display Order
WBS Status: Working
Make sure all the check-boxes at bottom of sheet are ticked.
Click the ‘Download’ button.
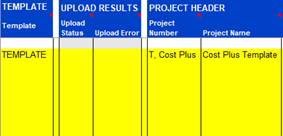
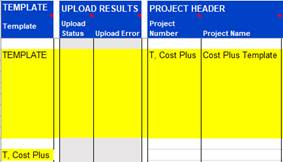
All the data that is entered against the template that was selected will populate the worksheet.
1.3
It is a good idea to highlight the template rows in a different colour. It helps later in the demonstration to see which data relates to the template (ie Highlight rows 11-17 and make them yellow).
Enter new Project Information
Step
Task
Screenshot
1.4
Now we will enter a new Project.
Enter a Project Template by copying the Project Number from the Template above and paste it onto a blank row (e.g. Row 19) in the ‘Template’ column
Note: You can also double-click in the Template Column and use the LOV on the form.
1.5
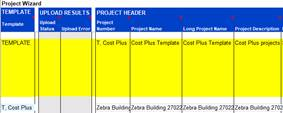
Enter the Project Header details in row 19.
First type the Project Number and name details directly into the worksheet as follows:
Project Number: Zebra Building + date string (e.g. Zebra Building 12122016)
Project Name: Copy text from ‘Project Number’ ie Zebra Building + date string (e.g. Zebra Building 12122016)
Long Project Name: Copy text from ‘Project Number’
Project Description: Copy text from ‘Project Number’
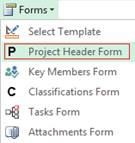
We will now enter the rest of the information using the ‘Project Header Form’.
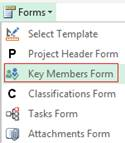
Click on the ‘Forms’ icon and select ‘Project Header Form’.
The ‘Project Header’ form will open.
The ‘Project Header’ form validates the data using lists of values, date formats, field lengths and some other field level validation.
Enter the following data using the LOVs:
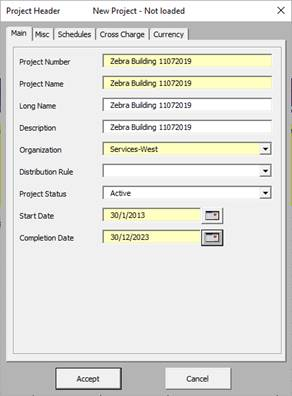
In the Main Tab
Organization:Select from LOVs (we have selected Services-West)
Project Status: Active
Start Date: 30/01/2013
Completion Date: 30/12/2023
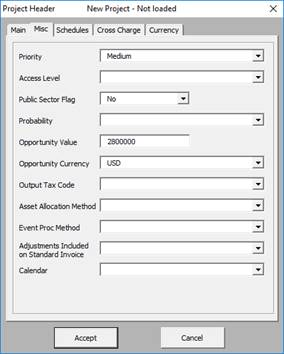
In the Misc Tab
Priority: Medium
Public Sector Flag: No
Opportunity Value: 2800000
Opportunity Currency: USD
The ‘Schedules’ tab is used to enterBurden, Bill Rate and Capital Interest schedule information.
Click ‘Accept’
1.6
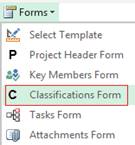
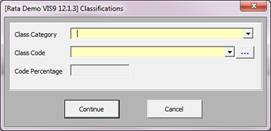
Click on the ‘Forms’ icon and select the ‘Classifications Form’ button.
The ‘Classifications’ form will display.
This can be used to enter and validate Classifications. We will simply allow the classifications attached to the template to be created so click ‘Cancel’.
1.7
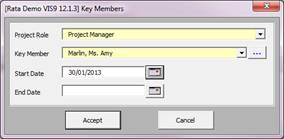
Click on the ‘Forms’ icon and select ‘Key Members Form’ button.
The ‘Key Members’ form will display.
Enter the following:
Project Role: Project Manager
Key Member: select from LOVs and click ... to populate
Start Date:we have entered30/01/2013
Click ‘Accept’
1.8
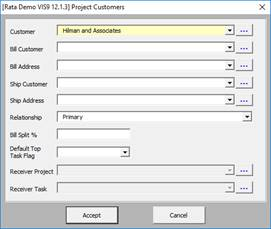
Double-click in the ‘Customers’ section and enter the following:
Customer: select from LOVs and click ... to populate
Relationship: Primary
Click ‘Accept’
1.9
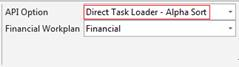
Make sure the ‘Wizard Mode’ on the ribbon is set to ‘Tasks’.
Make sure the ‘API Option’ is set to ‘Direct Task Loader- Alpha Sort’ on the Task Workplan ribbon.
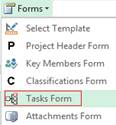
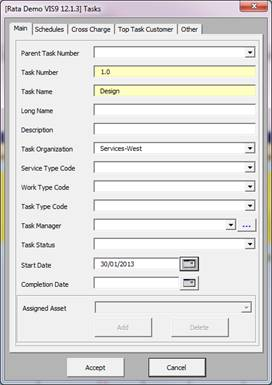
Click on the ‘Forms’ icon and select’ Tasks Form’ from the ribbon.
The ‘Tasks’ form will open.
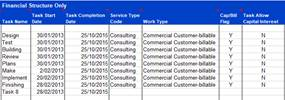
Enter the following data using the LOVs:
Task Number: 1.0
Task Name: Design
Task Organization:select from LOVs
Start Date: 30/01/2013
Click ‘Accept’
1.10
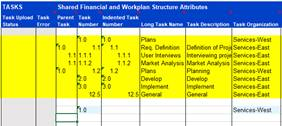
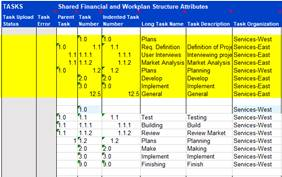
Move your cursor to the ‘Tasks’ section of the worksheet. Place the cursor in row 26 (ie first blank row under the last Task Number shown) in the ‘Parent Task’ column.
1.11
Copy the entire information from rows 11 to 23 (which are the rows highlighted above in worksheet) and enter from row 26 to rows below (or enter your own data).
Load into Oracle
Step
Task
Screenshot
1.12
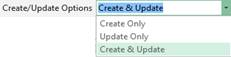
Ensure the ‘Create/Update Options’ icon is set to ‘Create Only’ or ‘Create & Update’ on the Project Wizard ribbon.
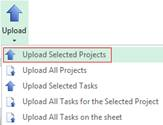
Place your cursor on any row which holds the Project details and click on the ‘Upload’ icon and select ‘Upload Selected Projects’ from the Project Wizard ribbon.
1.14
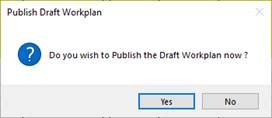
Message will appear “Do you wish to Publish the Draft Workplan now?”
Click ‘No’.
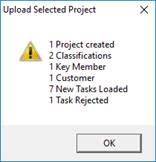
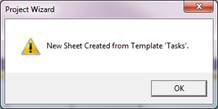
A message box will appear as per screenshot.
Click ‘OK’.
Check Project via Download
1.15
We will check the data uploaded into Oracle Projects by downloading the data back to the spreadsheet.
Place the cursor two rows below the last project Task (or the next blank row) and click the ‘Download via Form’ button from the Project Wizard ribbon.
The ‘Download Form’ will open.
Enter the Project you just created in the ‘Project’ field and click the … button.
Click ‘Download’.
Scroll across each section and you will see that the data entered has been loaded but also any other default information (e.g. Classifications) from the template has also populated into the Project.
Check Project in Oracle
1.16
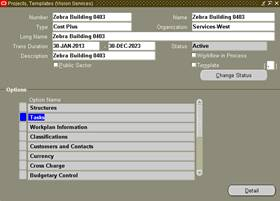
Navigation: >Projects
Enter Project Number and click ‘Find’.
Click ‘Open’.
Use the ‘Options’ section to look at Tasks, Classifications and Key Members.
2.Update Tasks
We are going to download Task information, make changes and upload back into Oracle Projects.
2.0
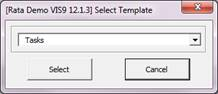
Click on the ‘New Sheet’ button.
Select ‘Tasks’ from the LOVs and click ‘Select’ on the ‘Select Template’ form.
This will populate a new worksheet with just the columns relating to Tasks.
2.1
Put cursor on a blank row below Row 9 and click the ‘Download via Form’ button on the Projects Wizard ribbon.
The ‘Download Projects’ form will open.
Choose the following criteria for download:
Project: the project you just created above
Note - If the ‘Project’ field is grey before beginning then click on the ‘Clear’ button.
Click ‘Download’.
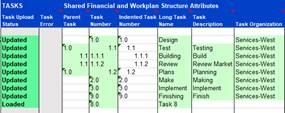
Task information for that Project will populate the sheet.
2.2
Enter the ‘Task Completion Date’ of 25/10/2015 on the first Task.
Copy this to all the other Tasks.
2.3
Ensure the ‘Create/Update Options’ is set to ‘Create & Update’ on the Project Wizard ribbon.
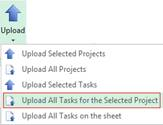
Click ‘Upload’ and select ‘Upload All Tasks for the Selected Project’ from the Project Wizard ribbon.
The Task Upload Status will say Updated and the records will be updated in Oracle.
2.4
We will check the information uploaded into Oracle Projects, by downloading the information back to the spreadsheet.
Place the cursor two rows below the last project task (ie a blank row) and click the ‘Download via Form’ buttonfrom the Projects Wizard ribbon.
The ‘Download Projects’ form will open.
Enter the project updated in the ‘Project’ field and click ‘Download’.
You will see the change of dates.
3. Add Transaction Controls
We are going to download a Project, add Transaction Controls and upload back into Oracle Projects.
3.0
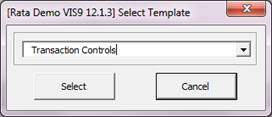
Click on the ‘New Sheet’ button.
Choose the ‘Transaction Controls’ option.
Click ‘Select’.
This will populate a new worksheet with columns relating to TransactionControls.
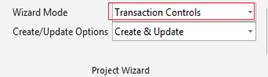
Select Wizard Mode ‘Transaction Controls’ on the Project Wizard ribbon.
3.1
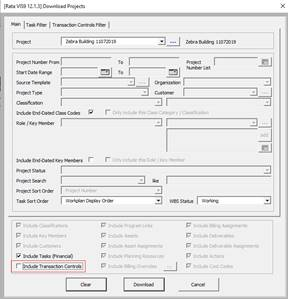
Put the cursor on a blank row (below row 10) and click the ‘Download via Form’ button on the Project Wizard ribbon.
The ‘Download Projects’ form will open.
Choose the following criteria for download:
Project: The Project you just created above.
Note - If the ‘Project’ field is grey before beginning then click on the ‘Clear’ button.
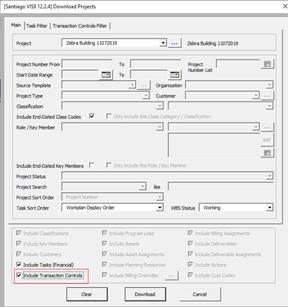
Ensure the ‘Include Transaction Controls’ tick box is un-ticked to ensure existing data is not downloaded.
Click ‘Download’.
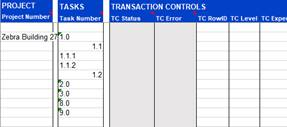
Task Numbers for that Project will populate the sheet.
At this stage there is no Transaction Control information.
3.2
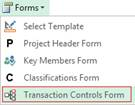
Place the cursor on the Task 1.1.1 (row 13) and click on the ‘Forms’ icon and select ‘Transaction Controls Form’ from the Project Wizard ribbon.
Note: Task 1.0 and 1.1 are invalid for Transaction Controls as only Tasks with no children are valid.
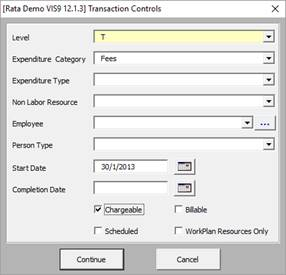
The ‘Transaction Controls’ form will open.
Note - If you get the ‘Transactions Controls maintenance’ message, you must set the following Profile Option ‘More4Apps: PW Enable Transaction Controls functionality’ in Oracle to ‘Yes’.
If you don’t do this the form will open but you will be unable to upload data.
You may also need to check the ‘More4Apps: PW Disable Transaction Controls’ profile option has not been set (This profile option is obsolete but the tool still checks in case someone has set it).
Enter the following:
Level: T
Expenditure Category: Fees
Start Date: 30/01/2013
Tick the ‘Chargeable’ check box and click ‘Continue’.
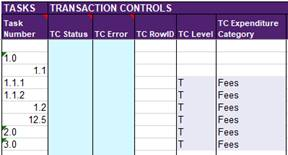
Copy and paste the data that we have just entered (ie Task 1.1.1) to all other Tasks, except Task 1.0 and 1.1 (you cannot create Transaction Controls for these Tasks as they have or are children).
3.3
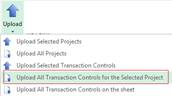
Click the ‘Upload’ icon and select ‘Upload All Transaction Controls for the Selected Project’ button from the Project Wizard ribbon.
Click ‘OK’.
3.4
To check the information loaded into Oracle Projects, download the information back to the spreadsheet.
Place the cursor two rows below the last project task on a blank row and click the ‘Download via Form’ button.
The ‘Download Form’ will open.
Enter the Project updated in the ‘Project’ field. Tick the ‘Include Transaction Controls’ box and click ‘Download’.
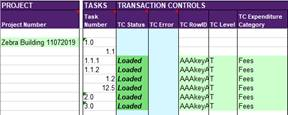
You will see the new Transaction Controls.
4.Change Key Members
We will now download Key Member information, make changes and load back into Oracle Projects.
4.0
In this example some Projects need to be managed by a different Key Member (ie Bob Cochrane and not Amy Marlin).
Click on the ‘New Sheet’ button.
From the LOVs select ‘Key Members’ and click ‘Select’.
This will populate a new worksheet with columns relating to Key Members.
Note – The main Project Wizard ribbon is used to load Key Members
4.1
Put the cursor on a blank row below row 9 and click the ‘Download via Form’ button.
The ‘Download Projects’ form will open.
Click on the ‘Clear’ button.
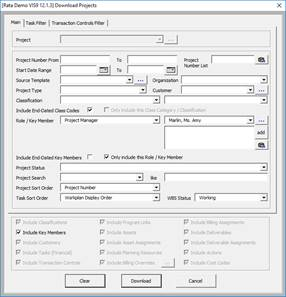
Enter the following criteria:
Role: Project Manager
Key Member:same as was entered for section 1.7 above
(Marlin, Ms. Amy) – select the … button to populate the selected Key Member
Include End-Dated Key Members:uncheck
Only include this Role/Key Member:check
Project Sort Order: Project Number
Task Sort Order: Workplan Display Order
Include Key Members: check
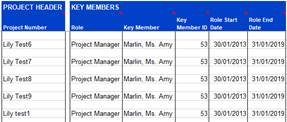
Click ‘Download’.
4.2
For this example delete any Projects with ‘Role End Dates’ in the future.
Then carry out the following exercise on the top five Projects (ie you could delete Projects after that and therefore only be showing 5x Projects on the worksheet).
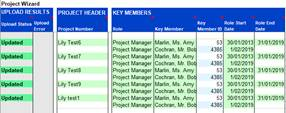
Add a ‘Role End Date’ for the top Project (date must be after start date) e.g. 31/01/2019.
Copy and paste this into each ‘Role End Date’ for ‘Key Member’ Amy Marlin.
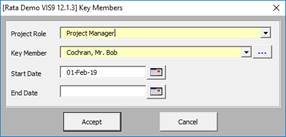
On the blank row directly under the first Project for Amy Marlin, double-click in the Key Members section to open the ‘Key Members’ form.
Enter the following data:
Project Role: Project Manager (select from LOVs)
Key Member:enter another Key Member (we have chosen ‘Cochran, Mr. Bob- Employee no. 396) thenclick the … button to select the required Key Member
Role Start Date:day after end date entered above e.g. 01/02/2019
Click ‘Accept’.
Copy this new Key Member information to the other 4 projects.
4.3
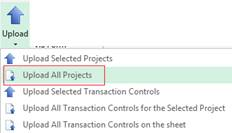
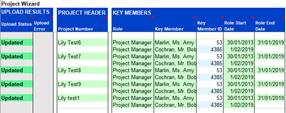
Click the ‘Upload’ icon and select ‘Upload All Projects’ from the Project Wizard ribbon.
The records will all show Updated successfully.
You could look in Oracle or download to check the result.
Navigation: >Projects
Enter Project Number and click ‘Find’.
Click ‘Open’.
Use the ‘Options’ section to look at Tasks, Classifications and Key Members.