|
1. Create a new Worksheet
All worksheets are created from the Template123 worksheet. Use the following steps to create your own customized template for your organization.
|
|
Step
|
Task
|
Screenshot
|
|
1.1
|
Click the ‘New Sheet’ button on the Material Transaction Wizard ribbon.
The ‘Generate template’ form will display. There is only one ‘Mode’ of ‘Material Transaction’.
Click ‘Create New’.
|
|
|
2.Enter Miscellaneous Receipts
We will now create some Miscellaneous Receipts
|
|
Step
|
Task
|
Screenshot
|
|
2.1
|
Place your cursor on any blank row, below row 10 (Default Values row).
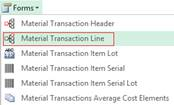
Click on the ‘Forms’ icon and select ‘Material Transaction Header’ from the Material Transaction Wizard ribbon. Alternatively double-click on the blank row in the ‘Header’ section of the worksheet to open the form.
|
|
|
2.2
|
The following screen may appear when the above action is undertaken. This indicates that you are not logged into your Oracle Instance.
Select the correct Oracle Instance from the dropdown list provided, click on the ‘Login’ button and enter your Username and Password.
Select a Responsibility and click ‘Continue’.
|
|
|
2.3
|
The ‘Material Transactions - Header’ form will open.
Enter the following information:
Inventory Org Code: Your Organisation
Transaction Date: today’s date will default
Transaction Type: Miscellaneous receipt
Default Account: Choose a combination
Click ‘Ok’ to close the form.
|
|
|
2.4
|
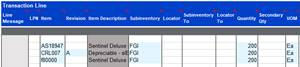
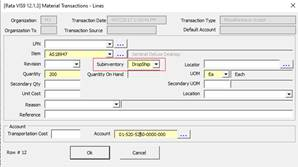
Transaction Lines
Click the ‘Forms’ icon and select ‘Material Transaction Line’ or alternatively double-click in the ‘Transaction Lines’ section on the same line as the Header information to open the ‘Lines’ form.
Enter transaction information for an item:
Item: a known Item number (then click the ‘…’ button)
Subinventory: choose from LOVs
Quantity: 200
Click the ‘Ok’ button to close the form.
|
|
|
2.6
|
Using Excel functionality copy the above ‘Transaction Line’ information down to the next two lines. Change the Item numbers (ensuring they are known Item numbers) and Quantities for the new lines.
Note - If those items are lot controlled or require serial numbers, please enter this information either in the form or directly into the worksheet.
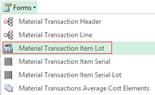
(You can navigate to the form by double clicking in the ‘Item Lot’ or ‘Item Serial’ section or double-clicking the ‘Forms’ icon and selecting ‘Material Transaction Item Lot’ or ‘Material Transaction Item Serial’ from the ribbon – see example below).
|
|
|
2.7
|
On the 2nd row (or any item number/row that is lot controlled), open the Lot Form by clicking on the ‘Forms’ icon and select ‘Material Transaction Item Lot’ on the ribbon.
Enter any required information and click ‘Ok’ to close the form.
The changes will be written to your worksheet.
|
|
|
3.Upload Miscellaneous Receipts
We will now upload these transactions into Oracle to create new Receipts.
|
|
3.1
|
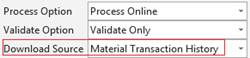
Ensure the ‘Process Option’ on the ribbon is set to ‘Process Online’. Place your cursor on any row of the Miscellaneous receipt.
Select the ‘Validate Only’ option from the Material Transaction Wizard ribbon.
|
|
|
3.2
|
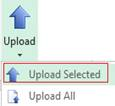
Click the ‘Upload’ icon and select ‘Upload Selected’ on the Material Transaction Wizard ribbon.
|
|
|
3.3
|
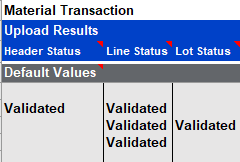
Your transactions will show an ‘Upload Result’ of Validated.
In the example shown to the right all 3 rows validated for the transaction.
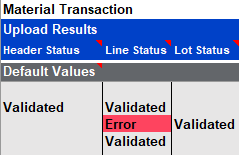
If you encounter any errors (as per the example to the right) read the Upload Message column and refer to the Error Handling and Validation section of this document.
Once the data has been corrected (if there were any errors), revalidate the transaction by placing your cursor on any row with the transaction and completing steps 3.1 and 3.2.
You can do this as many times as appropriate until all lines have a Validated upload result.
|
|
|
3.4
|
Once you have resolved any issues and revalidated, place your cursor on the row(s) which require processing.
Select the Validate Option of ‘Validate and Upload’ from the Material Transaction Wizard ribbon.
|
|
|
3.5
|
Click the ‘Upload’ icon and select ‘Upload Selected’ on the Material Transaction Wizard ribbon.
|
|
|
3.6
|
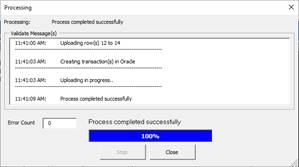
A message box will appear saying ‘Process completed successfully’.
Click ‘Close’.
|
|
|
3.7
|
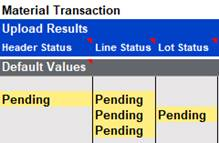
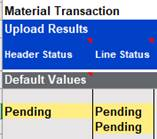
The status columns will be populated with Pending.
|
|
|
3.8
|
When the Upload Result is Pending, click the ‘Refresh Interface Status’ button on the ribbon to refresh the status.
This will show the final interface status.
|
|
|
3.9
|
Your transaction will show an ‘Upload Result’ of Accepted.
In the successful example shown to the right the Upload Result is Accepted. This indicates that all transaction lines have been uploaded including the Header, Lot and Serial information.
In the unsuccessful upload, one of the lines had an Error. This line has not been uploaded to Oracle and will need to be corrected and re-uploaded. The other lines have been uploaded to Oracle.
|
Example of successful upload
Example of unsuccessful upload
|
|
3.10
|
Log into your instance of Oracle and check the Material Transaction has been loaded successfully.
|
|
|
4. Download Transactions to Create New Transactions
We will now download into the worksheet some existing transactions from Oracle, make changes and upload them as new transactions into Oracle.
|
|
Step
|
Task
|
Screenshot
|
|
4.1
|
Click the ‘New Sheet’ button on the Material Transaction Wizard ribbon.
|
|
|
4.2
|
Click on any blank row, below row 10.
From the Download Source choose ‘Material Transaction History’ on the Material Transaction ribbon.
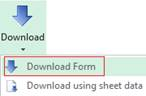
Click the ‘Download’ icon and select ‘Download Form’.
|
|
|
4.3
|
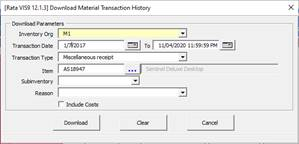
The ‘Download Material Transaction History’ form will open.
Enter the following information:
Inventory Org: your Organization
Transaction Date: a date range that will give you about 10-20 transactions
Transaction Type:
Item: an Item that will have transactions against them for dates entered (click the … button)
Click the ‘Download’ button.
|
|
|
4.4
|
The transaction details will populate the spreadsheet.
|
|
|
4.5
|
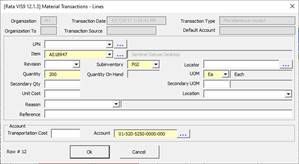
Place your cursor on the row of the first transaction in the ‘Transaction Lines’ section and double-click.
Or alternatively from anywhere in that row click on the ‘Forms’ icon and select ‘Transaction Lines Form’ from the Material Transaction Wizard ribbon.
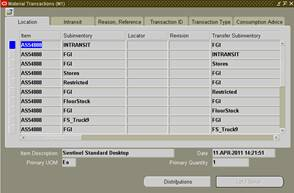
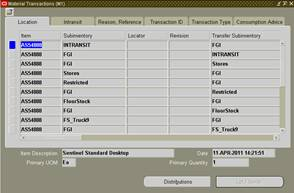
The ‘Material Transactions - Lines’ form will appear.
|
|
|
4.6
|
Choose a different Subinventory from the list of values.
Enter the correct Account combination for that Subinventory if different to the Header.
Click ‘Ok’.
The change will be written into your worksheet.
|
|
|
4.7
|
We are now going to create a new line for the same item with a different quantity.
Using the functionality of Excel, copy the line details for the first item and paste this into your worksheet on an empty row.
Scroll across to the ‘Quantity’ column and enter 2000.
Note - If this item is lot controlled, also change the lot details in the form or from the worksheet.
Delete all the rows in between, as we are only changing the first and last rows.
|
|
|
5.Upload the Changes into Oracle
We will now upload these changes to create new transactions in Oracle
|
|
Step
|
Task
|
Screenshot
|
|
5.1
|
Place your cursor on any row which has a transaction.
Select the ‘Validate Option’ of ‘Validate and Upload’ from the ribbon.
|
|
|
5.2
|
Click the ‘Upload’ icon and select ‘Upload All’ from the Wizard ribbon.
|
|
|
5.3
|
|
|
|
5.4
|
When the status is Pending you will need to click the ‘Refresh Interface Status’ button from the ribbon to refresh the status which will show the final upload status.
|
|
|
5.5
|
Your ‘Upload Result’ will show Accepted.
|
|
|
5.6
|
Log into your instance of Oracle and check the Material Transactions have been loaded successfully.
|
|
|
End of Demonstration
|