GL Wizard will always revalidate the worksheet records immediately before uploading them. Any journals that have a status of Accepted will be ignored. To upload this data again, the Accepted status value must be removed.
Use the cursor to select your range of data to upload, making sure you have included the first line of each to be uploaded. To upload a single Journal/Budget Amount, simply click anywhere on the row.
GL Wizard looks through the spreadsheet only between the top and bottom of the range you have indicated. If you have selected a range and only included the first line of the last Journal/Budget Amount to be uploaded, the Wizard will continue past the end of the selected range if necessary to locate all lines associated with the last selected Journal/Budget Amount.
The columns selected are NOT important.
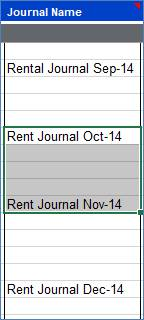
In this example each Journal contains five lines. We have selected two Journals to upload by highlighting the ‘Journal Name’ column.
Note - The Wizard will locate the five lines in each Journal without having to select all of the associated lines.
To upload the selected Journals/Budget Amounts to the interface, select the Validate Option of ‘Validate and Upload’ and then click ‘Upload’ and select 'Upload Selected':
If you want to upload all data on the sheet at the same time, whether they have been specifically selected or not, simply select the 'Upload All' option from the 'Upload' button. This upload option ignores the cursor location and goes straight to row 10 to begin uploading. It ignores any rows with Accepted data.