To upload a single or range of Budgets complete the following:
1)Click the ‘Edit Upload Options’ button from the ribbon.
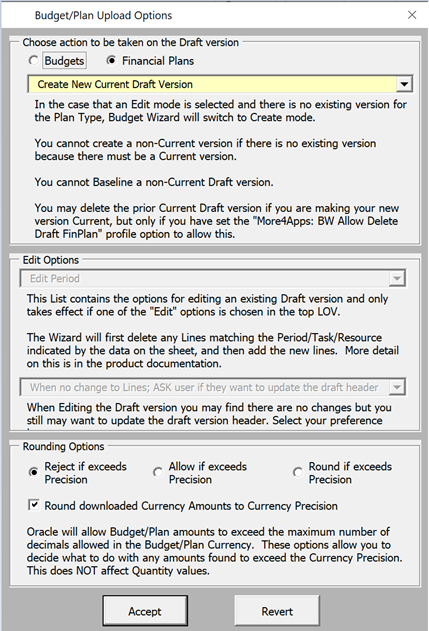
The following screen will display:
Choose the options you need for the upload and click on the ‘Accept’ button.
2)Choose from the dropdown list on the Wizard ribbon – ‘Baseline Budget’, ‘Leave as ‘Working’ or ‘Validate Only’.
3)Select either ‘Upload Directly’ to upload the budgets now or ‘Upload Using Concurrent Manager’ to submit the upload to the concurrent manager. This upload option, when run for the first time on each instance, will create a concurrent program for future use.
4)Use the cursor to select a single or range of budgets to upload, making sure you have included the first line of each budget to be uploaded.
Budget Wizard looks through the spreadsheet only between the top and bottom of the range you have indicated. If you have selected a range and only included the first line of the last Budget to be uploaded, Budget Wizard will continue past the end of the selected range if necessary to complete the last Budget. The columns selected are NOT important.
Click the ‘Upload’ icon and select ‘Upload Selected’ on the ribbon.
Any Budgets marked ‘Ok’ in the ‘Upload Ok’ column will be ignored.
Successful budget data will return ‘Ok’ in the ‘Upload Ok’ column or rejected budget data will return Rejected in the ‘Upload Ok’ column.
Where a Rejected message occurs, rectify any issues as outlined in the Error Handling and Validation section of this document.