Receipt Form - ‘Create’ Mode
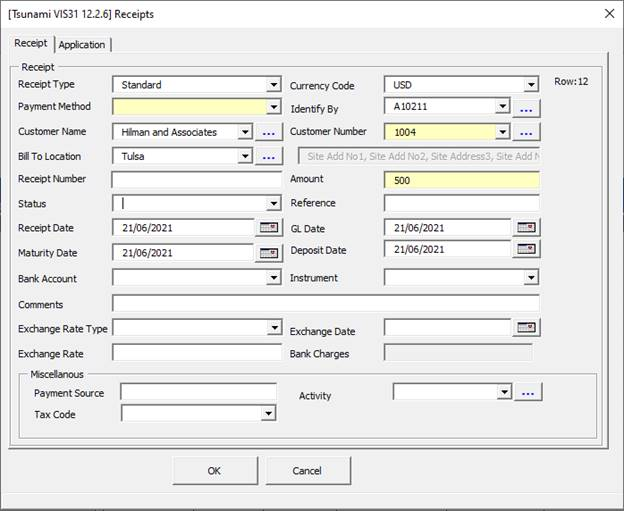
When the Upload Action mode is ‘Create’ the Wizard opens the ‘Receipts’ form. Using this function the Wizard will create new receipts and also, if applicable, apply these receipts to the appropriate invoices.
The Receipts form can be used to validate all the fields required to create a receipt via the Wizard.
The Identify By field allows you to default the customer details based on the Invoice Number. To use this feature, enter the Invoice Number and tab. The form will be populated with the customer details. Note - This field is case sensitive so upper or lower case needs to be accurate to return the correct details.
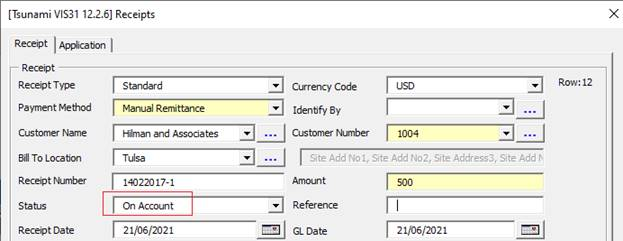
During the creation of a receipt, the remainder of the amount can be placed On Account. To use this feature set the Status as appropriate.
Create a Receipt with Status ‘On Account’. When Receipt and Apply happens the remainder amount will be automatically put into ‘On Account’.
Receipt Type
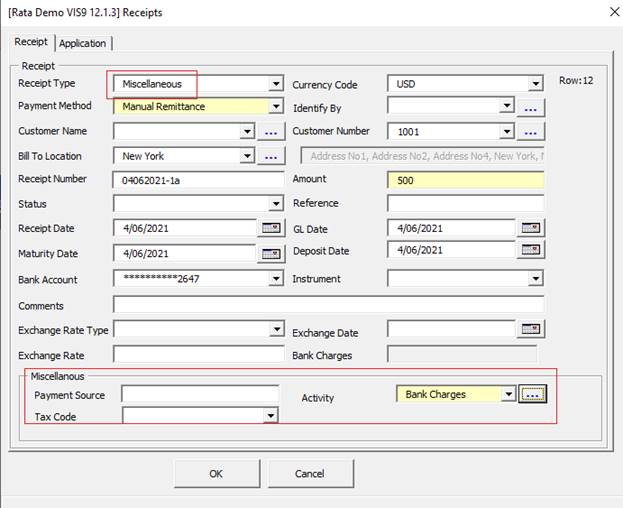
Receipt Type LOVs ‘Standard’ and ‘Miscellaneous’ depend on the Payment method (called Receipt Method in EBS).
Miscellaneous Section
Information relating to Miscellaneous Receipts i.e. non-invoice related transactions can be entered into the ‘Miscellaneous’ section (as shown below). AR Receipt Wizard requires you to associate these receipts with one of the Miscellaneous Cash Receivable Activities that you have defined previously.
Application Tab
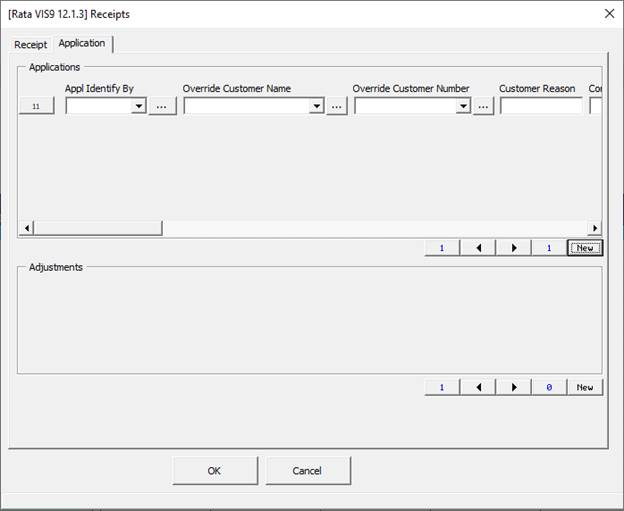
Applications Section
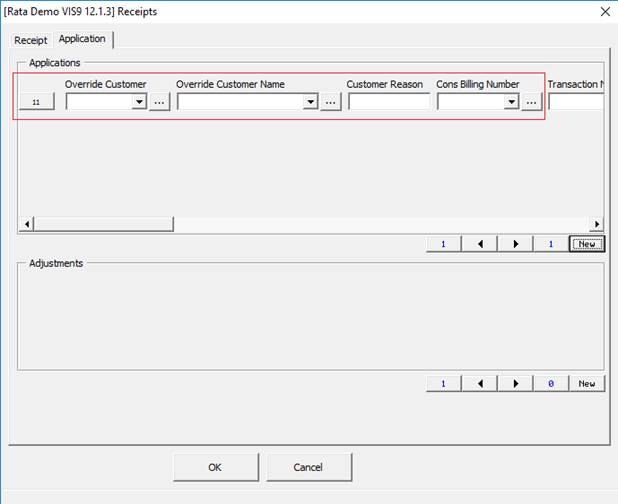
This is used to apply a Standard receipt to one or more invoices. This can be done at the same time as the receipt creation or at a later date.
Initially there will be no active rows on the form. Select the 'New' button to create a new line for each required application. When the form is closed, the entered data will appear in the ‘Applications’ section of the worksheet.
Use the scroll bar on the form to view and update other fields relevant to the receipt application.
When an invoice number is selected, the Wizard will automatically populate the Amount Applied field with the relevant amount. If the amount being applied is not the same as the outstanding balance of the invoice, you should remember to enter ‘Yes’ in the Override column.
Override Customer Name and Number Fields
These fields allow the user to specify a Customer other than the Customer associated with the receipt. The population of these fields has a bearing on the invoices available for the application of the receipt.
The behavior of the List of Values for the invoices field is dependent on the setting of your Oracle Receivables System Option ‘Allow Payment of Unrelated Transactions’ and/or any defined Relationship between the selected Customers. See below for details.
Apply Transactions
Available Invoices for Applications
• If your Receivables System Option does not allow you to pay unrelated transactions, then the invoice list will be restricted to the Receipt Customer and its related Customers.
• If your Receivables System Option does allow you to pay unrelated transactions and you do not specify an Override Customer, then the Invoice list will show invoices for all Customers.
• If your Receivables System Option does allow you to pay unrelated transactions and you do specify an Override Customer, then the invoice list will be restricted to the Override Customer and any related Customers.
Other Available Transactions for Applications
You can also use the Application section to apply part or all of a receipt to the following, provided the set-up has been configured in your instance of Oracle:
• On Account
• Receipt Write Off
• Claim Investigation
• Refund
• Credit Card Refund, etc.
To do this, select the appropriate option from the List of Values in the Transaction Number field as shown below:
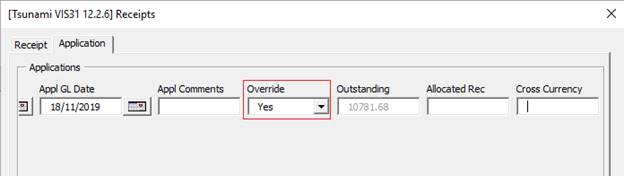
Override
If the value to be applied against the invoice is less than the outstanding value of the invoice enter ‘Yes’ in this field.
If you do not do this, the upload will generate an error message “Warning: The outstanding value does not match the applied amount. Please select to override if you wish to process this line.”
The receipt will not be applied to this invoice until the Override fields is updated to ‘Yes’ or the receipt amount is changed.
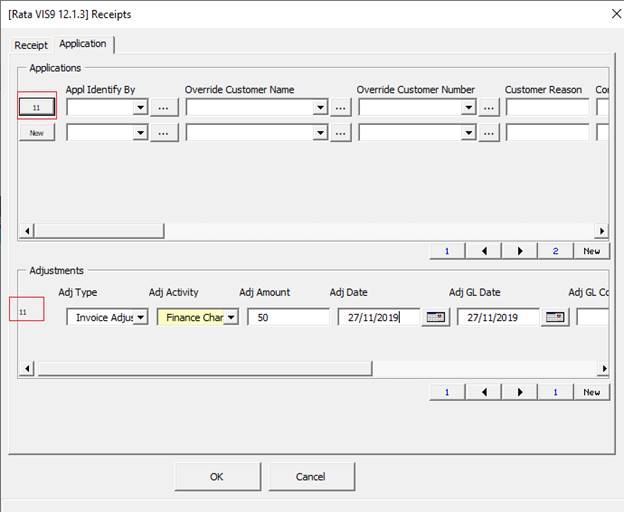
Adjustments Section
The Create Mode of the Wizard enables you to process an Adjustment against an invoice, for a positive or negative amount. The Adjustments section is found at the bottom of the Application form.
Initially, there will be no active rows on the Adjustments form. In the ‘Application’ tab, click on the button on the left-hand side of the row which holds the invoice to be adjusted. Click the ‘New’ button in the ‘Adjustments’ area to create a line.
You will note from the example below that the application line number and the adjustment line number will be the same.
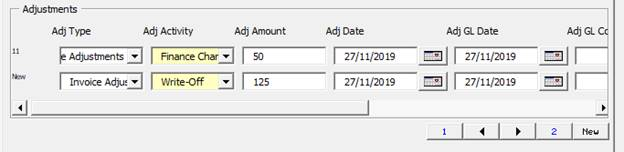
You can select the ‘New’ button multiple times to create any number of adjustments to the same invoice.
When you select ‘OK’ the Adjustment lines will be added to the worksheet.
Refer to section: