To customize the fields for the worksheet, click on the ‘New Sheet’ button on the AR Receipt Wizard ribbon.
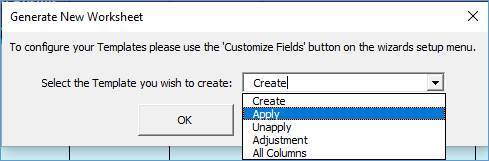
A message will display asking you to select the Template you wish to use to create the New Sheet.
The options are: Create, Apply, Unapply, Adjustment or All Columns:
The creation of transactions in each of the processing Wizard Modes (ie Create, Apply, Unapply, Adjustment) requires different fields to be populated so the individual templates have been formatted to take account of this. The template behind each of these Modes can be modified to reflect your individual requirements.
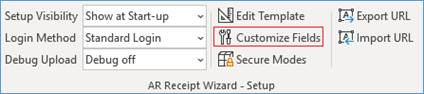
To do this, click on the ‘Customize Fields’ button on the AR Receipt Wizard – Setup ribbon:
The following ‘Set Create Fields’ form will open:
You firstly select which Wizard Mode you wish to modify. The above example shows the ‘Create’ Mode.
Each of the fields available for the selected Mode are displayed.
Those columns with a tick in the ‘Select’ box will appear in the worksheet for the selected Mode. Those fields which are mandatory for the Wizard to function correctly are ticked with a light grey tick and cannot be unticked.
If you wish to remove non-Mandatory columns from the Wizard, untick the Select box for the relevant field. When a new sheet is created from this template, those fields which have been deselected will not appear in the sheet. The deselected field will still appear in the forms but is greyed out so it cannot be populated.
The Mandatory column allows you to specify additional fields which must be entered for your particular Oracle configuration. These could include Descriptive Flexfield segments, for example.
Note - If any of the selected Mandatory fields (i.e. made mandatory by More4apps or by the user) are not populated or are not present in the worksheet, then the upload will fail.
Additional functionality provided by this form allows the user to:
• Define a ‘Custom Label’ for a column. This is useful where the Oracle Fields Name may not be known to the user e.g. Descriptive Flexfield Segment names. The value entered in the ‘Custom Label’ field will appear in row 9 of the selected column instead of the standard label.
• Add a meaningful ‘Comment’ to a field to assist the users in populating the worksheet.
If you wish to save the changes made to the Mode Template but do not wish to create a new sheet immediately, click on ‘OK’ and then ‘Cancel’.
Click on the ‘Create Sheet’ button if you wish to immediately create a sheet with the updated format. Once the sheet has been created, click on ‘Cancel’.
If you do not wish to save your changes, click on ‘Cancel’.
If you have saved your updates, the next time you create a New Sheet for the updated Mode, the worksheet and the forms will reflect the changes you have made.
Refer to section: