Attachments
AR Receipt Wizard enables the loading of one or more Attachments against an existing Standard or Miscellaneous Receipt.
To enable this functionality, you must have the ‘Attachment’ section displayed in your worksheet.

Attachments can be created in ‘Create’ mode by using the ‘Attachments’ form or by typing data directly into the Wizard fields.
Place the cursor on the row for the receipt against which the Attachment should be created.
To use the form, click the ‘Forms’ icon and select ‘Attachments’ from the list of values or alternatively double-click in the Attachments section.

When the form opens, the user can select one of three Types – File, Short Text or Web Page.
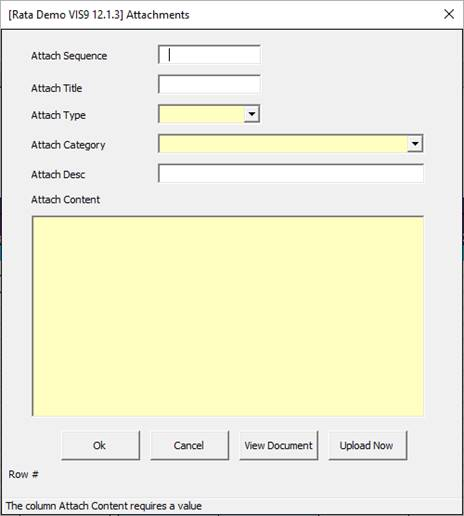
Select the ‘Category’ value from the list of values, as defined in your Oracle instance, and optionally enter a ‘Description’.
Enter a value in the ‘Content’ field, appropriate to the ‘Data Type’.
If the receipt against which you wish to attach the data already exists in Oracle, click the ‘Upload Now’ button. The form will close and the ‘Attach Status’ will read Accepted. The Attachment will now be visible in Oracle.
If the receipt does not yet exist in Oracle i.e. it has not yet been uploaded, you will need to successfully upload it before the Attachment can be uploaded.
So, if for any reason you do not wish or are unable to create the Attachment immediately, click the ‘OK’ button and the form will close and write the information into the cells in the worksheet. This data can be saved and uploaded at a later date, if necessary.
To upload Attachments for Receipts:
1) To upload an Attachment against a receipt, the receipt must already exist in Oracle Receivables.
2) Attachments can be uploaded immediately after the receipts have been created or they can be uploaded at a later date.
3) Attachments can only be uploaded from a ‘Create’ sheet when the Wizard is in ‘Create’ mode. Validate Option must be ‘Validate and Upload’.
4) To upload an Attachment, you need to have the relevant Receipt details in a ‘Create’ worksheet, you can either open the ‘Create’ sheet originally used to upload the Receipts or you can download specific Receipts using the Download option ‘Receipts via Form’.
5) Add the Attachment details for each of the records, either using the ‘Attachments’ form or by typing the information directly into the sheet cells.
6) If you are using the form to create Attachments, you can individually upload them, using the ‘Upload Now’ button displayed at the bottom of that form.
7) Alternatively, you can highlight the rows of Attachments and select one of the options under the Attachments icon i.e. ‘Upload All Attachments’ or ‘Upload Selected Attachments’.

Refer to section: