Under the Validation tab we are able to also build our own PL/SQL validation for our loaded.
The form is made up of three sections:
1. PL/SQL Variables
This box is where your PL/SQL variables will populate:
• p_ID will be the LOV Upload field value (If a LOV is assigned to the column. Or else will be NULL.
• p_MEANING is the sheet value. This will always be populated regardless of a LOV.
• p_ERROR can be set to an error message to fail validation and write to the sheet.
• b_REQUIRED can be set to TRUE to make a column mandatory for upload (or false for the opposite.
2. PL/SQL Declare
Your variables and dependencies must be created here, use the dependency builder to build variables to which you can then use those in the PL/SQL Body section.
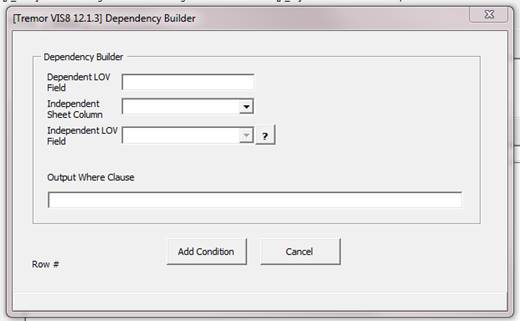
The following form will appear:
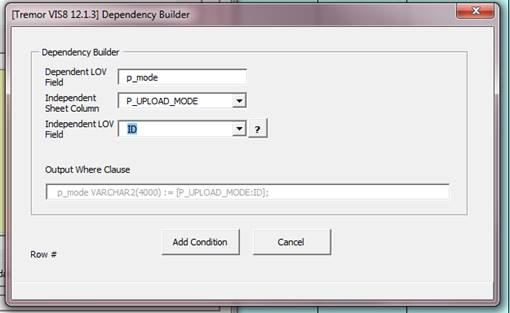
We are then able to add in our own dependencies where we can specify the dependent LOV fields for example:
3. PL/SQL Body
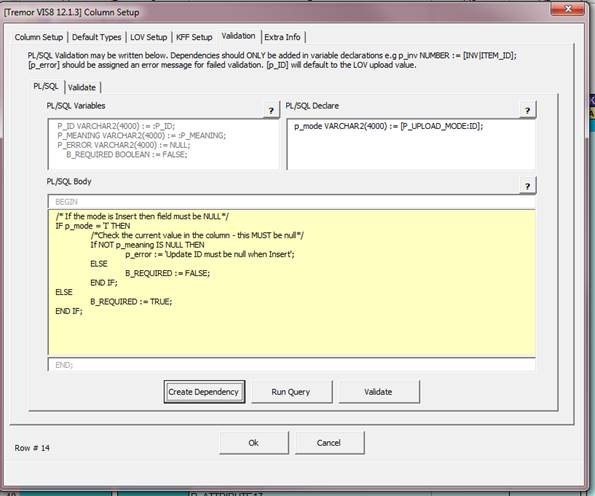
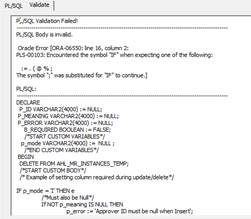
In this section the PL/SQL validation can be entered, for example we want to set a column to be required when we are doing an update or delete. The following image shows this:
Note the following regarding the PL/SQL variables:
-p_ID can be assigned a new ID for upload, or if a LOV is tied to a column p_ID will be the ID value from the LOV.
-p_ERROR can be assigned to write messages back. This does NOT have to be set if b_REQUIRED is used, otherwise this MUST be set with a message.
-b_REQUIRED is used to set a columns mandatory property for upload. If this is true then a value MUST be provided for upload.
-b_REQUIRED can be set to TRUE or FALSE here independently of p_ERROR.
-b_REQUIRED will default to the columns mandatory setting.
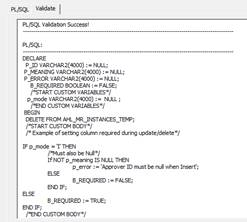
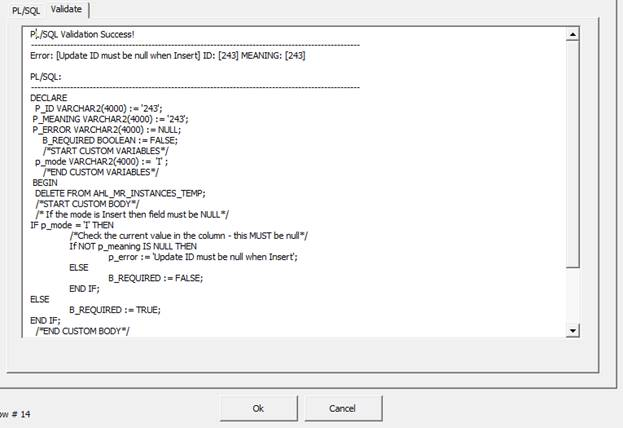
The PL/SQL can then be validated using the Validate button. This will then either display a success message or an error in which you will need to fix the validation.
We can then also use the ‘Run Query’ to test the validation:
This functionality gives us the ability to provide values to be put through the validation, as seen from the illustration below:
Once this is complete and we have saved our PL/SQL we can see in the form that the fields change based on what Upload Mode is selected based on our PL/SQL written:
INSERT Mode:
UPDATE Mode:
Refer to section: