|
1. Template/Worksheet
|
|
Step
|
Task
|
Screenshot
|
|
1.0
|
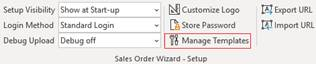
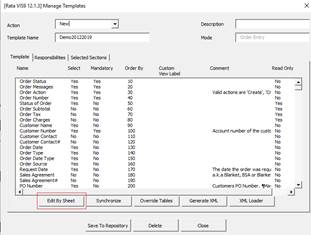
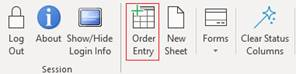
Click ‘Manage Templates’ from the Sales Order Wizard – Setup ribbon.
|
|
|
1.1
|
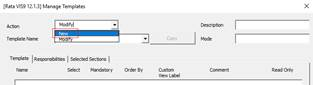
Select ‘New’ from the ‘Action’ list of values.
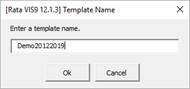
Enter a unique Template Name e.g. ‘Demo20122019’ (or similar) and click ‘Ok’.
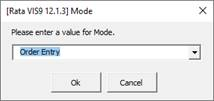
Select a Mode associated with the Template (Order Entry) and click ‘Ok’.
|
|
|
1.2
|
Click ‘Edit by Sheet’ button.
Save pending changes by clicking ‘Yes’.
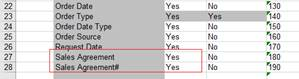
Display extra columns by setting the ‘Sales Agreement’ (Row 27) and Sales Agreement#’ (Row 28) to Yes.
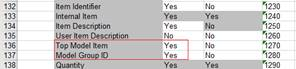
Also ‘Top Model Item’ (Row136) and ‘Model Group ID’ (Row137) to Yes.
Custom View Label
Attribute1 (Row72) update ‘Custom View Label’ (Col F) to ‘Phone Number’.
Update ‘Comment’ to ‘Phone number of Customer’.
Move Column order for Request Date (Row 26) - Update ‘Order By’ from ‘170’ to ‘135’.
Click the ‘Load’ Button in Cell A8.
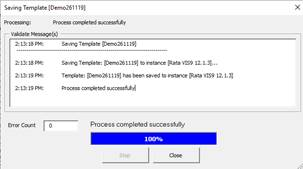
Click ‘Save to Repository’.
Click ‘Close’ and ‘Close’.
|
|
|
1.3
|
We will now create a new worksheet.
Click the ‘Select Template’ button on the Sales Order Wizard ribbon (now reads ‘Order Entry’.
The ‘Generate template’ form will appear.
Select Template ‘Demoxxxxxx’ and
Mode ‘Order Entry’.
Click ‘Create New’.
Confirm by clicking ‘OK’.
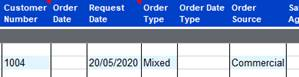
New fields added and column moved.
Column renamed and Comment displayed.
|
|
|
2. Create Sales Order via the Forms
|
|
Step
|
Task
|
Screenshot
|
|
2.0
|
Ensure the Mode is Order Entry.
We will now have a worksheet labelled ‘Demoxxxxxx’.
|
|
|
2.1
|
Place your cursor on a blank row below Row 10 (Default Values row).
Click on the ‘Forms’ button on the ribbon and select ‘Orders’.
|
|
|
2.2
|
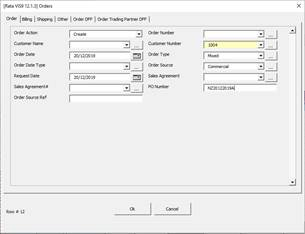
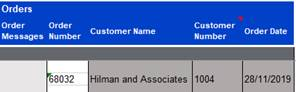
In the Order tab, enter data for the following:
Order Action: Create
Order Number: In this environment this is set to Automatic so does not need an entry
Customer Number:
Order Date: today’s date
Order Type: Mixed
Order Source: Commercial
Request Date: today’s date
PO Number: enter a unique number
Click the ‘Billing’ tab and enter data for the following:
Currency:
Price List:
Payment Terms:
Click the ‘Shipping’ tab and enter data for the following:
Ship to Customer #:
Ship to Location:
Order Warehouse:
Shipment Priority:
Shipping Method:
Freight Terms:
Click ‘Ok’ to return to the worksheet.
|
|
|
2.3
|
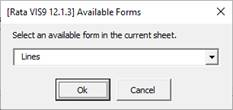
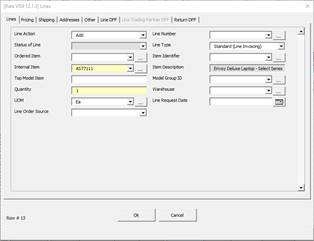
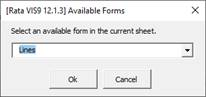
Click the ‘Forms’ button on the ribbon and select ‘Lines’.
Enter data for the following:
Line Action: Add
Line Type: Standard (Line Invoicing)
Internal Item:
Quantity: 1
UOM:
Click ‘Pricing’ tab and enter the following data:
Line Price List:
Selling Price:
Calculate Price Flag: (do not calculate, based on price list)
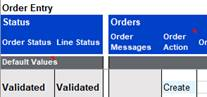
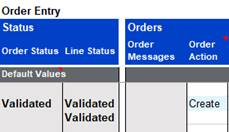
Click ‘Ok’. This will return you to the worksheet. Relevant fields will be validated and colored mauve.
Upload Status will show Validated.
Add a second line.
Put cursor on next line (line 12 in this case).
Click on the ‘Forms’ button on the ribbon and select ‘Lines Form’ (or double-click in a cell within the Lines section).
Lines Tab
Line Action: Add
Line Type:
Internal Item:
Quantity: 1
UOM:
Pricing Tab
Calculate Price Flag: Calculate Price
(calculates prices based on price list)
Click ‘OK’.
Upload Status will show Validated.
|
|
|
2.4
|
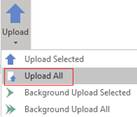
Click ‘Upload’ and select ‘Upload All’ from the ribbon.
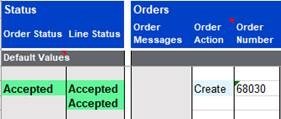
All rows will process with an Accepted Status and an ‘Order Number’.
Note – Could get a Line Message Warning ‘Scheduling failed. Unable to find a calendar date’. This is Ok as it is just a Warning
Or
‘Extension has failed – please check your…..’.
If you get this message turn off profile option ‘Enable Extension Pkg’.
|
|
|
2.5
|
Check the Sales Orders in Oracle.
Navigation:
Ø Orders. Returns > Quick Order Organizer
Enter the Order Number from the Spreadsheet.
Click on the ‘Find’ button.
Check the details.
|
|
|
3. Download Sales Order Information from Oracle into the Worksheet
|
|
Step
|
Task
|
Screenshot
|
|
3.0
|
There are two ways of downloading data to the spreadsheet using the ‘Download’ icon on the Sales Order Wizard ribbon, or another way is using the ‘Custom Query’ tab on the Custom Query ribbon.
Here we will demonstrate both ways using the ‘Download’ icon.
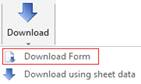
Using the same worksheet as above, place the cursor on a blank row. Click on the ‘Download’ icon and select ‘Download Form’ from the ribbon.
|
|
|
3.1
|
The ‘Download Form’ will appear.
Enter the Sales ‘Order Number’ created in the previous step and click the ‘Download’ button.
|
|
|
3.2
|
The Sales Order that meets the criteria will populate the worksheet.
|
|
|
Download by entering CRITERIA into the Worksheet
|
|
3.3
|
Criteria can also be entered directly into the worksheet as a basis for downloading data.
Put cursor on a blank row that has no data.
Enter an Order Number directly into that blank row on the spreadsheet in the ‘Order Number’ column.
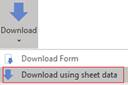
Click on the ‘Download’ button and select ‘Download using sheet data’ from the ribbon.
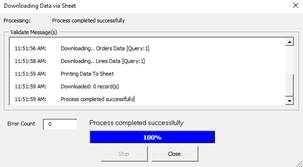
Data for that order will directly download into the spreadsheet.
|
|
|
3.4
|
The downloaded data can be used for the following:
- Update existing Orders
- Create new Orders
- Delete Orders or Order Lines
Then upload back into Oracle.
|
|
|
4. Create Sales Order with Service and Contract Details
|
|
Step
|
Task
|
Screenshot
|
|
4.0
|
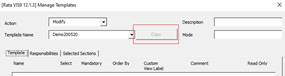
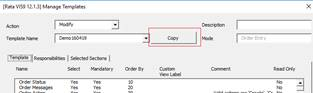
Prepare Worksheet by clicking the ‘Manage Templates’ button on the Sales Order Wizard - Setup ribbon.
Enter the following:
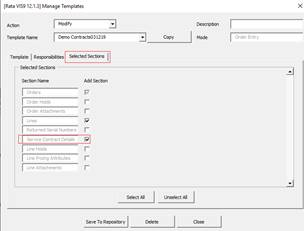
Action: Modify
Template Name: Demoxxxxxx (the worksheet created previously)
Click ‘Copy’.
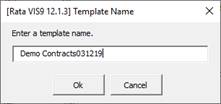
Template Name: Demo Contractsxxxxxx
Click ‘Ok’.
Click the ‘Selected Sections’ tab and tick on ‘Service Contract Details’.
Click ‘Save to Repository’.
Click the ‘Template’ tab and click ‘Edit by Sheet’.
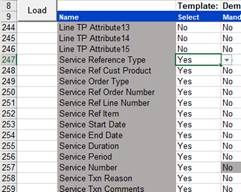
Navigate to ‘Service …’ columns in Lines section (row237-249) and set all to ‘Yes’.
Note: In some Instances there will be more service fields depending on the EBS release.
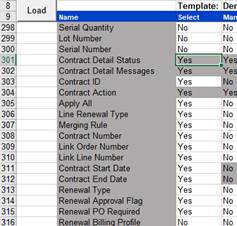
Navigate to Section ‘Service Contract Details’ (about row 294-319) and ensure all are selected to Yes.
Click Load (Cell A1).
Click ‘Save to Repository’ and ‘Close’ and ‘Close’.
|
|
|
4.1
|
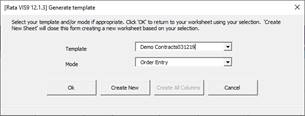
Create a worksheet by clicking the ‘Select Template’ button on the ribbon.
Select the following:
Template: Demo Contractsxxxxxx
Mode: Order Entry
Click ‘Create New’.
A new worksheet will have been created.
|
|
|
4.2
|
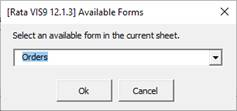
In this new worksheet, place the cursor on a blank row and open the ‘Order’ form by clicking ‘Forms’ and selecting ‘Orders’.
|
|
|
4.3
|
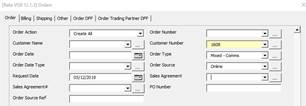
Enter data into the form:
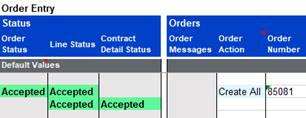
Order Tab
Order Action: Create All
Customer Number:
Order Type: % search and select ‘Mixed – Comms’ from LOV
Order Source: Online
Request Date: today’s date
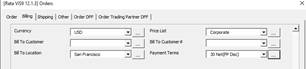
Click on the ‘Billing’ tab and enter the following:
Currency:
Price List: Corporate
Bill to Location:
Payment Terms: 30 Net(PP Disc)
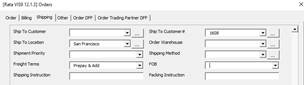
Click on the ‘Shipping’ tab and enter the following:
Ship to Customer#:
Ship to Location:
Freight Terms: Prepay & Add
Click ‘Ok’ to close the form and return to worksheet.
|
|
|
4.4
|
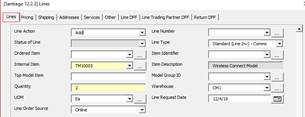
Click the Forms icon and select ‘Lines Form’.
In the form enter data into the following fields:
First Line
Lines Tab
Line Action: Add (by default)
Line Type: Standard (Line Inv) – Comms
Internal Item:
Quantity: 2
Warehouse:
UOM: Ea
Line Request Date: today’s date
Line Order Source: Online
Pricing Tab
Line Price List: Corporate
Calculate Price Flag: Calculate Price
Shipping Tab
Source Type: Internal
Line Shipping Method:
Click ‘Ok’.
Move down a line and click the ‘Forms’ icon and select ‘Lines Form’.
Second Line
Lines Tab
Line Type: Standard (Line Inv) – Comms
Internal Item:
Quantity: 2
Warehouse:
UOM: YR
Line Request Date: today’s date
Line Order Source: Online
Pricing Tab
Line Price List: Corporate
Selling Price: 400
Calculate Price Flag: Calculate Price
Services Tab
Service Reference Type: Current Order (‘Customer Product’ option cannot be selected as this functionality is not available)
Service Ref Item:
Service Start Date: today’s date
Service Duration: 2
Service Period: Year
Click ‘Ok’.
Click the ‘Forms’ icon and select ‘Service Contract Details Form’ from the ribbon.
Contract Action: Insert
Apply All: No
Line Renewal Type: Full Duration
Merging Rule: New
Renewal Type: Manual
Renewal Approval Flag: No
Renewal PO Required: Yes
Click ‘Ok’.
|
|
|
4.5
|
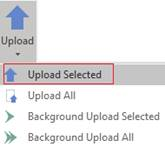
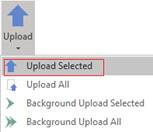
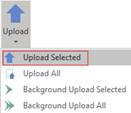
Click the ‘Upload’ icon and select ‘Upload Selected’ from the ribbon.
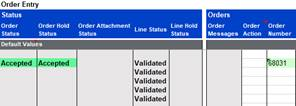
All rows will process with an Accepted Status.
|
|
|
5. Holds
|
|
Step
|
Task
|
Screenshot
|
|
5.0
|
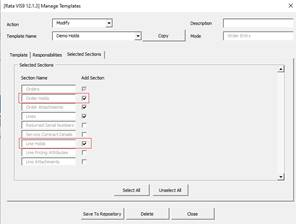
Prepare Worksheet by clicking ‘Manage Templates’ on the Setup ribbon.
Action: Modify
Template Name: Demoxxxxxx
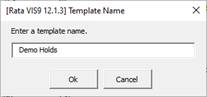
Click Copy.
Template Name: Demo Holds
Click Ok.
Select the ‘Selected Sections’ tab and tick on ‘Order Holds’ and ‘Line Holds’.
Click ‘Save to Repository’ and ‘Close’.
|
|
|
5.1
|
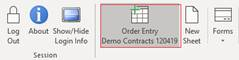
Create Worksheet by clicking the ‘Select Template’ button on the ribbon.
Select the following:
Mode: Order Entry
Template: Demo Holds
Click ‘Create New’.
|
|
|
5.2
|
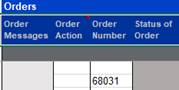
Enter a Sales Order number onto the worksheet.
Click Download and select ‘Download using sheet data’.
With cursor on the first line of data, click the ‘Forms’ icon and select ‘Order Holds Form’ from the ribbon.
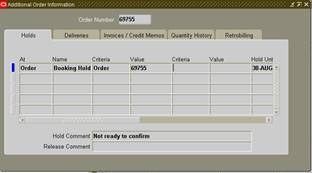
In the ‘Order Holds’ form enter the following:
Order Hold Action: Apply Hold
Order Hold Code: Booking Hold
Order Hold Comment: Not ready to confirm
Order Hold until Date: future date
Click ‘Ok’ to close the form.
|
|
|
5.3
|
Click ‘Upload’ and select ‘Upload Selected’ from the ribbon.
All rows will process with an Accepted Status.
|
|
|
5.4
|
Check the Sales Orders in Oracle. Navigation:
Ø Orders, Returns > Sales Orders
Click on the Find icon.
Enter the Order Number from the spreadsheet.
Click on the ‘Find’ button.
Check the details.
|
|
|
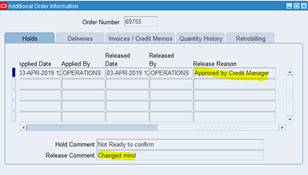
5.5
|
Download Order.
Navigate to the Order Holds section.
Enter data into the following fields:
Order Hold Action: Release Hold
Order Release Reason: Approved by Credit Manager
Order Release Comment: Changed mind
Click ‘Ok’.
|
|
|
5.6
|
Click ‘Upload’ and select ‘Upload Selected’ from the ribbon.
All rows will process with an Accepted Status.
|
|
|
5.7
|
Check the Sales Orders in Oracle. Navigation:
Ø Orders, Returns > Sales Orders
Click on the Find icon.
Enter the Order Number from the spreadsheet.
Click on the ‘Find’ button.
Check the details.
|
|
|
6. Sales Order Return(s)
Create Lot Number and Serial Number controlled item returns.
|
|
Step
|
Task
|
Screenshot
|
|
6.0
|
Prepare Worksheet by clicking ‘Manage Temples’ on the Sales Order Wizard – Setup ribbon.
Action: Modify
Template Name: Demoxxxxxx
Click ‘Copy’.
Template Name: Demo Serial
Click ‘Ok’.
Click the ‘Selected Sections’ tab and tick on ‘Returned Serial Numbers’
Click ‘Save to Repository’.
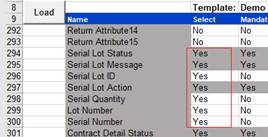
Go back to the ‘Template’ tab and click ‘Edit by Sheet’.
Navigate to ‘Return Serial Numbers’ section (around row 287-293) and set all to Yes.
Also set Return Reason (row 257) to Yes.
Click ‘Load’ button.
Click ‘Save to Repository’ and ‘Close’ and ‘Close’.
|
|
|
6.1
|
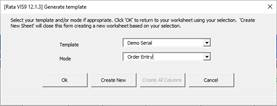
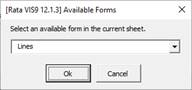
Create a new worksheet by clicking the ‘Select Template’ button from the ‘Sales Order Wizard’ ribbon.
Select the following:
Mode: Order Entry
Template: Demo Serial
Click ‘Create New’ and then ‘Ok’.
A new sheet labelled ‘Demo Serial1’ will be created.
|
|
|
6.2
|
With cursor on a blank row and in the Header section double-click or click on the ‘Forms’ icon and select ‘Orders’ button to open the form.
Enter the following data into the fields:
Order Action: Create & Book
Customer Number:
Order Type: Return Only
Request Date: today’s date
Click Ok to save the data and close the form.
Click the ‘Forms’ icon and select ‘Lines’ from the ribbon.
Enter the following data into the fields:
Line Action: Add
Line Type: Return (Receipt)
Internal Item:
Item Type: STANDARD
Quantity: 1
UOM: Ea (default)
Warehouse:
Line Request Date: today’s date
Select the ‘Other’ tab and enter the following data:
Return Reason: Accounts Receivables Billing Error
Click Ok to close the form.
|
|
|
6.3
|
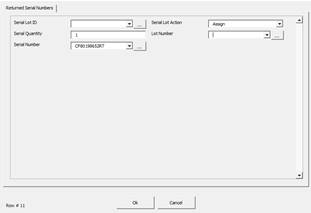
Click the ‘Forms’ icon and select ‘Returned Serial Numbers Form’ from the ribbon.
Enter the following data into the fields:
Serial Lot Action: Assign
Serial Quantity: 1
(Note - SOW only allows return of 1x Quantity for Serial Number or Lot Number and if Quantity is entered then a Serial/Lot Number must be specified).
Serial Number: Select a number from the list of values
Click ‘OK’.
|
|
|
6.4
|
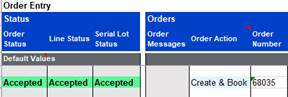
Upload by clicking ‘Upload’ and selecting ‘Upload All’ from the ribbon.
All rows will process with an Accepted Status and an ‘Order Number’.
|
|
|
6.5
|
Check the Sales Orders in Oracle. Navigation:
Ø Orders, Returns > Sales Orders
Click on the Find icon.
Enter the Order Number from the spreadsheet.
Click on the ‘Find’ button.
Check the details. (Actions > Return Lot and Serial Numbers)
|
|
|
7. Copy Template between Instances
|
|
Step
|
Task
|
Screenshot
|
|
7.0
|
Click the ‘Manage Templates’ button on the Sales Order Wizard – Setup ribbon.
|
|
|
7.1
|
Select the following:
Action: Modify
Template Name: Demoxxxxxx
Click ‘Generate XML’
Select the directory to save the ‘xml’ file.
Save.
|
|
|
7.2
|
Log Out.
Login to another instance.
|
|
|
7.3
|
Click ‘Manage Templates’ from the Sales Order Wizard – Setup ribbon.
|
|
|
7.4
|
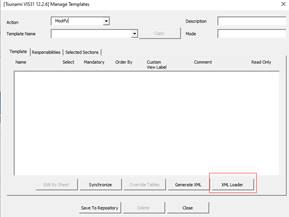
Click on the ‘XML Loader’ button.
Select the template ‘xml’ file generated previously and saved in the user directory.
Click ‘OK’ to save.
|
|
|
8. Pricing Adjustments
|
|
Step
|
Task
|
Screenshot
|
|
8.0
|
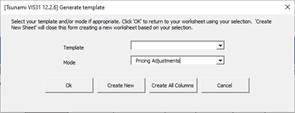
Create a new worksheet by clicking the ‘Select Template’ button on the ribbon.
Select Mode of ‘Pricing Adjustments’ and click ‘Create New’.
|
|
|
8.1
|
Enter an existing Order Number.
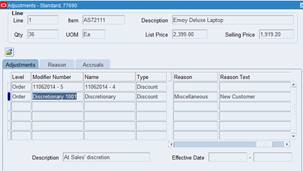
Enter the Modifier details directly onto the worksheet or enter via the form by clicking ‘Forms’ and selecting ‘Order Adjustments Form’ on the ribbon.
Order Adjustment Action: Apply
Order Modifier Number: Discretionary 1001
Order Modifier Rate: 10
Order Modifier Reason: Miscellaneous
Order Modifier Reason Text: New Customer discount.
Click Ok.
|
|
|
8.2
|
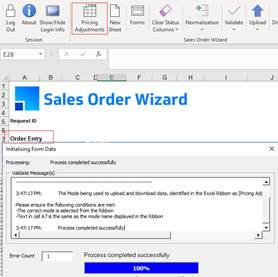
Click ‘Upload’ and select ‘Upload Selected’ from the ribbon.
|
|
|
8.3
|
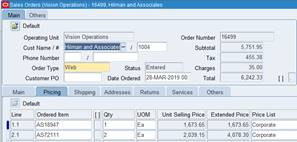
Check the Sales Orders in Oracle.
Navigation:
- Orders, Returns > Sales Orders
Click on the Find icon.
Enter the Order Number from the spreadsheet.
Click on the ‘Find’ button.
Check the details. (price)
Action, View Adjustments
|
|
|
9. Delete a Sales Order
We will now delete a Sales Order
|
|
Step
|
Task
|
Screenshot
|
|
9.0
|
Select a worksheet which is using the mode ‘Order Entry’.
Ensure that the Mode ‘Order Entry’ on the ribbon is the same as the worksheet (Cell A7).
Note: If they don’t match you will get this error.
|
|
|
9.1
|
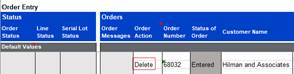
Download a Sales Order you wish to delete.
OR just enter the ‘Order Type, ‘Order Number’ and ‘Customer Number’ directly onto the sheet.
Enter Order Action ‘Delete’.
Click ‘Upload’ and select ‘Upload Selected’ on the ribbon.
|
|
|
9.2
|
Note – After performing the above delete process, try to download the Sales Order using the form or download via sheet, and no details will exist for your Sales Order.
|
|
|
10. Attachments
We will now add an Attachment.
|
|
Step
|
Task
|
Screenshot
|
|
10.0
|
We will use the same worksheet – make sure it has an Attachments section ie ‘Order Attachments’.
|
|
|
10.1
|
Download a Sales Order that was created earlier or enter the Order Number directly onto the worksheet.
Place the cursor in the ‘Attachment’ section of the Sales Order.
Double-click to open the ‘Attachments’ form or click on the ‘Forms’ icon and select ‘Order Attachments Forms’ from the ribbon.
|
|
|
10.2
|
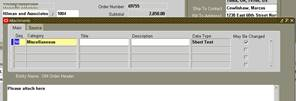
The user can attach three types – File, Text or URL. We will load a text message.
Order Attachment Data Type: Short Text
Order Attachment Category: Miscellaneous
Order Attachment Content: enter some text
Click the ‘Ok’ button.
Note: You can repeat to add multiple Attachments by going to the next row and adding another Attachment - you could try a file or URL.
|
|
|
10.3
|
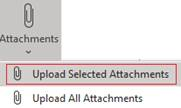
Click the ‘Attachments’ icon and select ‘Upload Selected Attachments’ on the ribbon.
|
|
|
10.4
|
Check in Oracle for the Attachment that was uploaded.
Navigation: Order Management > Order Organizer > Search your order > click on the Attachment icon.
|
|
|
End of Demonstration
|