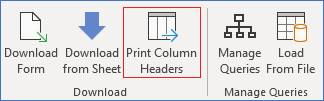
Custom Query Tab - Print Column Headers
Use the 'Print Column Headers' option to write the column names from the selected query into a worksheet. This can be any worksheet and doesn't need to be in a Wizard format. It is a useful method to first create column headers and then write data into the same sheet using either of the above 'Download' buttons.
1. Create a new Worksheet.
2. Click the 'Print Column Headers' button.
3. Select the appropriate Query Set and Row number to print the headings in.
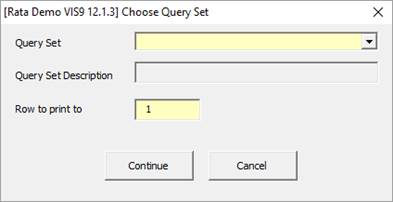
4. Click 'Continue' to write the column headings.
Note – Column headers are pasted into the nominated row commencing in column ‘A’.
5. You can now use the download options to write information into the sheet.
Note the following:
(a) You will need to have your cursor below Row 10.
(b) If you are using a ‘Non Wizard’ worksheet then you will need to dictate where you have created the headings. For example in the screenshot above the headings will have been written to row 1 so you need to ensure the query uses this row to determine the column names. This is provided on the ‘Settings’ tab of the Download form.
Refer to section: