|
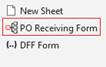
1. Create a new Worksheet using the customized Form Function
The PO Receiving Wizard has the option to customize your worksheet to exclude columns and change column labels. The following will illustrate how this can be done.
|
|
Step
|
Task
|
Screenshot
|
|
1.1
|
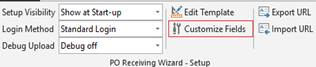
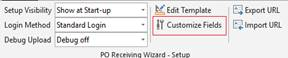
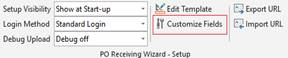
After opening the worksheet select the ‘Customize Fields’ button on the PO Receiving Wizard - Setup ribbon.
|
|
|
1.2
|
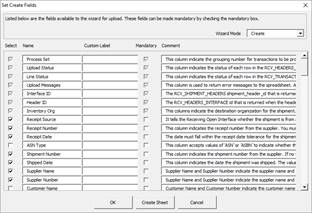
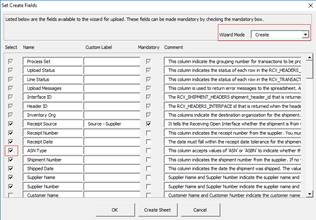
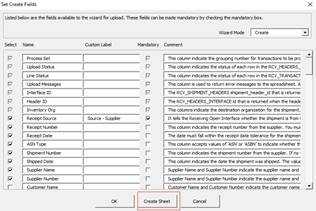
The ‘Set Create Fields’ form will display.
Ensure the Wizard Mode is set to ‘Create’.
|
|
|
1.3
|
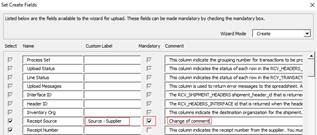
Make a column Mandatory and change the Custom Label and Comment by entering the details in the fields provided.
|
|
|
1.4
|
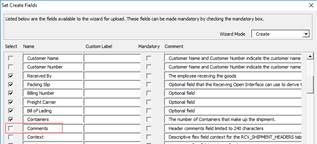
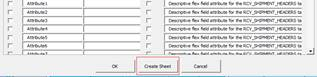
Select another column which is not required to create a receipt (example ‘Comments’) and untick the Select field.
|
|
|
1.5
|
Click the ‘Create Sheet’ button on the bottom of the form.
A message will display advising that a new sheet has been generated for ‘Create’ mode.
Select ‘OK’ to close the message.
Select ‘OK’ to close the form.
|
|
|
1.6
|
You will now be on the new worksheet.
|
|
|
2. Download a Purchase Order and create multiple Receipts for a Purchase Order.
We will now download an existing Purchase Order to create a Receipt.
|
|
Step
|
Task
|
Screenshot
|
|
2.1
|
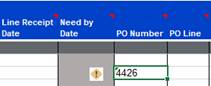
There are two options provided to download transactions into your worksheet.
For this demonstration we will use the ‘Download based on spreadsheet data’.
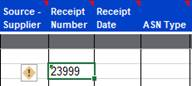
Enter a valid PO Number in the ‘PO Number’ column.
|
|
|
2.2
|
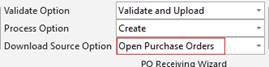
Select the ‘Download Source Option’ of Open Purchase Orders on the PO Receiving Wizard ribbon.
|
|
|
2.3
|
With the cursor on the same row as the PO Number, click the ‘Download’ icon and select ‘Download using sheet data’ on the PO Receiving Wizard ribbon.
|
|
|
2.4
|
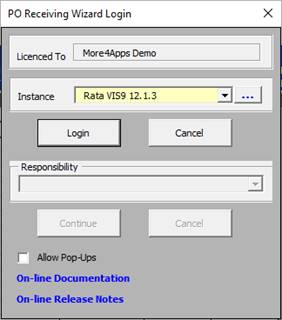
The ‘PO Receiving Wizard Login’ screen will appear if you are not logged into your Oracle instance.
Select the correct Oracle Instance from the drop-down list provided, click on the Login button and enter your User Name and Password.
Select a Responsibility and click ‘Continue’.
|
|
|
2.5
|
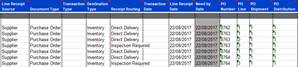
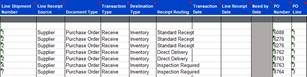
The PO details will now be in your worksheet.
|
|
|
2.6
|
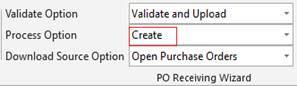
Select the ‘Process Option’ of Create on the PO Receiving Wizard ribbon.
|
|
|
2.7
|
In the header section double-click (using your mouse) on the first line holding the downloaded data.
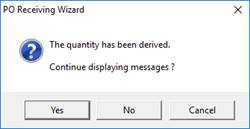
Message will appear ‘The quantity has been derived. Continue displaying message?’
Click ‘No’.
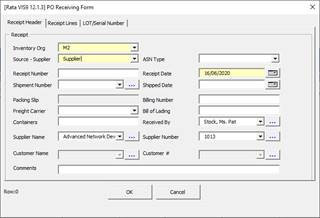
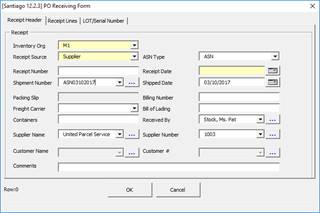
The ‘PO Receiving Form’ will display.
On the ‘Receipt Header’ tab enter the following data:
Receipt Number: If this is not automatically generated in your instance of Oracle
Receipt Source
Receipt Date
Any other details as appropriate.
|
|
|
2.8
|
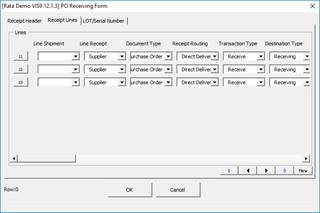
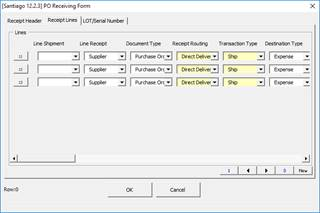
On the Receipt Lines tab enter the following for each line:
Transaction Type: Receive
Destination Type: Receiving
Transaction Date: don’t enter anything here as it defaults from today’s date
Line Receipt Date: remove any date that downloaded
Quantity
Deliver to Location
Subinventory
Complete any other details as appropriate.
Click ‘OK’ to close the PO Receiving Form.
|
|
|
2.9
|
We are now ready to upload the data into the interface table and subsequently run the concurrent program.
|
|
|
3. Upload the transaction to the Interface Table and run the Concurrent Program
|
|
3.1
|
You are two options available to upload data into the interface table. You can either upload the one Header or you can upload the entire Worksheet.
For this demonstration we will illustrate how to upload the one Header record.
|
|
|
3.2
|
Place your cursor on the first row holding the transactions.
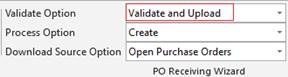
Check that the ‘Process Option’ is ‘Create’ on the PO Receiving Wizard ribbon.
Select the ‘Validate Option’ of ‘Validate and Upload’.
|
|
|
3.3
|
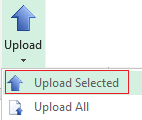
Click the ‘Upload’ icon and select ‘Upload Selected’ on the PO Receiving Wizard ribbon.
|
|
|
3.4
|
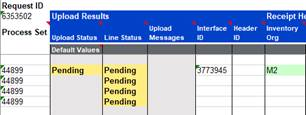
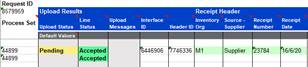
The transactions will now show a status of Pending and a ‘Process Set’ will be populated in the worksheet.
|
|
|
3.5
|
We now need to run the concurrent program to upload the data into Oracle Purchasing.
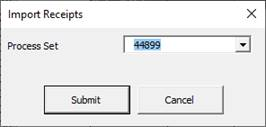
Click the ‘Submit Concurrent Program’ button on the PO Receiving Wizard ribbon.
On the ‘Import Receipts’ form enter the appropriate Process Set as shown in your worksheet or select from the LOVs.
Click the ‘Submit’ button.
|
|
|
3.6
|
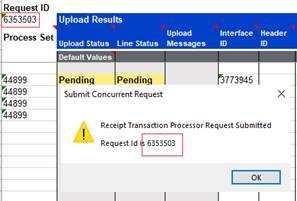
A message will appear detailing the Request ID and this will be populated in your worksheet.
Click ‘OK’.
|
|
|
3.7
|
Click the ‘View Concurrent Requests’ icon on the PO Receiving Wizard ribbon.
|
|
|
3.8
|
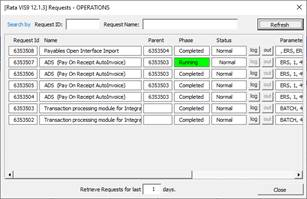
The Requests form will appear and provide the status of the request.
Refresh the form using the ‘Refresh’ button until the request is completed then close the form.
|
|
|
3.9
|
Select the ‘Refresh Interface Status’ icon on the PO Receiving Wizard ribbon.
|
|
|
3.10
|
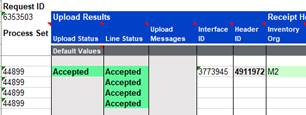
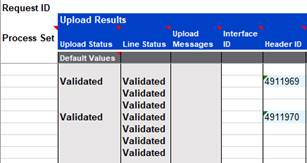
The worksheet will be updated and show an Accepted status in the ‘Upload Status’ (Header) and ‘Line Status’ and a Receipt Number will be populated (if auto generated).
|
|
|
3.11
|
Log into Oracle and confirm the creation of the Transaction.
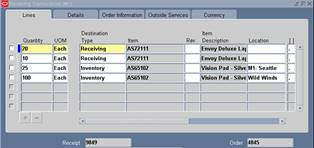
In my example receipts were created and subsequently visible in the Receiving Transaction form in Oracle.
|
|
|
4. Download a Purchase Order and create an Advanced Shipping Notifications (ASN)
|
|
Step
|
Task
|
Screenshot
|
|
4.1
|
We will now create a new sheet.
Click the ‘Customize Fields’ icon on the PO Receiving Wizard - Setup ribbon.
|
|
|
4.2
|
Ensure Wizard Mode is ‘Create’ and ‘ASN Type’ select box is selected.
Click the ‘Create Sheet’ button on the ‘Customize Columns’ form.
Click ‘OK’ to close the form.
You now have a new worksheet which has the same columns as created earlier with an additional column ‘ASN Type’.
|
|
|
4.3
|
There are two options provided to download transactions into your worksheet. For this demonstration we will use the Download Form.
For the ‘Download Source Option’ on the ribbon, select ‘Open Purchase Orders’ from the LOVs.
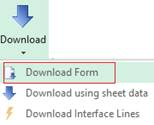
Place your cursor below row 10 and click the ‘Download’ icon and select ‘Download Form’ on the PO Receiving Wizard ribbon.
|
|
|
4.4
|
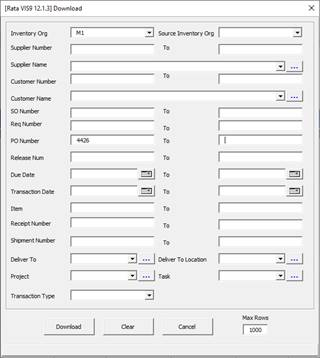
The Download form will display.
Enter data into the following fields in the form:
Inventory Org
PO Number
Click the ‘Download’ button.
Note: If downloading more than one PO Number and records are for the same Supplier, it will only create one Receipt Header.
|
|
|
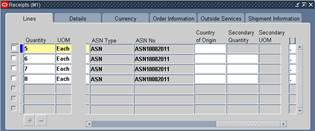
4.5
|
The PO details will now be downloaded into your worksheet.
|
|
|
4.6
|
Select the ‘Process Option’ of Create on the PO Receiving Wizard ribbon.
|
|
|
4.7
|
Place your cursor on any line which has the PO details.
Click the ‘PO Receiving Form’ icon on the ribbon.
Message will display ‘The quantity has been derived. Continue displaying messages?’
Click ‘No’.
The ‘PO Receiving Form’ will display with the PO details.
Click the ‘Receipt Header’ tab and enter the following:
ASN Type: ASN
Receipt Number: If this is not automatically generated in your instance of Oracle
Shipment Number: a unique Shipment Number
Shipped Date
Any other details as appropriate
|
|
|
4.8
|
Select the ‘Receipt Lines’ tab and enter the following for each line:
Transaction Type: Ship
Line Receipt Date: remove any data
Quantity
Subinventory: remove any data in this column as this is not required for an ASN and will cause an interface error.
Complete any other details as appropriate
Quantity
The quantity remaining to be receipted will not be populated as part of the download. If you wish to see the quantities remaining to be receipted, leave the quantity value ‘blank’ and use the Validate Option of ‘Validate only’ or if you open the form the derived quantities will be loaded into your worksheet and these can be changed as appropriate.
Click ‘OK’.
|
|
|
4.9
|
We are now ready to upload the data into the interface table and subsequently run the concurrent program.
Undertake the steps shown at Section 3 above to complete these steps.
|
|
|
4.10
|
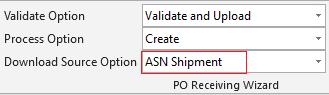
The ASN records created will be visible in the Receipt form in Oracle.
You can also download the ASN created above by selecting the ‘Download Source Option’ on the PO Receiving Wizard of ‘ASN Shipment’. Then enter the ASN Number in the Shipment Number field using the Download option of Download Form or Download using sheet data.
|
|
|
5. Confirm Delivery of a Receipt
Now that we have created a Receipt, we will now confirm Delivery of the Receipt.
|
|
Step
|
Task
|
Screenshot
|
|
5.1
|
We will now create a new sheet.
Click the ‘Customize Fields’ button on the PO Receiving Wizard - Setup ribbon.
|
|
|
5.2
|
Click the ‘Create Sheet’ button on the Customize Columns form.
Click ‘OK’ to close the form.
You now have a new worksheet which is in the same format as those completed earlier.
|
|
|
5.3
|
There are two options provided to download transactions into your worksheet.
For this demonstration we will use the ‘Download using sheet data’.
Enter a Receipt Number onto the worksheet.
|
|
|
5.4
|
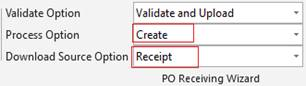
Change the ‘Process Option’ to ‘Create’ and select ‘Receipt’ for the ‘Download Source Option’ on the PO Receiving Wizard ribbon.
|
|
|
5.5
|
With cursor on same row as the Receipt Number, click the ‘Download’ icon and select ‘Download using sheet data’ on the PO Receiving Wizard ribbon.
|
|
|
5.6
|
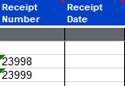
The Receipt details will now be in your worksheet with the required ID’s.
|
|
|
5.7
|
In the Header section enter a Receipt Date of today’s date.
In the Receipt Transactions section of the worksheet enter the following directly into the worksheet for each line:
Transaction Type: Deliver
Destination Type: Inventory
Transaction Date and Line Receipt Date: remove any data
Deliver to Location
Subinventory: Should be populated by the download. If any are missing, copy an existing value.
Complete any other details as appropriate.
Delete any lines which you do not what to confirm a delivery or are not required as no items were delivered to that destination (applicable for shipments with multiple destinations). Care should be taken when deleting the first line as the header forms part of this line and should not be deleted.
Quantity
The quantity remaining to be delivered will not be populated as part of the download. If you wish to see the quantities remaining to be delivered, leave the quantity value ‘blank’ and use the Validate Option of ‘Validate only’. The derived quantities will be loaded into your worksheet and these can be changed as appropriate.
|
|
|
5.8
|
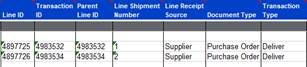
Copy the ‘Transaction ID’ for all lines and paste to ‘Parent Line ID’.
|
|
|
5.9
|
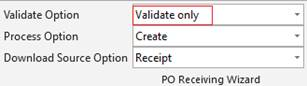
Change the ‘Validate Option’ to ‘Validate only’. (We will do this so that the Wizard calculates the Quantity that can be receipted).
|
|
|
5.10
|
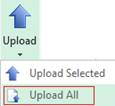
Click the ‘Upload’ icon and select ‘Upload All’.
The transactions will now show an Upload Status of Validated and Line Status of Validated.
|
|
|
5.11
|
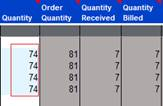
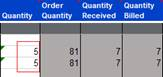
The Wizard will calculate the Quantity which has not been receipted.
The Quantity can be over-ridden.
Change the Quantity.
This is the Quantity we want to confirm delivery of.
|
|
|
5.12
|
Change the ‘Validate Option’ to be ‘Validate and Upload’.
Click the ‘Upload’ icon and select ‘Upload All’.
The transactions will now show an Upload Status of Pendingand Line Status of Pending.
|
|
|
5.13
|
We are now ready to upload the data into the interface table and subsequently run the concurrent program.
Undertake the steps shown at section 3.
|
|
|
5.14
|
Log into Oracle and confirm the creation of the transaction.
Ø Receiving > Receiving Transactions Summary
|
|
|
6. Return a delivered transaction to Receiver and return a received transaction to the Supplier.
|
|
Step
|
Task
|
Screenshot
|
|
6.1
|
We will now create a new sheet.
Select the ‘Customize Fields’ button on the PO Receiving Wizard - Setup ribbon.
|
|
|
6.2
|
Click the ‘Create Sheet’ button on the ‘Set Create Fields’ form.
Click ‘OK’ to close the form.
You now have a new worksheet.
|
|
|
6.3
|
There are two options provided to download transactions into your worksheet. For this demonstration we will use the ‘Download using sheet data’.
Enter a Receipt Number in the Receipt Number column.
|
|
|
6.4
|
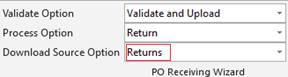
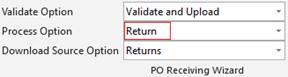
Select ‘Process Option of ‘Return’ and ‘Download Source Option’ of ‘Returns’ on the PO Receiving Wizard ribbon.
|
|
|
6.5
|
With cursor on same row as the Receipt Number, click the ‘Download’ icon and select ‘Download using sheet data’ on the PO Receiving Wizard ribbon.
|
|
|
6.6
|
The transactions which can be returned will now be in your worksheet with the required ID’s.
|
|
|
6.7
|
Select the ‘Process Option’ of ‘Return’ on the PO Receiving Wizard ribbon.
|
|
|
6.8
|
First delete any lines which you do not want to create a return transaction for.
In my example I am:
1. Returning a Receive transaction to the Supplier.
2. Returning a delivered transaction to ‘Receive’.
IMPORTANT NOTE
If deleting the first line of the receipt, be careful not to delete the header details.
|
|
|
6.9
|
Double-click (using your mouse) on any line which has the receipt details.
Message will display ‘The quantity has been derived. Continue displaying messages?’
Click ‘No’.
The PO Receiving Form will display.
On the Receipt Lines tab enter the following for each line:
Transaction Type: ‘Return to Receiving’ or ‘Return to Supplier’
Line Receipt Date: remove any dates
Quantity
Complete any other details as appropriate
Quantity
The quantity will not be populated as part of the download. If you wish to see the original quantities receipted or delivered, leave the quantity value ‘blank’ and use the Validate Option of ‘Validate only’. The derived quantities will be loaded into your worksheet and these can be changed as appropriate.
|
|
|
6.10
|
We are now ready to upload the data into the interface table and subsequently run the concurrent program.
Undertake the steps shown at section 3.
|
|
|
7. Correct a Transaction
|
|
Step
|
Task
|
Screenshot
|
|
7.1
|
We will now create a new sheet.
Select the ‘Customize Fields’ button on the PO Receiving Wizard - Setup ribbon.
|
|
|
7.2
|
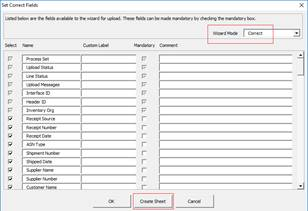
On the form select Wizard Mode of ‘Correct’ and click the ‘Create Sheet’ button.
Click ‘OK’ to close the form.
You now have a new worksheet which is in the same format as previous sheets.
|
|
|
7.3
|
There are two options provided to download transactions into your worksheet. For this demonstration we will use the ‘Download using sheet data’ option.
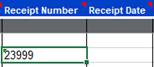
Enter a Receipt Number into the Receipt Number column.
|
|
|
7.4
|
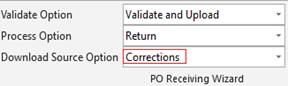
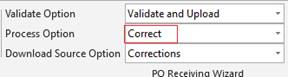
Select the ‘Download Source Option’ of ‘Corrections’ on the PO Receiving Wizard ribbon.
|
|
|
7.5
|
Put cursor on the same row as the Receipt Number and click the ‘Download’ icon and select ‘Download using sheet data’ on the PO Receiving Wizard ribbon.
|
|
|
7.6
|
The transactions which can be corrected will now be in your worksheet with the required ID’s.
|
|
|
7.7
|
Select the ‘Process Option’ of Correct on the PO Receiving Wizard ribbon.
|
|
|
7.8
|
Correct Receipt
Select a transaction which has a ‘Destination Type’ of ‘Receiving’.
In the ‘Receipt Transactions’ section enter the following:
Transaction Type: Correct
Line Receipt Date: remove any dates
Quantity: the quantity entered here should be the adjustment value. For example if a receipt has been created for 100 items and this needs to be corrected to 90 items then a correction value of negative 10 is required (-10)
Complete any other details as appropriate
Correct Delivery
Select a record which has a ‘Destination Type’ of ‘Deliver’.
In the ‘Receipt Transaction’ section enter the following:
Transaction Type: Correct
Line Receipt Date: remove any dates
Quantity: the quantity entered here should be the adjustment value. For example if a receipt has been created for 100 items and this needs to be corrected to 90 items then a correction value of negative 10 is required (-10)
Complete any other details as appropriate
Quantity
The quantity remaining to be delivered will not be populated as part of the download. If you wish to see the quantities remaining to be delivered, leave the quantity value ‘blank’ and use the Validate Option of ‘Validate only’. The derived quantities will be loaded into your worksheet and these can be changed as appropriate.
Important Note - Delete any of the lines which are not being changed. Note that when deleting the lines not being returned ensure that you do not delete the header at the same time as this is held against the first line of the receipt. The header line is required to process the return.
|
|
|
7.9
|
We are now ready to upload the data into the interface table and subsequently run the concurrent program.
Undertake the steps shown at section 3.
|
|
|
End of Demonstration
|