Correcting Errors and Reloading
Correcting Rejected Data
If you have a Rejected status in any of the status columns, you need to read the message in the ‘Invoice Error’ and/or ‘Line Error’ column/s and investigate the data. The error messages relate to data on the same row in the relevant section.
To correct the information either key directly into the worksheet or open the Invoice Header or Invoice Distributions Form.
Then choose to either upload one row, selected range of rows or the entire worksheet.
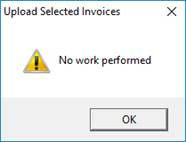
Invoices that already have an Upload Status of Processed will not be processed again.
Continuing the previous example, after correcting the data and re-running the ‘Validate and Upload’ process and submitting them to Oracle, on refresh it will show all records are successfully transferred into Oracle Payables.

Update Invoices and Distributions in the Interface Table
If for any reason you want to update an invoice or a distributions line in the Interface Table, there is functionality provided to do so via the “Extras” button on the ribbon. An update facility is not available for the interface table, rather a delete and insert facility is provided.
You can delete an Invoice or a Distribution line or even an entire Invoice Batch from the interface table. The items are deleted from the Interface tables only. This includes Invoice Header, Distribution, and Error records. The data can then be changed and uploaded if required.
Delete an Invoice and all its Distribution Lines
Place the cursor on any column in the Invoice Header section. This includes the ‘Invoice ID’, ‘Invoice Status’, and ‘Invoice Error’ columns. Click on the ‘Delete selected invoices from Interface tables’ button. You will be prompted to confirm.
You can now change the data for that invoice, so long as you have not altered the ‘Invoice ID’ and ‘Line ID’ columns, AP Invoice Wizard can remove the Invoice and all its Distributions. Reload the invoice and all its distributions.
AP Invoice Wizard will ignore any other lines already marked Processed. Only your changed invoice will be uploaded, with a new ID.
Delete an entire Invoice Batch
On the form for ‘Submit Invoice Import’ there is a button allowing you to delete an entire Invoice Batch. This will work for both un-imported batches and imported batches that have not been purged.

Refer to section: