Create Query Sets
As a user you must have access to the 'Profile System Values’ (FND_FNDPOMPV) function to use this functionality.
If the user doesn’t have access to ‘Profile System Values’ function, they can ‘Manage Queries’ by having the following profile option set to ‘Yes’ at user level. This is Wizard specific:
More4Apps: XXX Custom Query Manager - This profile allows customers to nominate a user to manage download queries. This is useful if the user lacks sysadmin access and cannot be granted sysadmin.
A Query Set is a group of one or more related queries. Data is downloaded based on these Query Sets. Using the ‘Manage Query Sets’ form allows you to create, modify and delete Query Sets. Only Responsibilities able to modify system profile options have access to manage the Query Sets.
After the Custom Query has been installed for your instance of Oracle Applications, the following steps outline the basic procedure for creating a Query Set to download records from Oracle into Excel.
Steps to Create a new Query Set:
1. Manage Queries - Select the 'Manage Queries' icon from the 'Custom Query' ribbon.

2. Select 'New' from the Action List.
Enter the Query Set Name and Query Set Description.
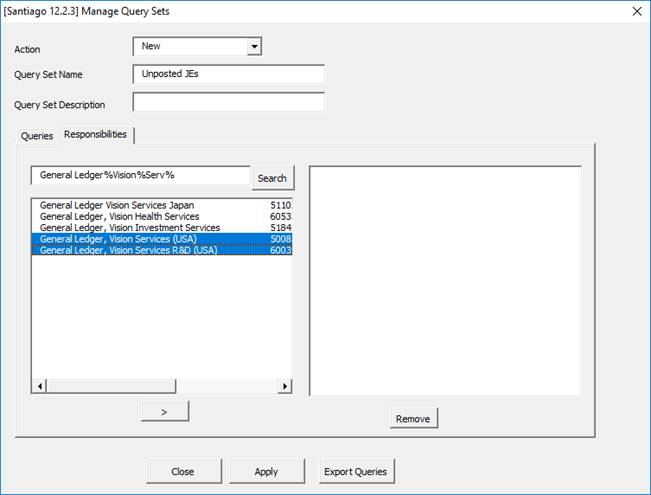
Click on the ‘Responsibilities’ tab and search for the responsibility(s) that will have access to this query. (Use the cursor to select the responsibility(s) and click on the forward arrow ‘>’ to move the responsibility(s) into the selected list).
Example screenshot of GL Wizard:
Go back to the ‘Queries’ tab and click the ‘Add’ button to add a new Query to the Query Set.
3. Enter the Query Set Name.
Enter the Query Text (Paste or Type).
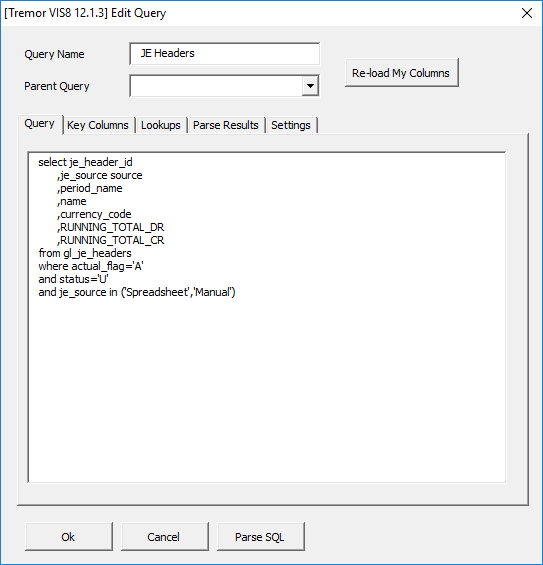
4. Click on ‘Parse SQL’ button to validate the query.
Tip: The first Query is always the Parent Level Query. If you are going to add more queries to the Query Set remember to add the primary key in the Query Text as we will need it later for joining the child query.
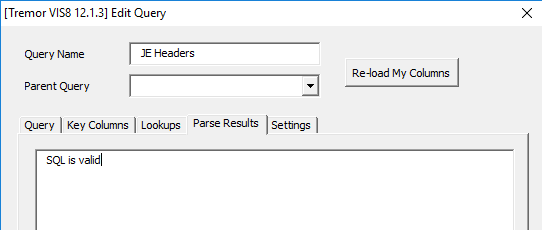
If the Query has no errors, then you will see a message as follows:
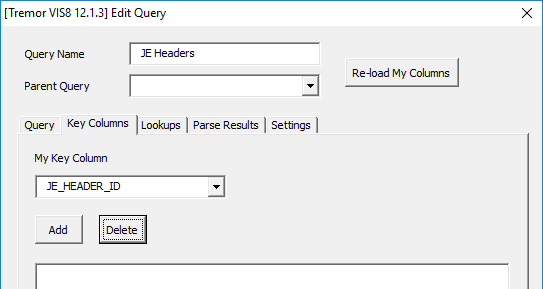
5. Click on the ‘Key Columns’ tab if you are planning to have more than one query for this Query Set (it’s also recommended as best practice to include the primary key column to uniquely identify the records).
Select the Key Column value from the dropdown list, and tab, then click the ‘Add’ button.
6. Optional – In some queries the ability to use lookups may be required. To do this navigate to the Lookups Tab. Here the lookup code can be searched and then assigned to a column from the query being made.

Once the ‘Lookup Type’ and the ‘My Column’ values are selected the user can click ‘Add’ to add the constraint.
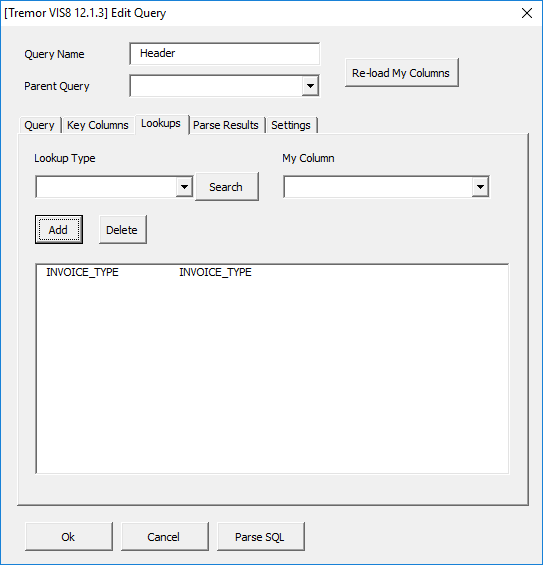
Note- Currently functionality is only limited to FND_LOOKUPS.
7. Click ‘Ok’ and then the Query you just created is now displayed in the list box.
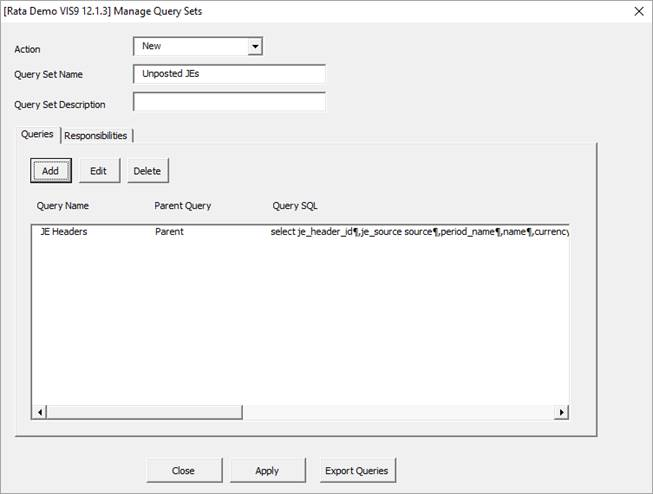
8. To create the child query, click the ‘Add’ button from the ‘Manage Query Sets’ form.
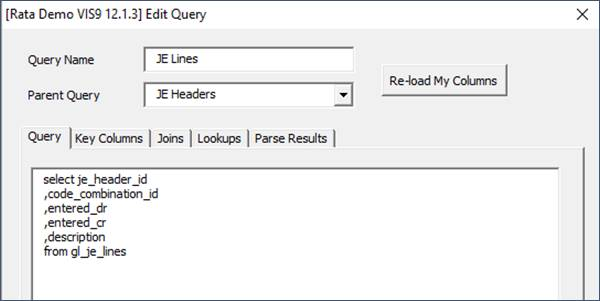
Enter the Query Name
Select the Parent Query (the one that was created first)
Enter the Query Text
Click on the Parse SQL Button to validate Query
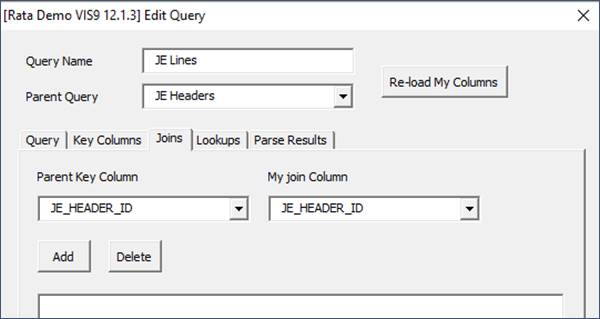
9. Click on the ‘Joins’ tab and indicate what would be the field(s) in both Parent and Child queries involved in the Join.
Click the ‘Re-load My Columns’ button on the form.
Note - The ‘Re-load My Columns’ button updates the List of Values associated with that particular query (My Key Column, My Join Column, and My Lookup Column LOVs).
Then click ‘Add’, and press ‘OK’.
Both Queries are now displayed in the list box:
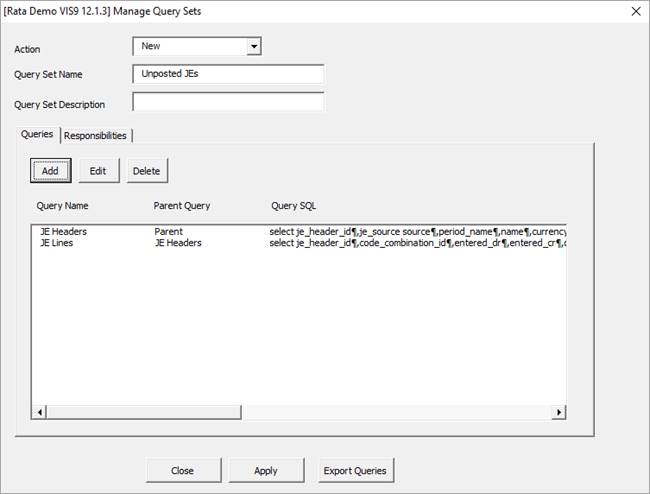
10. Click the ‘Apply’ button.
A message is displayed as below:

Refer to section: