Attachments
Several of the More4apps Wizards enable Attachments to be loaded from the spreadsheet. Refer to the product-specific Online Documentation on our website to see if a particular Wizard has this functionality. To request additional functionality, please contact us at https://more4apps.com/support/new-support-request
You can key Attachment information directly into the relevant cells in the worksheet. However, the Attachment form will assist the user to enter the details correctly.
Depending on the version of each individual Wizard the Attachments form can be opened by either:
· Clicking on the ‘Attachments’ icon on the ribbon and selecting ‘Attachments form’:

· Clicking on the ‘Form’ icon on the ribbon and selecting the relevant ‘Attachment’ icon:

Alternatively, double-click in a relevant cell within the worksheet for one of the attachment columns.
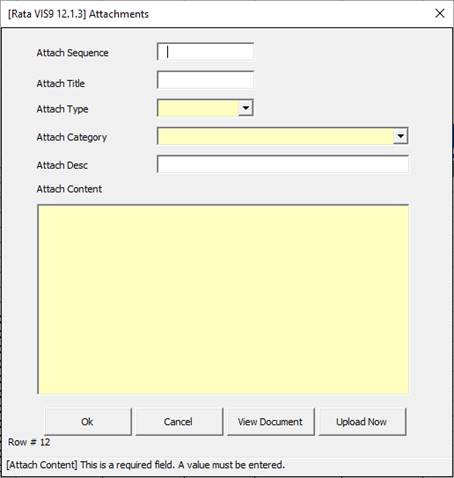
Example of Attachments form:

· Select the Type of Attachment: Short Text (limited to 2000 characters), Long Text, Web Page, or File
· Enter a Sequence (optional)
· Enter a Title (option and not available in R11)
· Select the Category from the list of values.
· Enter a Description (optional)
· Depending on the type of Attachment enter the details:
- File: Use the ‘…’ icon to search your directories and find the file. Alternatively, type the path and filename directly into the field. Click on the ‘View Document’ button to check that the file can be successfully opened.
- Text: Type the text directly into the field provided.
- URL: Type the full URL into the field provided. Click on the ‘View Document’ button to check that the URL can be successfully accessed.
· Click on the ‘Ok’ button.
The Attachment information will be written into the cells in the worksheet.
Refer to section: