The Wizard can either be run with secure templates defined by your System Administrator, or by using the pre-defined mode without implementing templating.
Important Note:
By default, a new sheet created for the mode will contain the more commonly used columns.
The user can now create new worksheets that display all available columns for the mode.
Once created the user can simply copy the columns they need into their own worksheets, provide of course they are not using the Wizard ‘Template’ functionality.
This replaces the requirement for the use of the ‘Setup’ ribbon to search for available columns.
Here’s how:
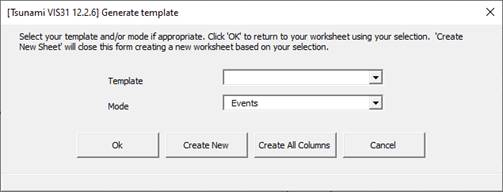
First click the ‘Select Template’ button on the Wizard’s standard ribbon:
Select the appropriate Wizard mode (Event Wizard has only one mode):
Click the ‘Create All Columns’ button:
A worksheet will now be automatically created that contains all available columns for the selected mode. This functionality does not require a template to be created or selected. The Wizard simply reads through the hidden record sheet for the mode and generates a new worksheet using this data.
The Event Wizard allows the user to load Revenue and Billing Events into Oracle Projects. You can type directly into the sheet or enter data into the Events Form.
After you have established your worksheet, there are three ways to populate information into the worksheet:
a) Import a file, type or paste data directly into the cells provided. Validation is performed when you run the upload program or open the ‘Event’ form.
b) Use the ‘Event’ form to enter the data into the worksheet. Data is validated and lists of values are available. To enter data in this way first position your cursor on the row you wish to contain the event data, then double-click in one of the cells or alternatively click on the ‘Forms’ icon on the Event Wizard ribbon and select ‘Event Form’.
c) Download existing information by using one of the following options:
(i) Download Form
(ii) Download using sheet data (from criteria entered directly into the worksheet)
(iii) Custom Query Ribbon to run pre-defined queries
You can then use one of the methods above to update the events information.
Event Form
To open the Events form, position the cursor on the row you require to enter the Event data (row 11 or below). Then double-click in one of the cells that will contain the values. Alternatively click on the ‘Forms’ icon on the ribbon.
You can also enter data directly into the cells in the worksheet or copy and paste data in.
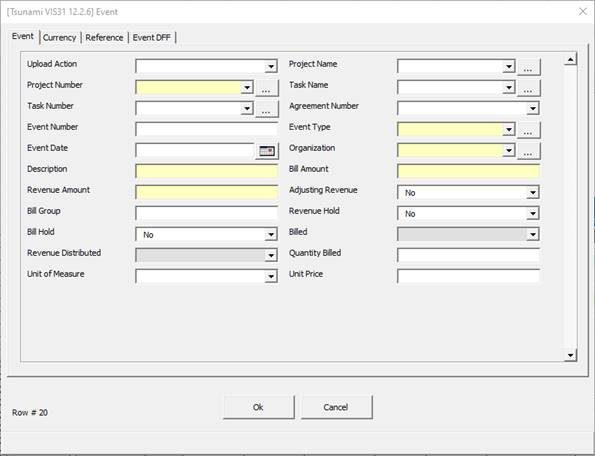
The following form will appear:
Event Tab
‘Upload Mode’ determines the action for this record. Change the Upload Mode in the form as per the requirement:
Create – Creates a new Event.
Update – Updates an existing Event.
Note - If you're on R12.1.3 and later and find that the values in the following fields are not updating when you perform an update from the Wizard, please review Oracle Doc ID 2311662.1 to see if patch 26868629 is appropriate for your environment:
Amounts (Bill and Rev)
Description
Not Billed
Revenue_hold_flag
Delete – Deletes an existing Event from the Oracle Project application. Accepted will display in the ‘Event Status’ column. All information for the Event will have been deleted in Oracle Projects.
The following table describes how to enter specific information in the Event form fields:
|
Field Name
|
Description
|
|
Project Name/Project Number
|
Select the relevant Project Name or Project Number.
Enter a search string into the relevant field using ‘%’ as the wildcard.
Click on the search button . This will populate the drop-down list. Use the drop-down to select the correct project. . This will populate the drop-down list. Use the drop-down to select the correct project.
|
|
Task Name/Task Number
|
Select the relevant Task Name or Task Number.
Click on the search button. This will populate the drop-down list with tasks for the selected project. Use the drop-down to select the correct task.
This step is optional - you do not have to associate an event with a task (unless you change the workbook setup using the ‘Mandatory Fields’ button).
|
|
Event Number
|
A number for the Event. This will automatically populate but is updateable. The number should be unique for the Project and Task.
Event Numbers must be greater than 0 and cannot be changed once the Event is billed or revenue generated.
This field is optional in Create mode; if left blank the upload will generate the next available number for the combination of project and task numbers.
|
|
Agreement Number
|
An Agreement Number can be selected via validated LOVs based on the Project and uploaded to the Event. It’s not a mandatory field and is not available in EBS Release 11i.
|
|
Event Type
|
Select the Event Type from the list.
|
|
Event Date
|
The date the Event is eligible for processing.
This step is optional - you do not have to enter an event date (unless you change the workbook setup using the ‘Customize Fields’).
|
|
Adj Revenue Flag
|
Check the ‘Adj Revenue’ check box if you are entering an event to adjust revenue amount.
|
|
Rev Dist Flag
|
Indicates whether this Events revenue has been distributed.
|
|
Billed Flag
|
Indicates whether this Event has been billed.
|
The following table describes the purpose of each button in the Event tab on the form:
|
Button Name
|
Description
|
|
Ok
|
Selecting this button will close the form and the new values will be written into the corresponding cells in the worksheet. Any fields highlighted in red that have failed validation, will not be written into the worksheet.
|
|
Cancel
|
Selecting this button will close the form and no changes will be written into the corresponding cells in the worksheet.
|
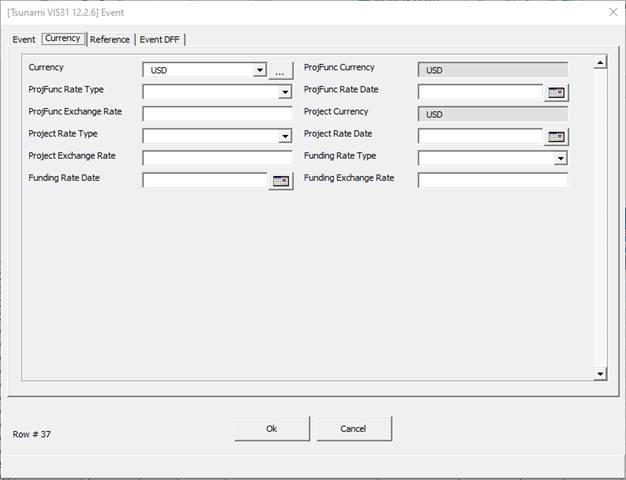
Currency Tab
Use this form to enter your Multi-Currency information:
The following table describes the purpose of each field in the ‘Currency’ tab on the form:
|
Field Name
|
Description
|
|
Currency
|
The Currency field is used to select the relevant Currency. This field will default to the Projects base currency (on upload) but if the Project is Multi-Currency enabled, you can change it by selecting a value from the drop list.
If you select a Project that is not Multi-Currency enabled and you enter a different ‘Currency Code’, a message ‘Project is Not Multicurrency enabled’ will display in the ‘Upload Message’ column on exiting the form or on upload.
|
The following table describes the purpose of each button on the ‘Currency’ tab in the form:
|
Button Name
|
Description
|
|
Ok
|
Selecting this button will close the form and the new values will be written into the corresponding cells in the worksheet.
Any fields highlighted in red have failed validation.
|
|
Cancel
|
Selecting this button will close the form and no changes will be written into the corresponding cells in the worksheet.
|
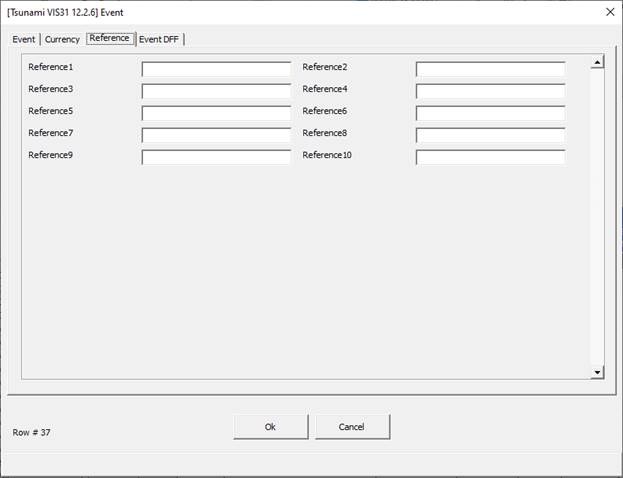
Reference Tab
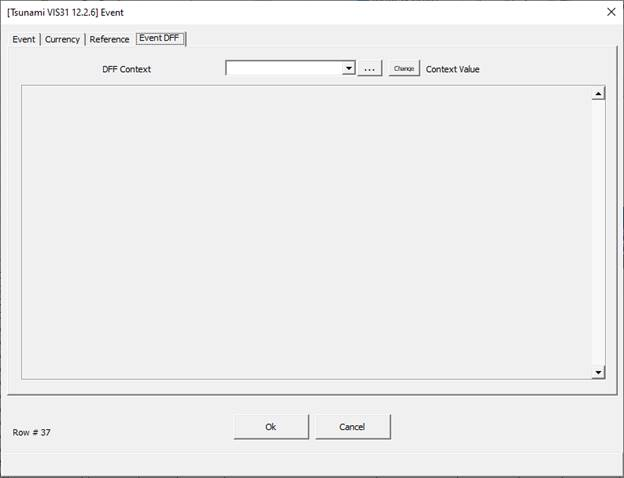
Event DFF Tab