To populate the Batch Header, open the Element Header form by clicking on the ‘Batch Header’ button.
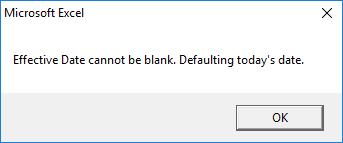
The Effective Date cannot be blank, so the following message will appear. Click ‘OK’ and today’s date will default:
The following form will then appear:
The following table describes the purpose of each field and how to enter the information:
Field Name
Description
Batch Name
The Batch Name is highlighted as mandatory but can be left blank. It is defaulted at upload time with YYYYMMDD:HHMMSS to create a unique Batch Name if the user hasn’t entered their own preferred Batch Name into the form before upload.
Element Name
The Element Name is highlighted as mandatory.
Select the element from the drop-down list.
The list of elements is restricted to those within the business group of the responsibility logged in.
Payroll Name
Select the payroll from the drop-down list or leave blank for all payrolls.
The list of payrolls is restricted to those within the business group of the responsibility logged in.
The list of payrolls is also limited according to the element link set up. If there are element links for specific payroll(s) then only those payrolls will be available. If the element link is not restricted by payroll, the full list will display.
You do not have to enter a Payroll Name if you wish to load element entries against people on various payrolls. The benefit of selecting a payroll means that subsequent assignment lists will be shortened to only display assignments of the selected payroll.
Batch Source
Enter a Batch Source for your own reference.
Business Group Name
Display only. This is the business group assigned to the responsibility logged in. The business group is used (among other things) to limit the list of payrolls, elements and employee assignment lists.
Effective Date
Set your Effective Date to the date you want your element entries to take effect from. Key directly into the field or use the calendar icon.
Action if Exists
Select what action the process should take if one of the batch lines matches an existing element entry for an assignment at the effective date:
Create New Entry- The process creates a new entry if multiple entries of the element are allowed by the element definition. If multiple entries are not allowed, the process sets the status of the batch line to Error.
Reject Entry- The process sets the status of the batch line to Error.
Change Existing Entry- The process corrects or updates the existing entry. If there is more than one existing entry, the process sets the status of the line to Error.
If you selected Change Existing Entry, select the type of date effective change to be made to recurring entries:
• Update - The process changes the existing entry from the effective date but preserves the previous information. If there are future-dated changes to the existing entry, the process inserts the change before the next scheduled change.
• Correction - The process corrects the existing entry from its start date through to its end date. Any future-dated changes are unaffected.
Purge After Transfer
If you want the batch to be purged from the temporary tables after successful transfer to Oracle HR, check the ‘Purge After Transfer’ check box.
Note: If you set this to ‘No’ (uncheck the box), you can later submit the concurrent process from the wizard in “purge” mode and it will remove the entire batch from the interface tables.
Recommendation is to set this to ‘No’ (uncheck the box).
Reject if Future Changes
If you want to reject batch lines that match entries that start in the future or for which future changes are scheduled, check the ‘Reject if Future Changes’ check box.
Choose ‘Accept’ to save the changes and close the window.
The Input columns in the spreadsheet (from column L) will contain the input fields as defined for the element.