|
|||||
|
This script is designed to illustrate the downloading/creating/uploading of a customer record to give the User a “feel” for the Wizard.
The Wizard is designed to use a similar process for processing large numbers of customers/sites, which will significantly reduce data-entry time and improve productivity.
|
|
1. Create a new Worksheet
All worksheets are created from the Template123 worksheet.
Use the following steps to create your own customized template for your organization.
| ||
|
Step
|
Task
|
Screenshot
|
|
1.1
|
Click the ‘Select Template’ button on the Customer Wizard ribbon to open the ‘Generate template’ form.
The ‘Customer Wizard Login’ screen will appear if you have not already logged into your Oracle Instance of Oracle.
Select the correct Oracle Instance from the drop-down list provided. Click on the ‘Login’ button and enter your User Name and Password.
Select a Responsibility and click ‘Continue’.
Refer to the following documentation for further assistance: Common User Instructions
|
  |
|
1.2
|
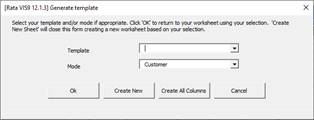
The ‘Generate template’ form will open.
Leave the ‘Template’ field blank and select ‘Customer’ from the LOVs for the ‘Mode’.
Click ‘Create New’ to create a new blank worksheet for this mode.
(‘Create All Columns’ button creates a new worksheet with all columns or the ‘Ok’ button selects the chosen Mode and remains in the same worksheet).
Note – Other available Modes are ‘Party’ and ‘Banks’.
To make additional columns mandatory or to select additional columns etc., click the ‘Manage Templates’ icon on the Setup ribbon.
|
  |
|
1.3
|
A new worksheet will appear with the selected columns inserted.
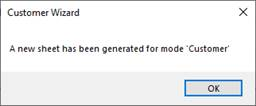
A message will appear confirming the new sheet has been generated for the required mode.
Click ‘OK’.
|
 |
|
1.4
|
We will now explain the worksheet layout:
1. All of the Status columns are on the left so you can easily see any errors without looking at the entire worksheet.
2. The worksheet is divided into many sections (as illustrated by the number of Status columns), but if you double-click on one of the status columns it will take you to the associated section on the worksheet. This allows you to navigate to any section which has an error without having to scroll through the worksheet.
3. Each section on the Wizard has an ‘Action’ column.
The new worksheet contains the selected fields within the selected sections.
|
 |
|
2. Download Customer and associated Site Information
| ||
|
Step
|
Task
|
Screenshot
|
|
2.1
|
Download a Customer by placing your cursor on a blank field below row 10 (the ‘Default Values’ row).
Click on the ‘Download’ icon and select ‘Download Form’ on the Customer Wizard ribbon.
|
 |
|
2.2
|
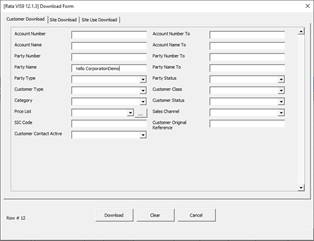
The ‘Download Form’ will display.
Enter an ‘Account Number’ or ‘Party Name’ that exists in your instance of Oracle and also has a number of associated Sites.
Click the ‘Download’ button on the form.
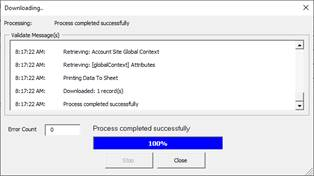
A message will appear which details the records which have been downloaded based on the ‘Account Number’ or ‘Party Name’ entered above.
Click ‘Close’.
|
  |
|
2.3
|
The worksheet will now display the downloaded records.
This Wizard uses the standard grandparenting logic.
Therefore, the first Site record is on the same row as the Customer data.
Note – The Status columns are NOT populated by the download.
The ‘Action’ columns control what gets uploaded.
|
 |
|
3. Create a new Customer from the downloaded Record
| ||
|
Step
|
Task
|
Screenshot
|
|
3.1
|
Using the record downloaded above, we will now create a new Customer.
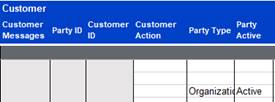
Remove all the IDs from all sections from the records downloaded. Also remove ‘Party Number’, ‘Account Number’ and ‘Party Site Number’. Remove any ‘Reference’ numbers in all columns/sections.
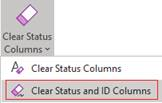
Note – This can be done by clicking the ‘Clear Status Columns’ button on the ribbon and selecting ‘Clear Status and ID Columns’.
This downloaded information can now be used as the basis for a new Customer.
|
  |
|
3.2
|
Change the ‘Party Name’, ensuring this is not the same as an existing Customer. (This will be the name of the new Customer).
Copy the new ‘Party Name’ to the ‘Account Name’ for the Customer.
Enter ‘Create All’ in the ‘Customer Action’ field.
We are now ready to upload the record into Oracle.
|
 |
|
4. Load the new Customer into Oracle
| ||
|
Step
|
Task
|
Screenshot
|
|
4.1
|
We will first validate the data by putting the cursor on the same row as the record.
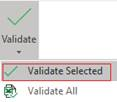
On the Customer Wizard ribbon click ‘Validate’ and select ‘Validate Selected’.
|
 |
|
4.2
|
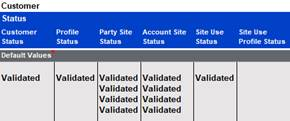
‘Validated’ will display in the Status columns for all records.
|
 |
|
4.3
|
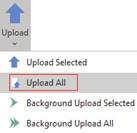
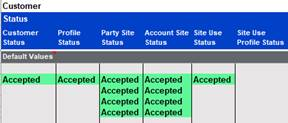
Click the ‘Upload’ icon and select ‘Upload All’.
Accepted will now display in the ‘Status’ columns.
|
  |
|
4.5
|
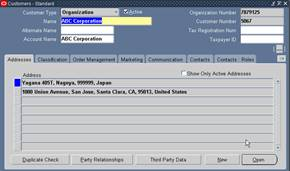
Check Oracle - Log into your instance of Oracle and select the ‘Customer Number’ (‘Account Number’ in the Wizard) that was created as per the uploaded worksheet.
The Customer will be created with the information from the worksheet.
|
 |
|
5. Make changes to the existing Customer and associated Site(s)
| ||
|
Step
|
Task
|
Screenshot
|
|
5.1
|
Now that we have the new Customer, we will modify the details.
You can make a change by entering the details directly into the worksheet cell or double-clicking on one of the columns in the ‘Customer’, ‘Site’ or ‘Site Use’ sections.
When you double-click on the worksheet cell a form appears. Where there is a list of values in your version of Oracle, the options will be displayed on this form using the down arrow next to the field.
You can either enter the change directly into the field or select from the options provided.
|
|
|
5.2
|
For our demonstration we will change the ‘Customer Type’ and the ‘Site Address’.
Customers
Double-click on a column in the ‘Customer’ section.
The ‘Customer’ form will display.
Change the value in the ‘Customer Type’ field.
Click ‘Ok’ to save the changes and close the form.
|
 In the example above we have changed the Customer Type from ‘Internal’ to ‘External’
|
|
5.3
|
Site
Double-click in a field on a site row, in the Site ‘Address’ section.
The ‘Party Site’ form will display, and you will be in the ‘Address’ section.
Change/enter a value for the Address.
Click ‘Ok’ to save the changes and close the form.
The Customer and Site details are now ready to be uploaded.
|
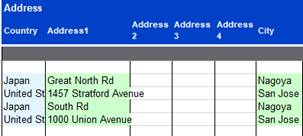 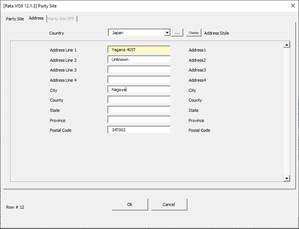 Entered Address Line 1 of ‘Yagana 405T’ and Address Line 2 of ‘Unknown’
|
|
6. Load the changes into Oracle
| ||
|
Step
|
Task
|
Screenshot
|
|
6.1
|
Clear out the existing 'Status' columns by clicking the ‘Clear Status Columns’ icon on the ribbon. This will only clear the Status columns Accepted and will not remove the IDs which are required to update a record.
Remove all the ‘Create All’ action modes for all sections and enter ‘Update All’ into the ‘Customer Action’ field (in the ‘Customer’ section).
|
  |
|
6.2
|
With the cursor on the record, click the ‘Upload’ icon and select ‘Upload All’ on the Customer Wizard ribbon.
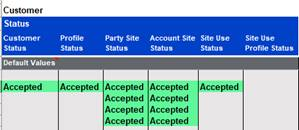
The records now have a status of Accepted and the changes will have been made in Oracle.
If a record has an error, the appropriate error message will appear in the status column. Double-click on the error status and you will be navigated to the start of the section, then make the appropriate changes to correct the error.
|
  |
|
6.3
|
Log into Oracle and select the Customer and/or Site record.
You will see that the appropriate changes have been made.
|
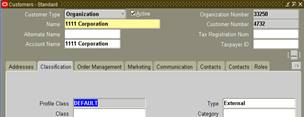 The above illustrates the change of Type to ‘External’
 The above illustrates the change of Address
|
|
7. Add new Contact to an existing Customer Site
In this example we will add a Contact to an existing Site.
| ||
|
Step
|
Task
|
Screenshot
|
|
7.1
|
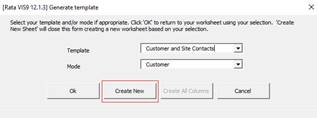
Select or create a Template that contains Customer and Site Contact fields.
Click ‘Create New’.
|
 |
|
7.2
|
In a row below row 10 (the ‘Default Values’ row) enter the ‘Party Number’ for the new contact (created earlier).
|
 |
|
7.3
|
With cursor on the same row as the Party Number, click the ‘Download’ button and select ‘Download using sheet data’.
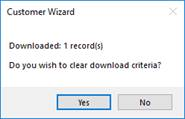
Message will appear ‘Do you wish to clear download criteria?’
For this demo, click ‘Yes’.
|
  |
|
7.4
|
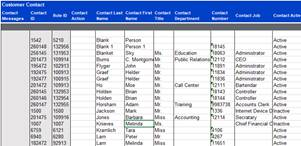
The worksheet will now display the downloaded Customer and Site records.
|
 |
|
7.5
|
Scroll to the ‘Customer Contact’ section.
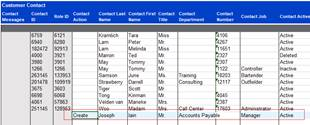
On the last blank line under the other contacts, enter the new Contact details directly into the worksheet.
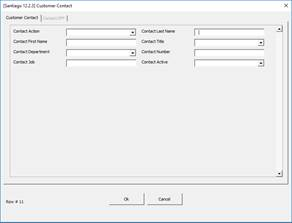
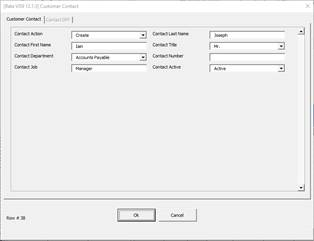
You can also open the ‘Customer Contact’ form and enter the details by double-clicking on this blank line.
If the site has no Contacts the form will appear with no details as per the screenshot.
Enter ‘Contact Action’ of Create.
Enter details for the ‘Contact’ and click ‘Ok’ to close the form.
|
   |
|
7.6
|
Place the cursor on any row of the record.
|
 |
|
7.7
|
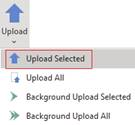
Click the ‘Upload’ button and select ‘Upload Selected’.
|
 |
|
7.8
|
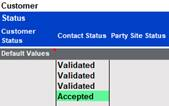
The ‘Contact Status’ field will now display Accepted.
The Customer Contact IDs will have been created as per the screenshot.
|
  |
|
End of Demonstration
| ||
