Now that the Wizard has been installed and configured this document will guide you through the following simple exercises:
1.Create a new worksheet
2.Create new Bill of Materials from a Download
Note- The screenshots are using Oracle Release 12 and Excel 2013.
This script is designed to illustrate the downloading/creating/uploading of a project agreement to give the user a “feel” for the Wizard.
The Wizard is designed to use a similar process for processing large numbers of agreements and funding, which will significantly reduce data-entry time and improve productivity.
1. Create new Bill of Materials using the Data-entry Forms
Step
Task
Screenshot
1.1
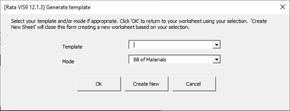
Click the ‘Select Template’ button on the Bill of Materials Wizard ribbon, to create a new Template.
Login, if not already.
1.2
Click ‘Create New’ to create a new blank worksheet for this mode.
Templates can be created using the ‘Manage Templates’ functionality on the Setup ribbon.
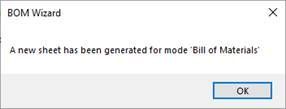
A new sheet will be created with the selected columns inserted.
The sheet is ready to use when you receive the message shown to the right.
Click ‘OK’.
1.4
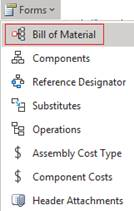
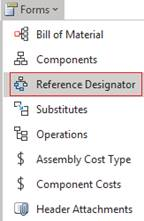
Place cursor on a blank row below row 10 (Default Values row) and click on the ‘Forms’ icon and select ‘Bill of Material’.
1.5
The ‘Manufacturing BOM Header’ will open.
Enter the following data:
Inventory Org Code:
BOM Upload Mode: Create All
Assembly:
Alternate: Primary
Roll Up Costs: No
Click ‘Ok’ to close the form.
1.6
Click on the ‘Forms’ icon on the ribbon and select ‘Components’ to open the ‘Components’ form.
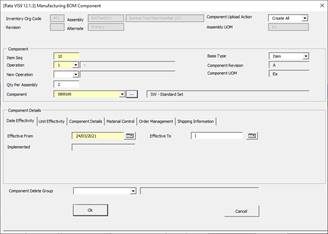
1.7
Enter the following Component information:
Item Seq: 10
Qty Per Assembly: 2
Component:
Effective From: Enter a date after today by clicking on the calendar
Click the ‘Component Details’ tab and enter:
Yield: 1
Click the ‘Material Control’ tab and enter:
WIP Supply Type: Bulk
Click ‘Ok’ to close the form.
Put cursor on the next blank row in the ‘Main’ section and double-click to open the form and enter the following:
Item Seq: 20
Qty Per Assembly: 1
Component:
Effective From: Enter a date after today by clicking on the calendar
Click the ‘Component Details’ tab and enter:
Yield: 1
Click the ‘Material Control’ tab and enter:
WIP Supply Type: Bulk
Follow the above instructions for the 3rd row:
Item Seq: 30
Qty Per Assembly: 5
Component:
Effective From: Enter a date after today by clicking on the calendar
Yield: 1
WIP Supply Type: Supplier
1.8
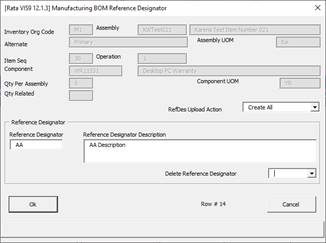
With cursor on the 3rd row, click the ‘Forms’ icon on the ribbon and select ‘Reference Designator’ to open the ‘Manufacturing BOM Reference Designator’ form.
1.9
Enter the following:
Reference Designator: AA
Reference Designator Description: AA Description
Note - A Reference Designator would be some instructions about where/how to place this item when performing the Assembly e.g. It may need to be placed in a particular place on the circuit board.
Click ‘Ok’ to close the form.
With cursor on the next row in the Reference Designators section, double-click to open the form and enter the following:
Reference Designator: BB
Reference Designator Description: BB Description
Click ‘Ok’ to close the form.
Upload the BOM and show the result in Oracle
1.10
Validate Option: Validate and Upload
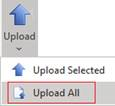
With cursor on the Assembly, click the Upload icon and select ‘Upload All’.
1.11
Message box will appear ‘Do you wish to process attachments?’.
As there are no attachments to upload on the worksheet, click ‘No’.
1.12
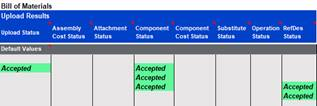
The Status’s will all show Accepted, indicating that this Bill of Material has been created within Oracle Bills of Materials.
1.13
Navigation:
Change to relevant Org
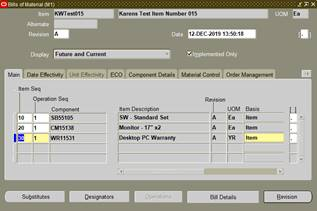
> Bill of Materials > Bills > Bills
Click Find icon, find the item
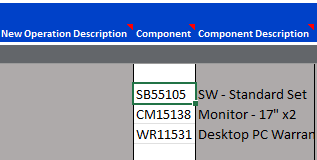
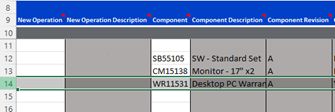
There will be three Components against this Assembly. Item Seq# 30 will have the designators ‘AA’ and ‘BB’.
2. Create a new Bill of Materials from a Download
Step
Task
Screenshot
2.0
On the ribbon the ‘Display Option’ should be ‘Current and Future’.
Place the cursor on a blank row (below any other data).
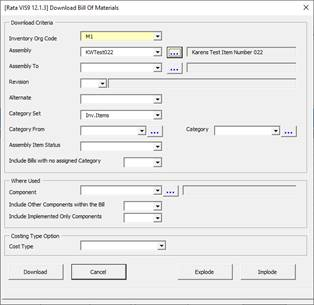
Click the ‘Download’ icon on the ribbon and select ‘Download Form’.
Enter the Inventory Org Code and Assembly created above.
Click the … button to populate the fields.
Click the ‘Download’ button.
2.1
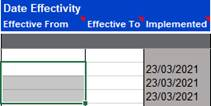
Remove the Components ‘Effective From’ dates for each Component.
2.2
Open the Header form by double-clicking in a cell in the ‘Header’ section or click the ‘Forms’ icon and select ‘Bill of Material’.
Change the following:
Inventory Org Code:
BOM Upload Action: Create All
Click ‘Ok’ to close the form.
2.3
Open the ‘Components’ form by double-clicking on the 3rd Component.
Enter the following:
Qty Per Assembly: change to 3
Effective From:a future date
Click ‘Ok’ to close the form.
Add a 4th Component by putting the cursor on a blank row below the 3rd component.
Double-click to open the form.
Enter the following data:
Item Seq: 40
Qty Per Assembly:1
Component:
Effective From: a future date
Yield:1
WIP Supply Type:Bulk
Click the ‘OK’ button.
Note – The first 2x Components don’t have an ‘Effective From’ date. Enter a future date in these fields.
Upload the BOM and show the result in Oracle
2.4
Change the drop-down on the ribbon to ‘Validate and Upload’.
Click the ‘Upload’ icon and select ‘Upload Selected’.
2.5
The ‘Upload Result’ will show Accepted, indicating that this Bill of Material has been created within Oracle Bills of Materials.
2.6
Check in Oracle, navigation:
Change to relevant org
> Bill of Materials > Bills > Bills
Search for the item.
There will be four Components against this Assembly. Item Seq# 30 should have the Designator ‘AA’ & ‘BB’. No other Components have Designators.
3. Upload changes only
3.1
Download the new (created above) Bill to the Sheet
3.2
Add a Substitute Component for the first and last Components:
On the sheet, select the first Component.
On the Ribbon select the ‘Substitutes’ form
This will open the Substitutes form in the Substitute Components section, on the same row as the first Component.
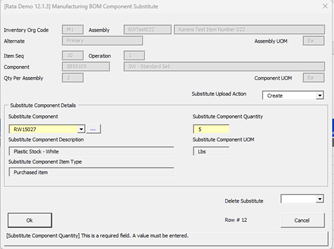
3.3
Adda Substitute Component to the first Component:
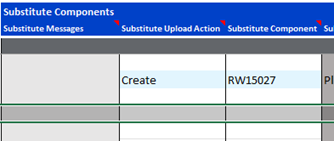
Select an action from the ‘Substitute Upload Action’ LOV = Create
Select a Substitute Component from the ’Substitute Component’ LOV – use a wildcard search, = ‘RW%’
Give it a ‘Substitute Component Quantity’ = 5
Select OK to accept the data and print it to the sheet.
3.4
Highlight the row relating to the last Component
Move across to the Substitute Component section and double click on the highlighted ‘Substitute Component’ cell to open the form.
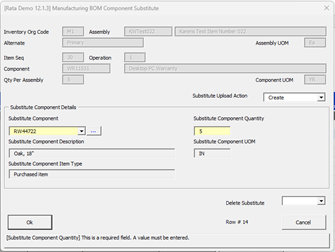
3.5
Adda Substitute Component to the last Component:
Select an action from the ‘Substitute Upload Action’ LOV = Create
Select a Substitute Component from the ’Substitute Component’ LOV – use a wildcard search, = ‘RW%’
Give it a ‘Substitute Component Quantity’ = 5
Select OK to accept the data and print it to the sheet.
Upload the changes only
3.6
Select the second Substitute Component
On the Ribbon:
Validate Option = ‘Validate and Upload’
Upload = ‘Upload Selected’
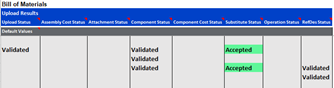
3.7
The ‘Upload Results’ status columns show that the entire Bill was validated but only the 2 Substitute Components were uploaded