AR Receipt Wizard Ribbon
The following table provides a quick reference to the AR Receipt Wizard Ribbon and its functions.
|
Excel 2007 or Later
 | |||
|
Icon
|
Description/Functionality
| ||
|
Login/Logout
|
This will either log you into or out of EBS depending on your status (terminate or reinstate your Oracle database connection).
The icon will change depending on your current status. If you are currently logged in then the icon will show as ‘Log Out’. If you are not logged in the icon will show as ‘Log In’.
| ||
|
About
|
Displays product and package version information along with licencing and usage data.
You need to click on this button to load a new Licence Key, Modify/add a user of the Wizard or ‘View Usage’.
| ||
|
Show/Hide Login Info
|
This button toggles the display of the ‘Login Info' information on the ribbon.
| ||
|
New Sheet
|
A new worksheet will be created based on the master template sheet.
If you have not modified the master template (using the ‘Show/Hide Template’ icon) all columns available will be displayed. If you have modified the master template, your new worksheets will include these changes.
| ||
|
Edit Receipts
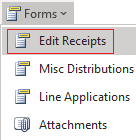 |
A form to enter the receipt information will display. You do not have to use this form, you can copy and paste or key directly into the cells of the worksheet if you prefer.
If you do use this form, you can make use of the ‘List of Values’ and other validation as you are entering the data.
Double clicking in the worksheet in the receipt section will give you the same result.
| ||
|
Misc Distributions
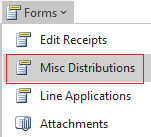 |
A form to enter Miscellaneous Receipt Distribution information will display. You do not have to use this form, you can copy and paste or key directly into the cells of the worksheet if you prefer.
If you do use this form, you can make use of the ‘List of Values’ and other validation as you are entering the data.
| ||
|
Line Applications
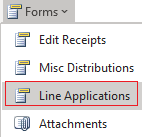 |
A form to enter Line Applications information will display. You do not have to use this form, you can copy and paste or key directly into the cells of the worksheet if you prefer.
If you do use this form, you can make use of the ‘List of Values’ and other validation as you are entering the data.
| ||
|
Attachments
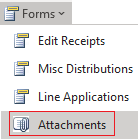 |
A form to enter Attachments will display. You do not have to use this form, you can copy and paste or key directly into the cells of the worksheet if you prefer.
Double clicking in the worksheet in the Attachments section will give you the same result.
| ||
|
Edit DFF
 |
A form will open to enable the flexfield information to be entered against the applicable section.
You do not have to use this form, you can copy and paste or key directly into the fields if you prefer.
| ||
|
Validate Option
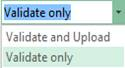 |
Choose whether to ‘Validate only’ or ‘Validate and Upload’ when uploading lines into Oracle.
When Validate only is selected the validation held in the Wizard will run and any error(s) found will be shown in the worksheet.
When Validate and Upload is selected the above validation occurs and the record is uploaded into Oracle. Additional errors may be found which have not been picked up by the Wizard validation.
| ||
|
Upload Action
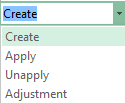 |
This allows you to select the mode of Upload Actions applicable to the set of data you are uploading into Oracle Receivables:
Create – To create new receipts.
Apply – To apply receipts to invoices.
Unapply – To unapply receipts & invoices.
The three options above will also affect what the receipts form will look like, as this dictates the purpose of the upload.
Adjustment – To create adjustments to transactions either when creating receipts or as a stand-alone function.
| ||
|
Upload Selected
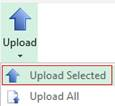 |
The ‘Upload Selected’ rows (as indicated by the cursor) will be validated/loaded into the interface table.
| ||
|
Upload All
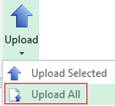 |
All rows in the worksheet (that have not already been processed) will be validated/loaded into the interface table.
| ||
|
Download via Form
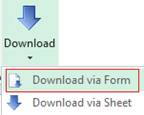 |
This option opens the ‘Download via Form’ form to enable the user to select ‘Receipt’ or ‘Transaction’ information to Download. Based on what LOV is chosen will determine whether the ‘Receipt Download’ form or the ‘Transaction Download’ form opens.
The ‘Transaction Download’ form enables you to download ‘Closed’ invoices and invoices with Adjustments against them.
| ||
|
Download via Sheet
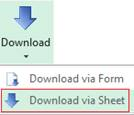 |
This option enables you to download open items into the sheet when you have selected Create, Apply or Adjustment mode.
The download will be based on information entered into the sheet e.g. Customer Number or Name, and the number of records returned is determined by the ‘Max Rows’ figure entered in the Receipt Download Form (default is 1000).
| ||
|
Attachments
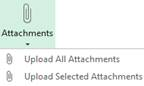 |
Allows users to Upload All Attachments or Upload Selected Attachments to Oracle.
Attachments can only be uploaded after the receipt has been created in Oracle Receivables.
Attachments can be uploaded against Standard and Miscellaneous Receipts.
| ||
|
Format Data
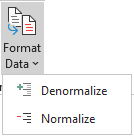 |
Used for formatting data by adding duplicate parent rows based on child rows and removing duplicate parent rows respectively.
Denormalize the data is useful for when you need to sort the data in Excel. Click the ‘Denormalize Data’ button and it will duplicate header data for the rows containing child data. Once you are finished sorting the data then you can normalize the data to remove the duplicate headers and prepare it for upload.
Normalize the data is used to prepare data for upload in the Wizard whether you’ve just denormalized it for sorting or imported the data from an external source with duplicate headers. Normalization will only affect sections that have children with multiple rows of data.
Both functions will affect all the records on the active sheet.
| ||
|
Sorting Order
|
This button determines the sort order of the downloaded invoices.
You can select a Primary and a Secondary sort field from the available lists of values e.g. Invoice Date, Balance Due, Due Date etc.
| ||
|
Calculate Discount
|
This icon will calculate the discount applicable for an Invoice if paid in accordance with the defined Discount Rules.
| ||
|
Logging
|
Click the ‘Logging’ button before upload and a new worksheet will record all actions taken by the Wizard. This new worksheet will be labelled ‘M4A – Query Log’ and will hold all upload information.
This is helpful for support to ensure that More4apps has all the information required to resolve your issue.
| ||
|
Help
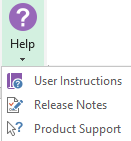 |
Click this icon for help on the functionality of this Wizard.
The three options are:
User Instructions – Link to the More4apps online User Guide to find detailed explanation on the Wizard.
Release Notes – Link to the list of all version releases for the Wizard.
Product Support – Link to the More4apps support page where issues/requests can be logged by completing the form details.
| ||
Refer to section: