|
|||||
|
This script is designed to illustrate the downloading/creating/uploading of a project agreement to give the user a “feel” for the Wizard.
The Wizard is designed to use a similar process for processing large numbers of agreements and funding, which will significantly reduce data-entry time and improve productivity.
|
|
1. Choose a Template/Mode and Set Up the Worksheet
| |||||||
|
Step
|
Task
|
Screenshot
| |||||
|
1.1
|
Click the ‘Select Template’ button on the Agreement and Funding Wizard ribbon, to create a new Template.
Login, if not already.
|
| |||||
|
1.2
|
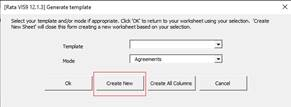
There is only one Mode for this Wizard.
Note - Templates can be created using the ‘Manage Templates’ functionality on the Setup ribbon.
Refer to section: Manage Templates
Click ‘Create New’ if you want a default template sheet for the mode or click ‘Create All Columns’ if you want a sheet with all columns available.
|
 | |||||
|
1.3
|
A new sheet will be created with the Template name followed by 1.
|
| |||||
|
2. Download an existing Agreement
We will now download an existing Agreement into this worksheet.
| |||||||
|
Step
|
Task
|
Screenshot
| |||||
|
2.1
|
Place your cursor on an empty row below row 10.
Click the ‘Download’ icon and select ‘Download Form’ on the Agreement & Funding Wizard ribbon.
|
 | |||||
|
2.2
|
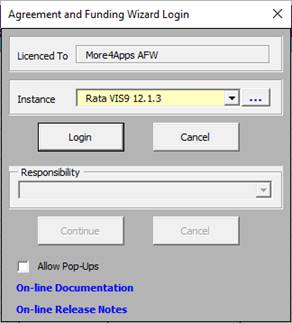
The following screen may appear when the above action is undertaken. This indicates that you are not logged into your Oracle Instance.
Select the correct Oracle Instance from the drop-down list provided, click on the Login button and enter your User Name and Password.
Select a Responsibility and click ‘Continue’.
The ‘Allow Pop-Ups’ checkbox enables users that require popups as a part of their login process, to log in to their Oracle instance through the Wizard. If the user does not require any additional popup dialogues as a part of their login process through the Wizard, this checkbox can remain unchecked.
Refer to the following documentation for further assistance: Common User Instructions
|
 | |||||
|
2.3
|
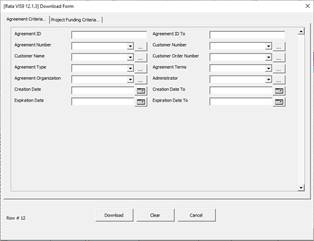
The ‘Download Form’ will appear.
|
 | |||||
|
2.4
|
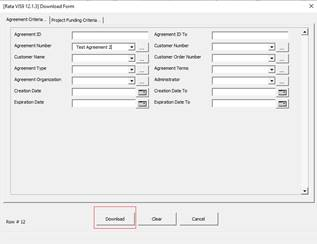
You can enter any details in the fields provided (at least one must be completed).
For this exercise enter an ‘Agreement Number’ value with existing funding.
(Refer to the Download Agreement Information section of this document for further details on downloading existing records).
Click the ‘Download’ button.
|
 | |||||
|
2.5
|
Agreements and the associated Funding will be downloaded into your worksheet.
Note - The Agreement and Funding records have an ID populated. This is required when changing an existing Agreement and/or Funding.
|
  | |||||
|
3. Create a new Agreement from the Downloaded Record
Now that we have an existing agreement and funding record in our worksheet, we will use this to create a new Agreement and Funding.
| |||||||
|
Step
|
Task
|
Screenshot
| |||||
|
3.1
|
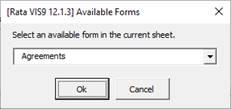
To open the ‘Agreements’ form, double-click on the same line as the Header Agreement.
Alternatively you can click the ‘Forms’ icon and select ‘Agreements’ from the LOVs in the ‘Available Forms’ display.
|
 | |||||
|
3.2
|
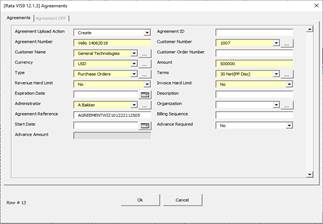
The ‘Agreements’ form will open.
Explain that the Wizard forms validate the data using lists of values, date formats, field lengths and some other field level validation.
Remove the Agreement ID to create a new record.
Enter the following data into the form:
Agreement Upload Action: Create
Agreement Number:
Amount: 500000
Click ‘Ok’ to close the form.
Scroll across to the Funding section and remove the Funding ID for all the Funding lines.
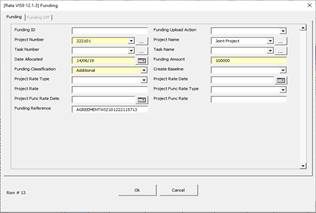
To open the ‘Funding’ form, double-click on the first line in the Funding section, or alternatively you can click the ‘Forms’ icon and select ‘Funding’ from the LOVs in the ‘Available Forms’ display.
Funding – For each Funding (x3) make the following changes:
Funding Update Mode: Create
Date Allocated: today’s date
Funding Amount:
• 1st Funding – 100000
• 2nd Funding – 122000
• 3rd Funding – 300000
Note - The third funding is over funding to create an error when we upload.
Click ‘Ok’.
The above changes will now be included in your worksheet.
Note – If changing the Project Number, the Wizard form is greater than the LOVs provided in Oracle form (Project list restricted by customer), and any mismatch will be picked up at Upload/Validation. This was due to a customer request.
|
   | |||||
|
4. Load the new Agreement into Oracle.
We will now upload the new Agreement into your instance of Oracle Projects.
| |||||||
|
Step
|
Task
|
Screenshot
| |||||
|
4.1
|
We will validate the data before uploading it.
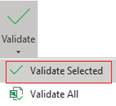
With cursor on the header row of the data, click ‘Validate’ and select ‘Validate Selected’ on the Agreement and Funding Wizard ribbon.
|
 | |||||
|
4.2
|
The Status of the records will show as Validated for the Agreement and Funding records, if no errors occur.
|
 | |||||
|
4.3
|
We will now upload the data to Oracle.
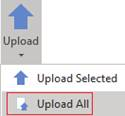
Click the ‘Upload’ icon and select ‘Upload All’ on the Agreement and Funding Wizard ribbon.
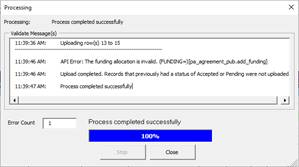
The Processing form will display with what has been Accepted or Errored.
In this instance there has been an error:
“API Error: The funding allocation is invalid. (FUNDING=)[pa_agreement_pub.add_funding]”
Click ‘Close’.
|
  | |||||
|
4.4
|
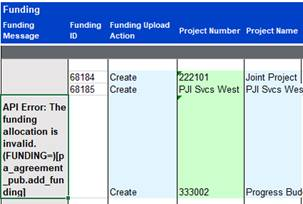
The Agreement and Funding will now have a status of Accepted.
In my example the agreement amount has been exceeded by the last funding and therefore this record has been Error.
|
 | |||||
|
4.5
|
The following step is not required if you did not encounter any errors.
The funding record with the Error status has a comment in the Message column of:
API Error: The funding allocation is invalid. (FUNDING=)[pa_agreement_pub.add_funding]
This is because the total funding records in our worksheet (522000) exceeds the agreement amount (500000).
To correct the issue, enter in a value of 278000 directly into the worksheet for the 3rd funding record.
Note: The funding lines can add up to less than the header but not more.
|
Before After
  | |||||
|
4.6
|
The following step is not required if you did not encounter any errors.
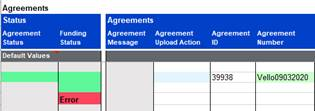
Remove the Status Accepted for the Agreement and Funding.
Also remove the ‘Create’ in the ‘Agreement Upload Action’ field.
Remove the Action for the Funding section for the 2x records that already have a Funding ID created.
|
  | |||||
|
4.7
|
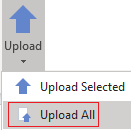
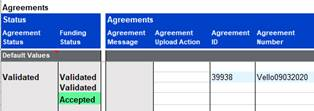
Click the ‘Upload’ icon and select ‘Upload All’ on the Agreement & Funding Wizard ribbon to process the error record.
The rejected funding record will now have an Accepted‘Funding Status’.
|
  | |||||
|
4.8
|
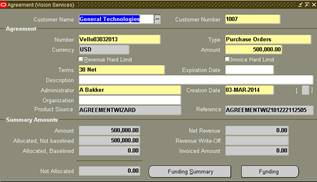
We can now Login to Oracle and see the Agreement has been loaded.
|
 | |||||
|
5. Make changes to an existing Agreement
Now that we have created an Agreement, we will make some changes to the same Agreement.
| |||||||
|
Step
|
Task
|
Screenshot
| |||||
|
5.1
|
Create a new worksheet by clicking on the ‘New Sheet’ button on the Agreement and Funding Wizard ribbon.
|
| |||||
|
5.2
|
Download the record created at step 4 by placing the cursor anywhere below row 10.
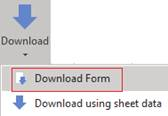
Click the ‘Download’ icon and select ‘Download Form’ on the Agreement and Funding Wizard ribbon.
On the ‘Download Form’ form enter the Agreement Number created at step 4 and click the search button.
Click ‘Download’.
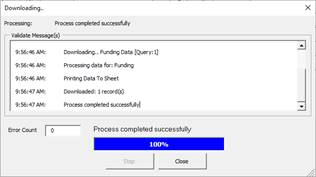
A message will appear which confirms the Agreement has been downloaded.
|
   | |||||
|
5.3
|
The Agreement and the associated Funding will be downloaded into your worksheet.
Note - The Agreement and Funding records have an ID populated. This is required when changing an existing Agreement or Funding.
|
  | |||||
|
5.4
|
Make changes to the Agreement and Funding records as follows:
Double-click on the row which holds the Agreement that you have just downloaded.
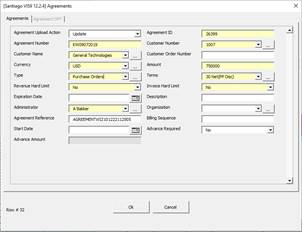
The ‘Agreements’ form will open to enter the following:
Agreement Upload Action: Update
Amount: Increase this value.
Click ‘Ok’ to close the form.
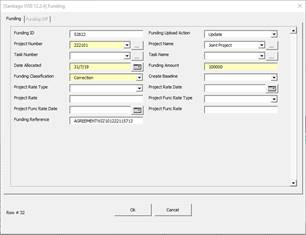
Double-click in the Funding section on the first record to open the ‘Funding’ form.
Enter the following:
Funding Upload Action: Update
Date Allocated: Change the date to one in the future.
Classification: Select a different value from the list of values provided.
Click ‘Ok’ to close the form.
Alternative to using the forms, you can enter data directly onto the worksheet, and enter ‘Update’ into the Upload Actions for the lines to be updated.
|
  | |||||
|
5.5
|
We now have an amended Agreement and Funding which we will now upload into Oracle Projects.
|
| |||||
|
6. Load the changes into Oracle
We will now load the amended details into Oracle Projects.
| |||||||
|
Step
|
Task
|
Screenshot
| |||||
|
6.1
|
Place your cursor on the first line of the Agreement.
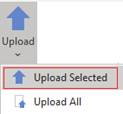
Click the ‘Upload’ icon and select ‘Upload Selected’.
|
 | |||||
|
6.2
|
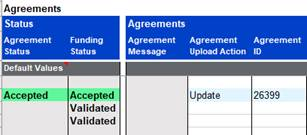
The Agreement Status and Funding Status will both say Accepted for the data being updated.
|
 | |||||
|
6.3
|
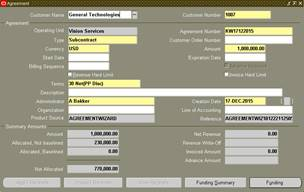
Login to Oracle to see that the changes have been uploaded.
|
 | |||||
|
End of Demonstration
| |||||||
